Technology
The best hidden features for Windows 11
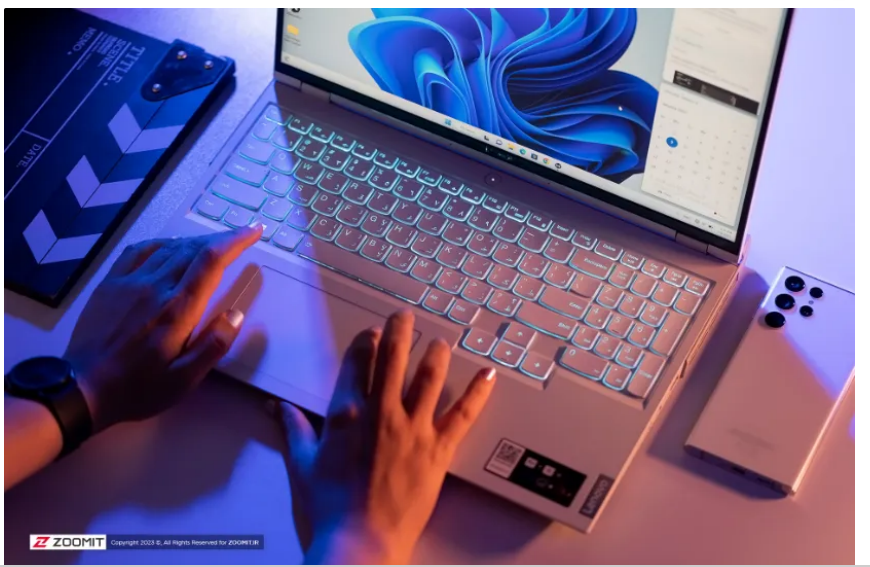
The best hidden features for Windows 11
Even though several years have passed since the release of Windows 11, the share of Windows 10 is still higher among the different versions of Microsoft’s desktop operating system, and many users think that Windows 11 does not offer many special features compared to the previous versions. Of course, Microsoft has provided very attractive updates for its latest operating system; These features, along with major changes in appearance, are designed to attract the attention of users.
In addition to all the familiar features of Windows, this operating system offers many other features that are generally hidden from the eyes of many users and may not be used by many people. In this article, we are going to introduce you to the best and most useful hidden and little-known tricks of Windows 10 and Windows 11.
-
1. Restore right-click options
-
2. Live subtitles
-
3. Quick management of open windows
-
4. Run apps pinned to the taskbar faster and more professionally
-
5. Move the start menu position
-
6. Increase focus on tasks with Focus Assist
-
8. Edit images
1. Restore right-click options
One of the most annoying changes that Microsoft made in Windows 11 was the redesign of the right-click menu. The company removed most of the previous options from the default right-click menu view to make it look simpler. However, the full list of options is still available to users, and to use them, you must click on Show more options.
To restore Windows 11 right-click the menu options, and follow the steps below:
1. Right-click the Start button and select Windows Terminal.
2. Copy and paste the following code into the command line tool:
3. Close the CMD window.
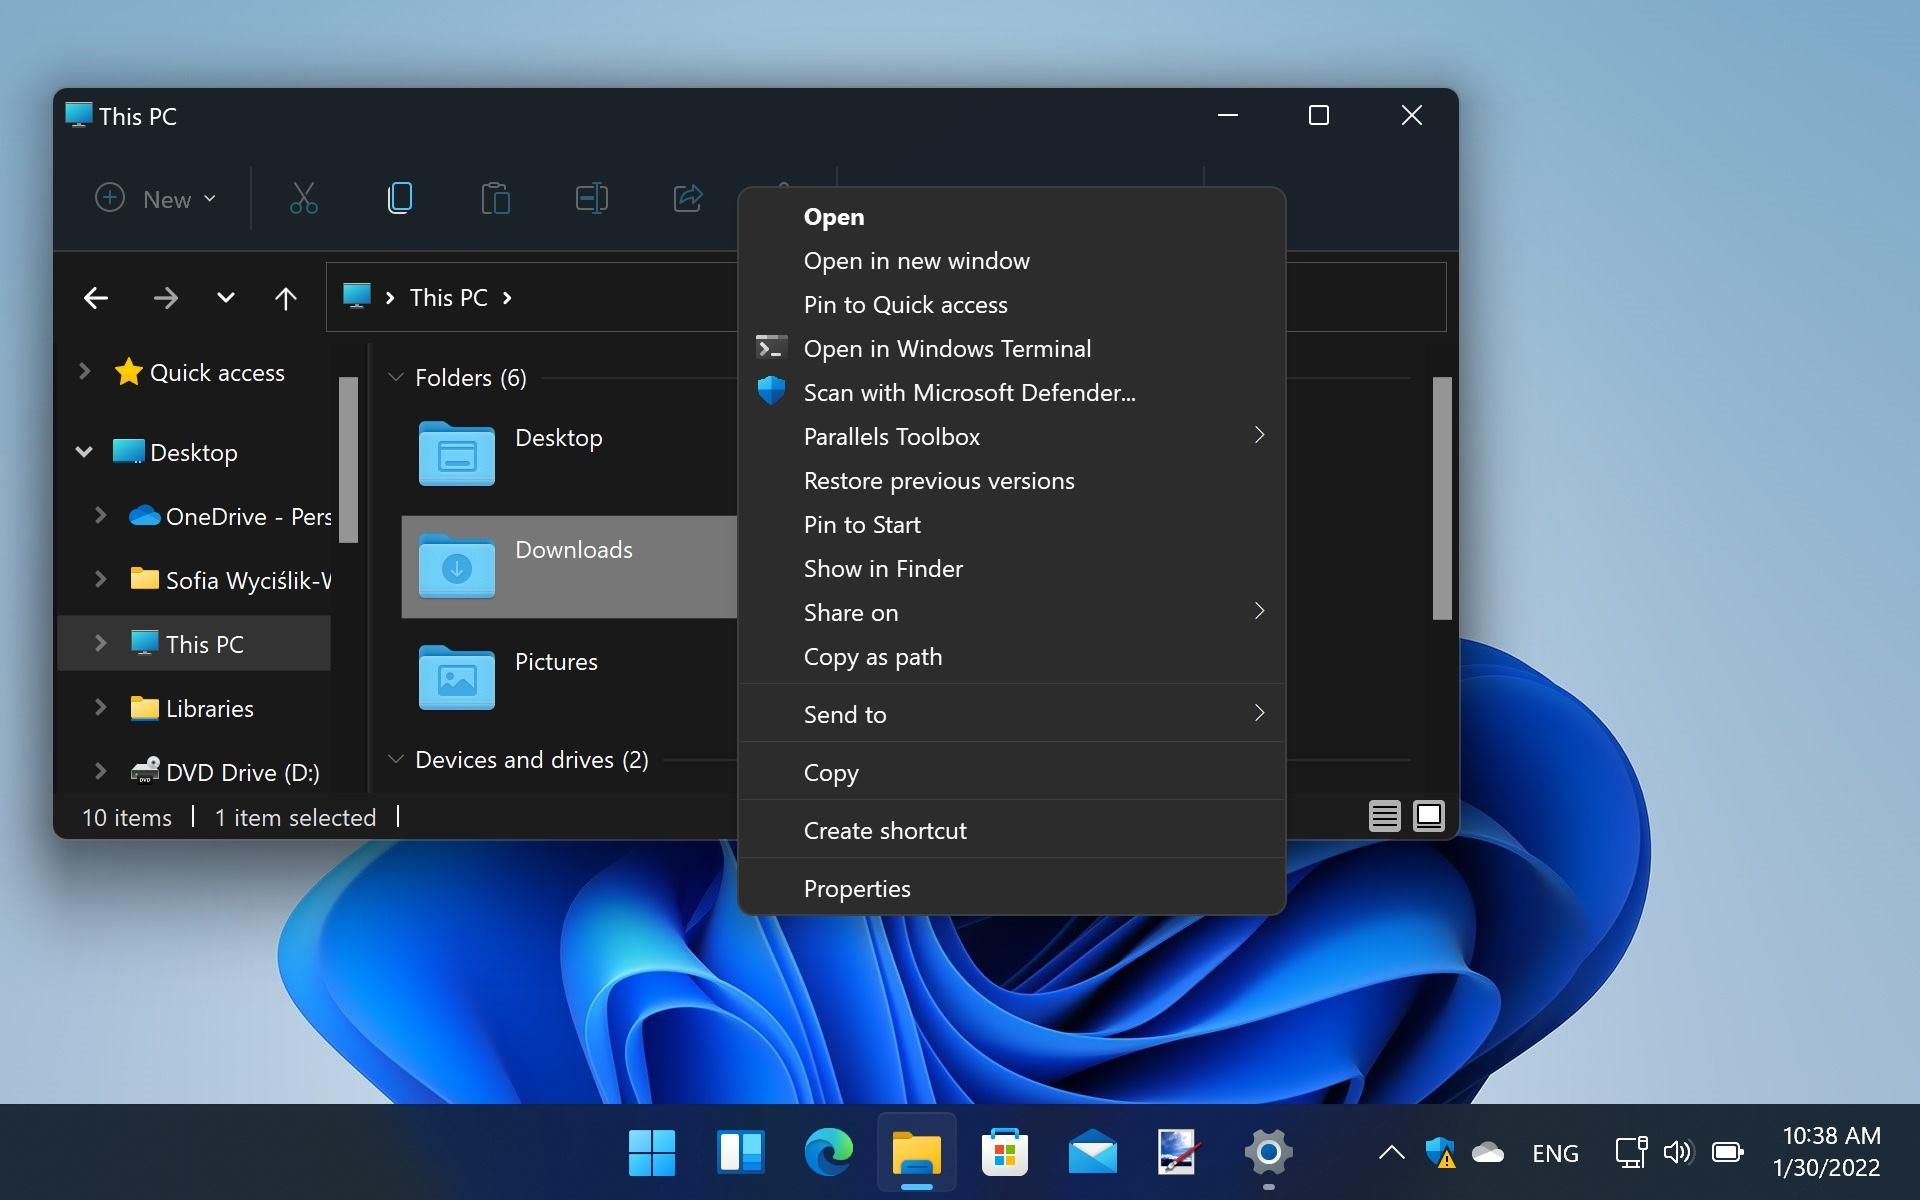
Restart your computer to apply the changes. After turning on the system, you will access all the options like Windows 10 by right-clicking on the screen.
2. Live subtitles
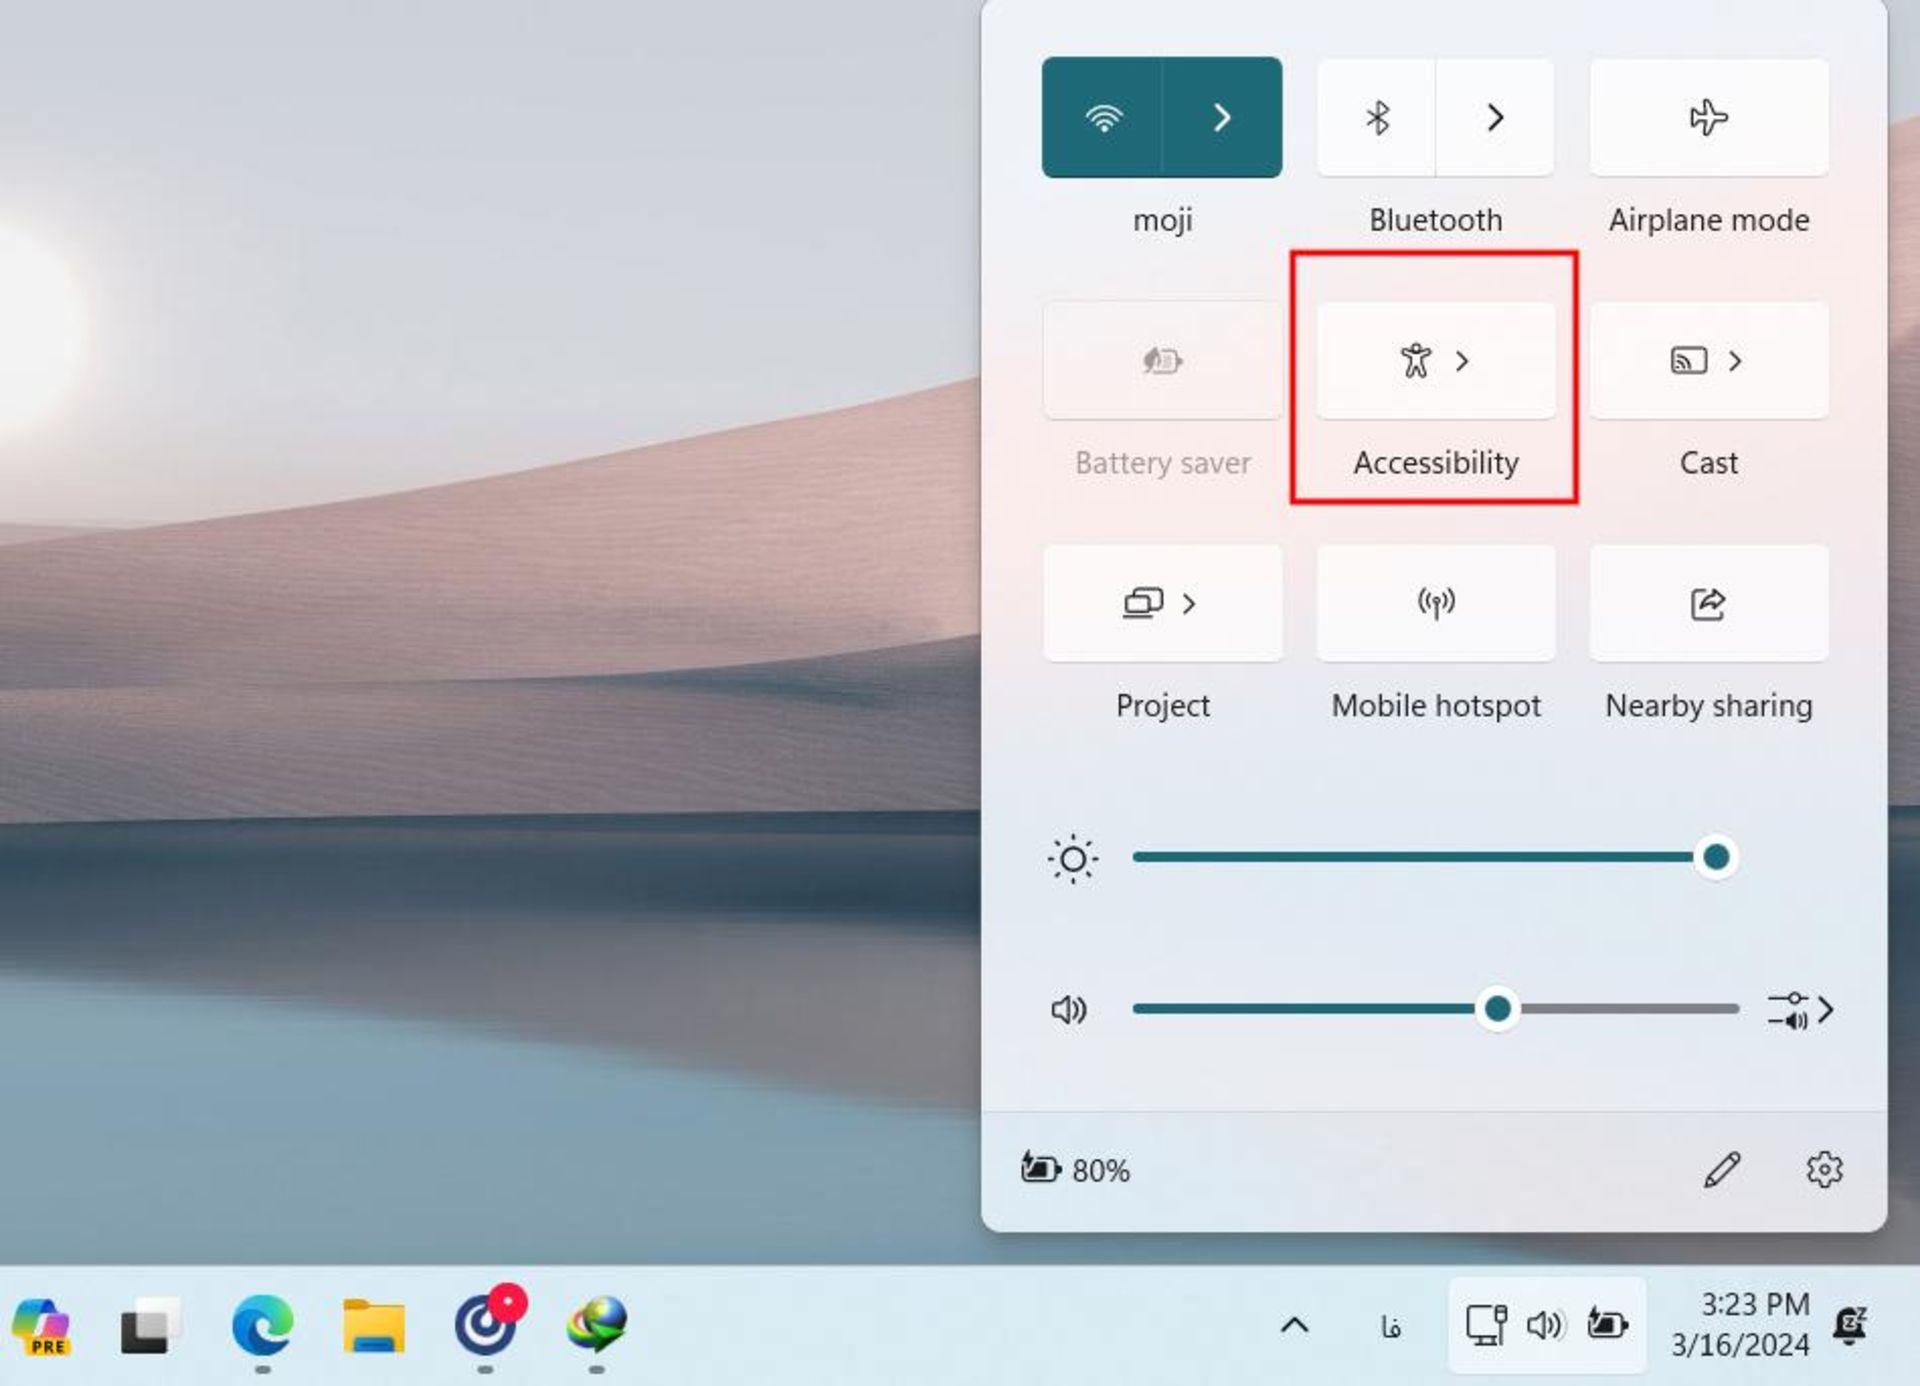
This windows allows you to view the text while playing audio such as video, music, etc. This operating system converts audio to text live and automatically with very high quality. To activate the live captions feature, click on Accessibility in the System Tray section and then turn on the Live Captions option.
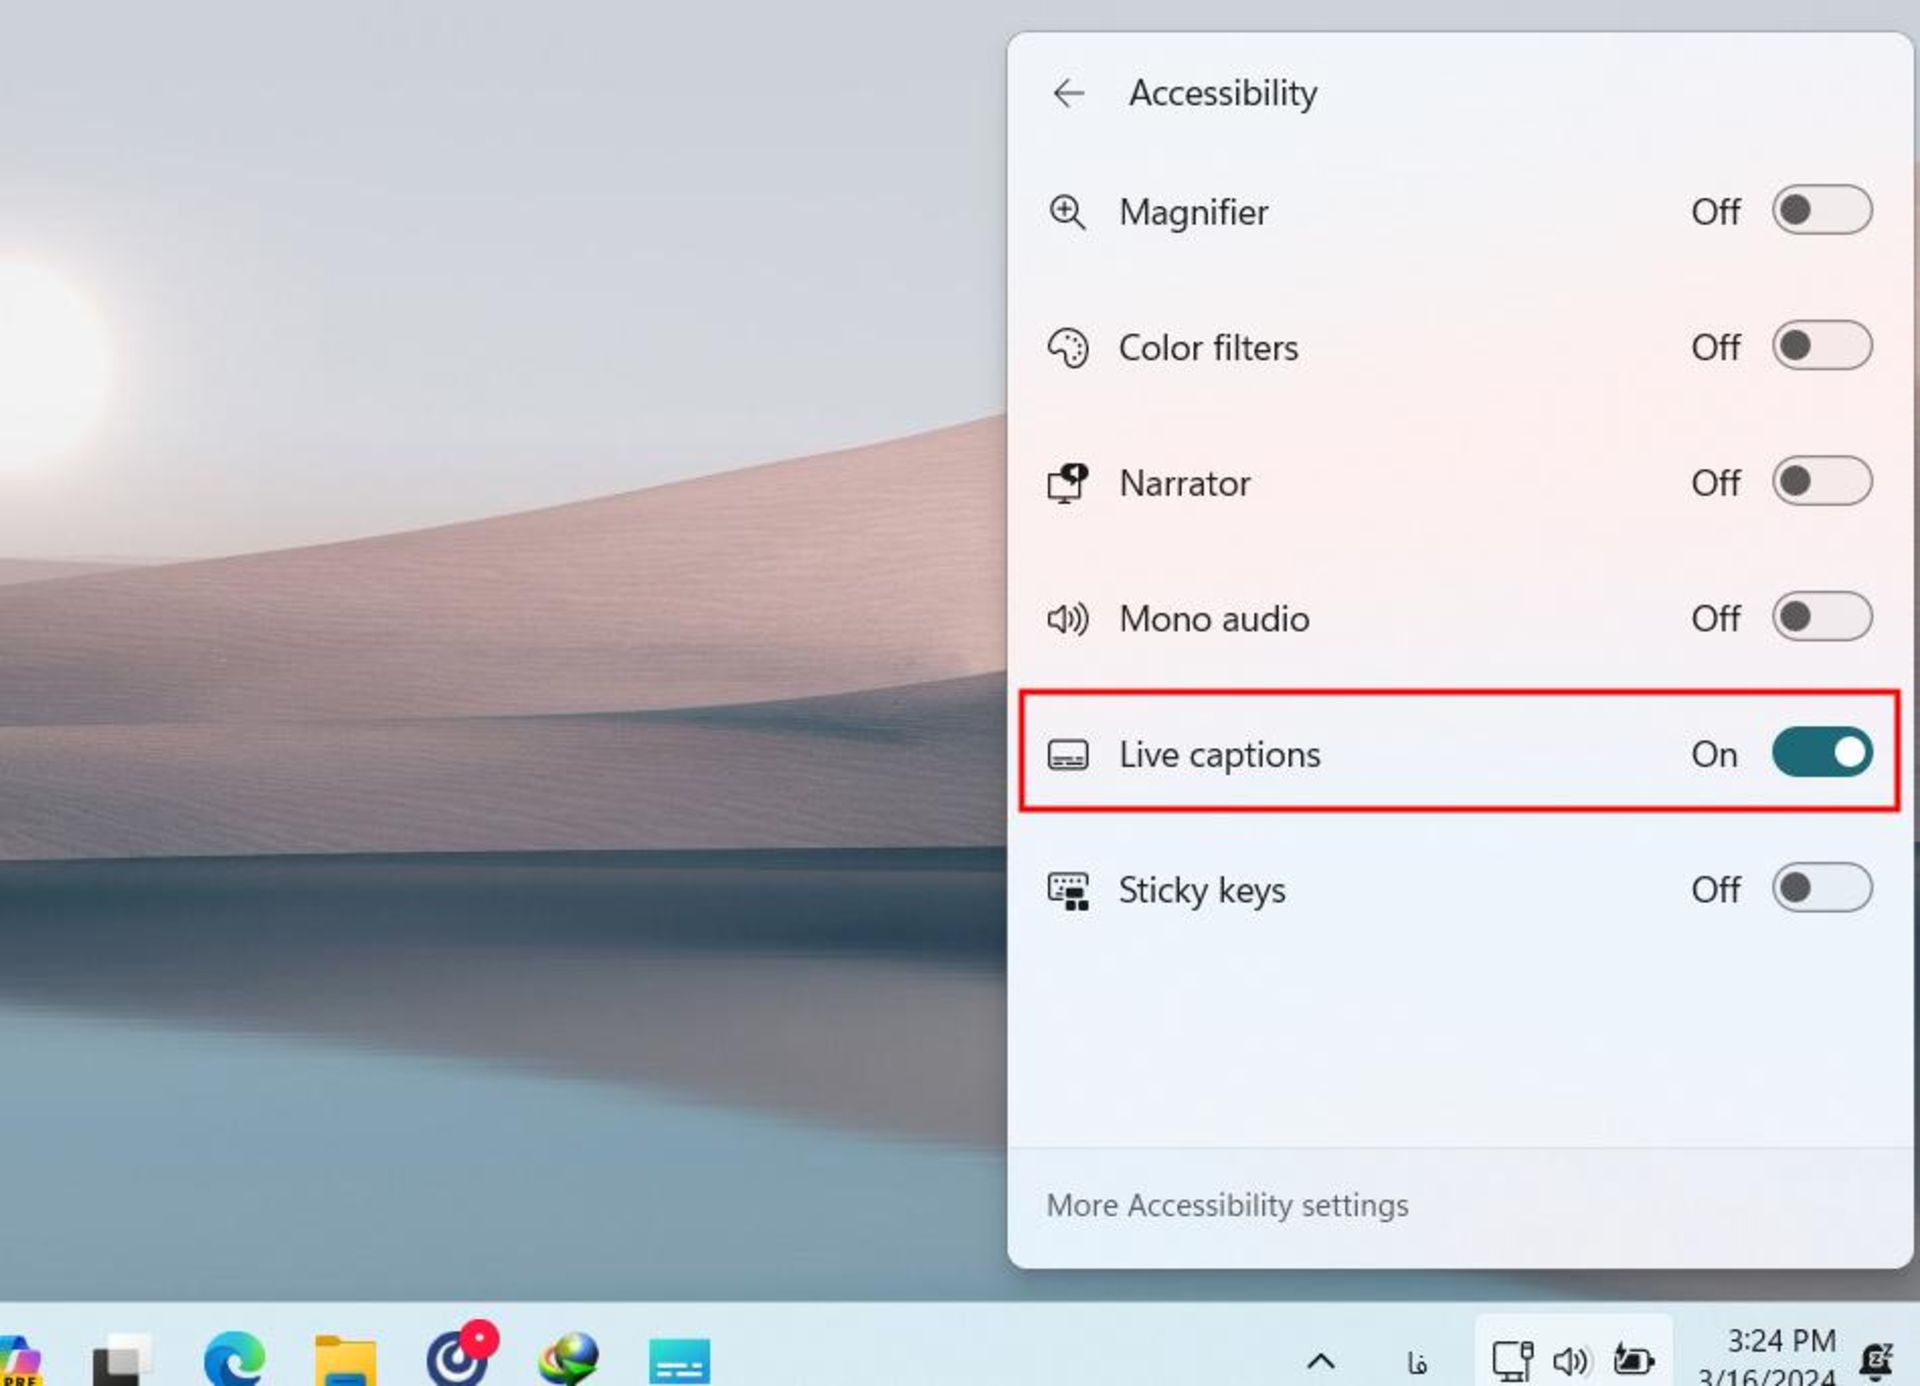
Now when playing any sound, including videos and music, its text will be displayed by default at the top of the screen, although you can change its display location to your liking through the settings of this section.
3. Quick management of open windows
Using the shortcut Windows + D will minimize all open windows on the desktop, but there is another way to close many windows at once. Enter Windows 11 Settings and go to System > Multi-tasking and enable the Title bar window shake option.
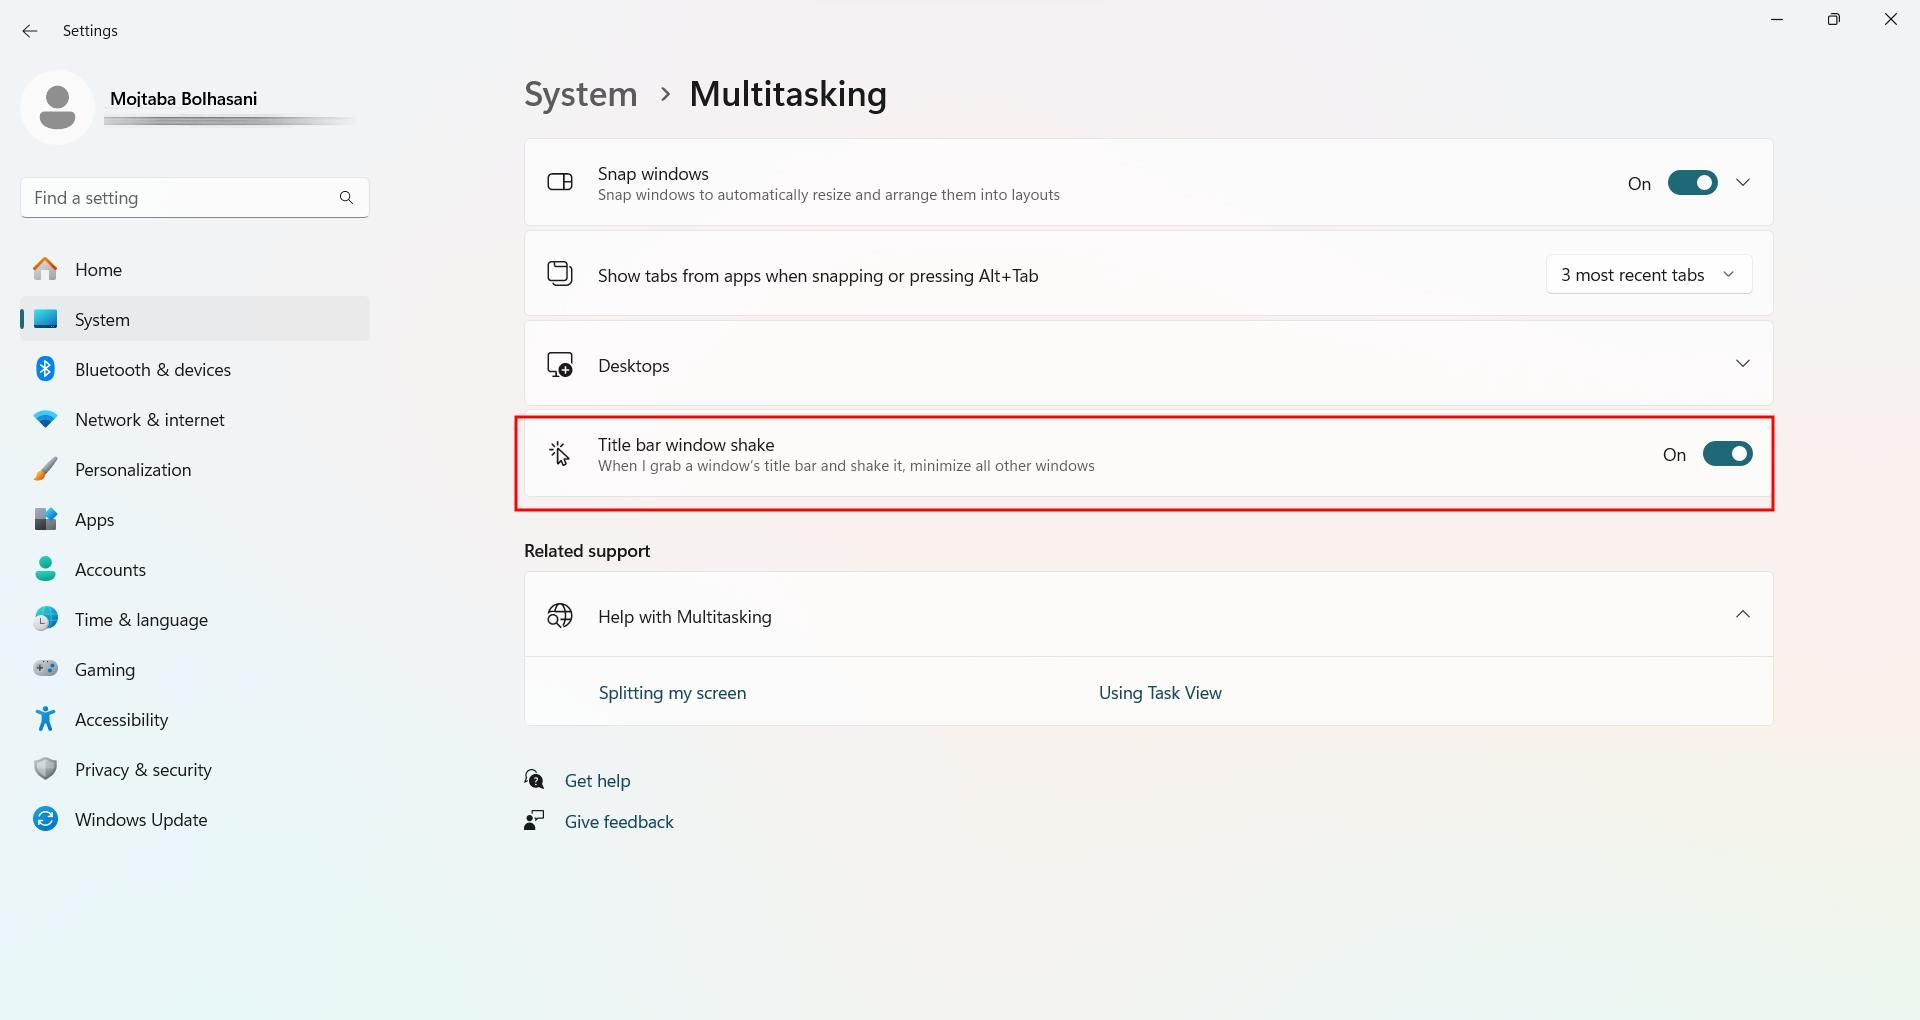
Now click on the title bar of one of the open Windows 11 windows and while holding the left mouse button, quickly shake it left and right. By doing this, all the windows except the one you selected will be minimized.
4. Run apps pinned to the taskbar faster and more professionally
Each user in Windows 11 pins a number of frequently used programs to the taskbar, which is an easy way to access those programs faster. However, for faster access to these applications, you can also use the combination key Windows + 1. This key will run the program whose icon is in the first position of the Windows 11 taskbar. Similarly, Windows key + 2 will run the program that is in the second place.

You can even press several numbers at the same time and as a result, run two or more programs at the same time and at high speed. For example, pressing Windows + 1 + 2 will run the programs in the first and second positions of the Windows 11 taskbar simultaneously.
5. Move the start menu position
Microsoft has moved the Windows 11 start menu to the center of the taskbar by default, and such a change may not be liked by all users. If you prefer the start button to be displayed in the left corner of the screen like in previous versions of Windows 11, right-click on the empty part of the taskbar and select Taskbar Settings.
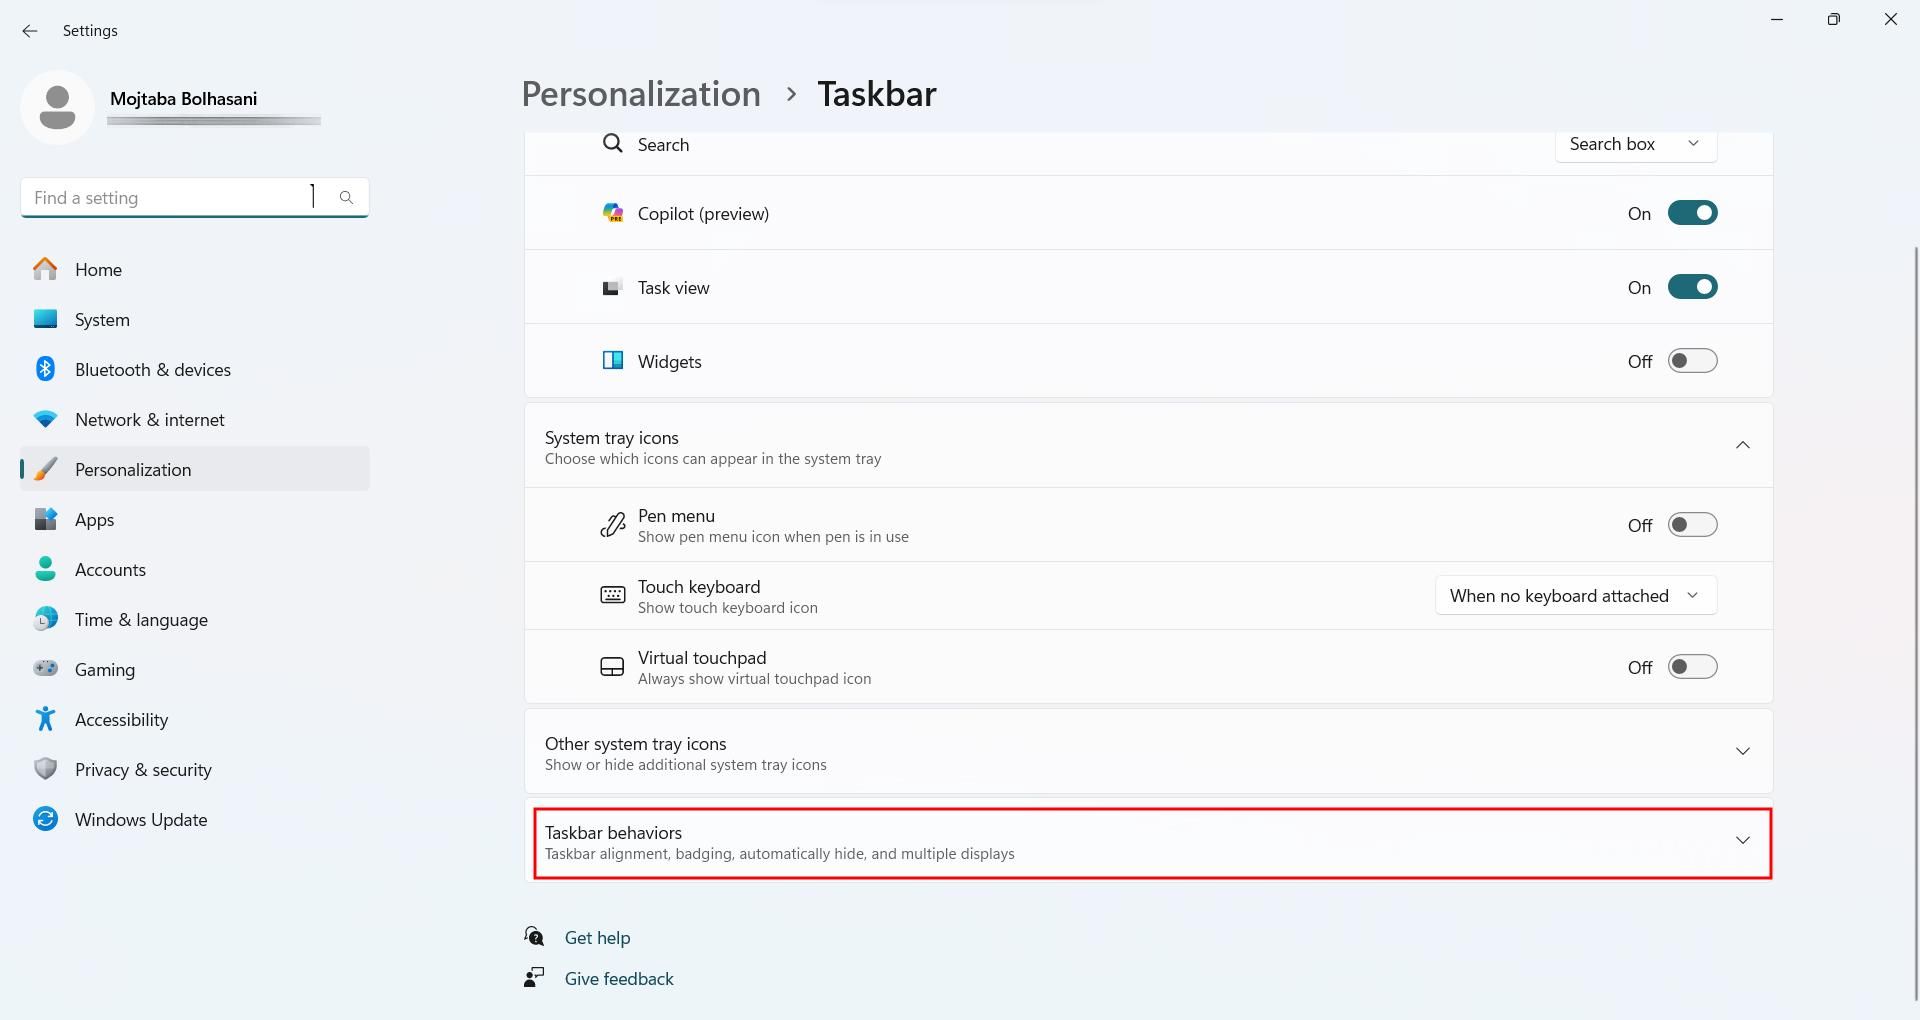
Now click on Taskbar behaviors and select Left from the Taskbar alignment drop-down menu.
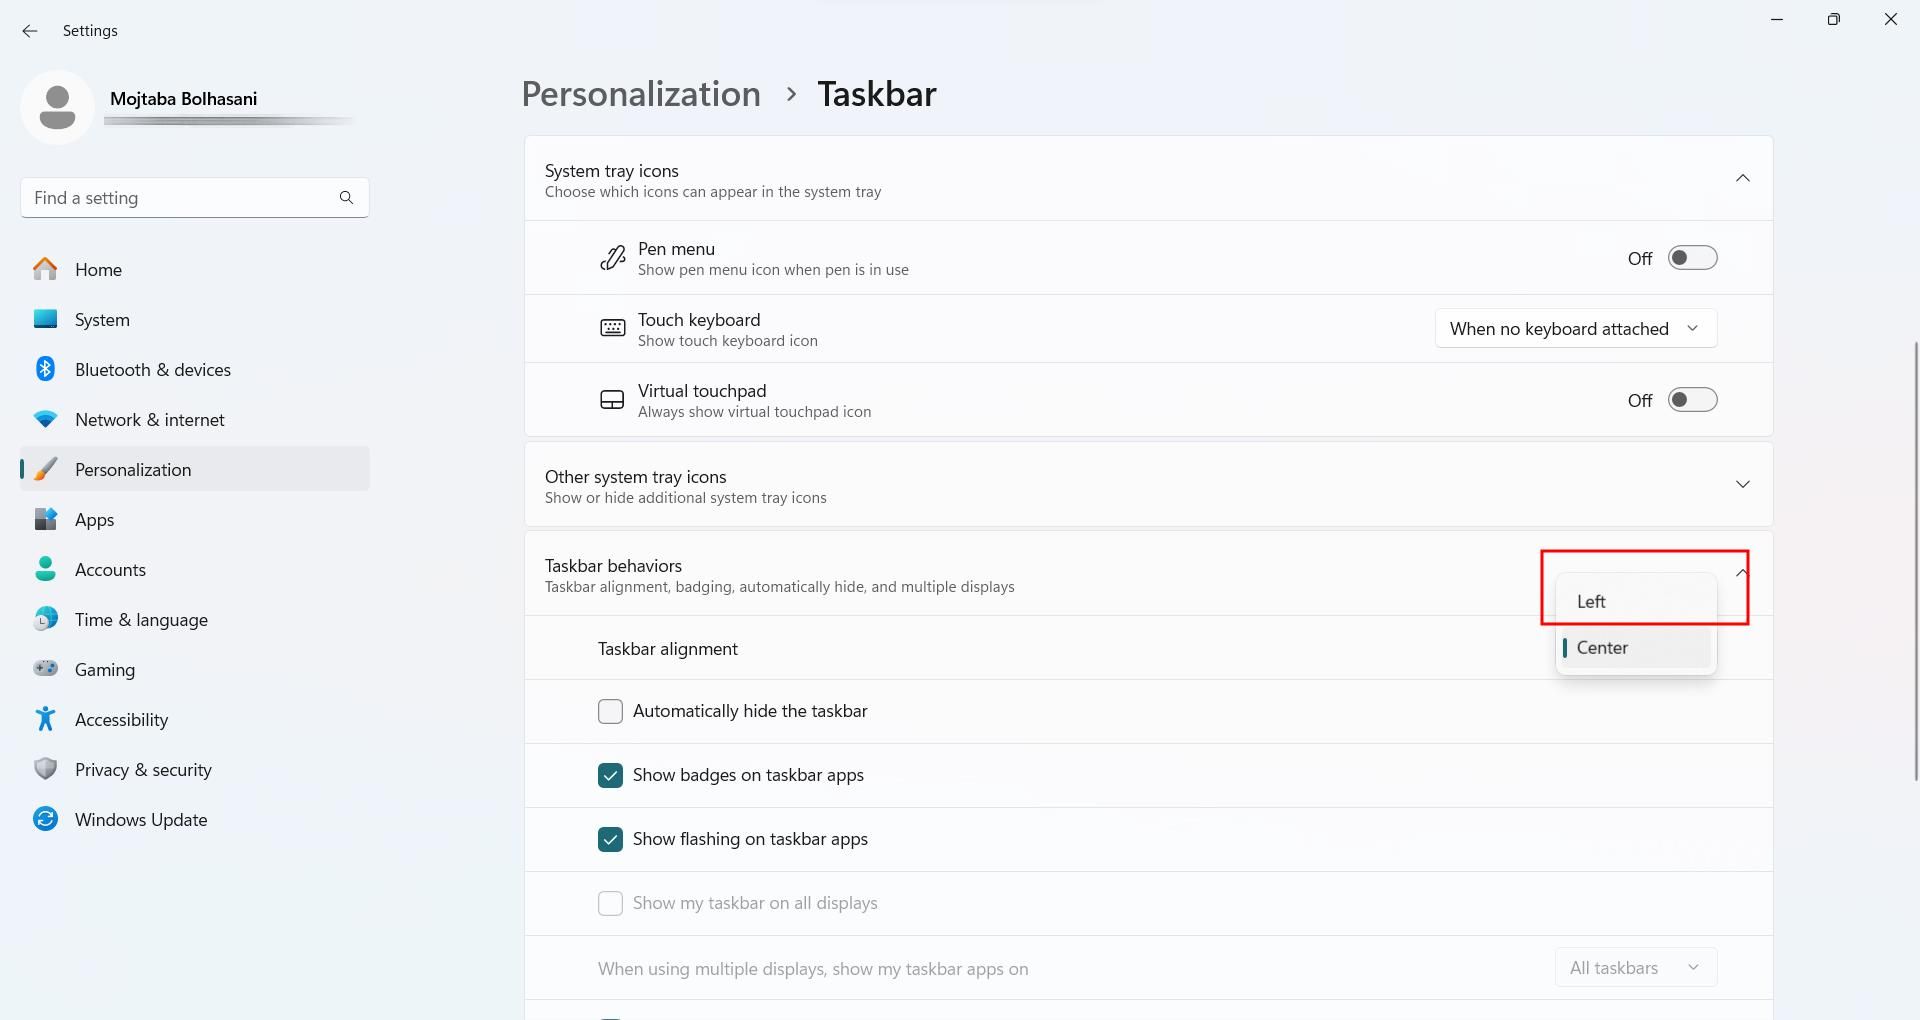
Now your Windows 11 start menu has moved to the left corner of the screen.
6. Increase focus on tasks with Focus Assist
Windows 11 has a tool called Focus Assist, which can be used to prevent the display of notifications and, as a result, increase focus on tasks. To use this feature, enter Windows 11 Settings and go to Focus in the System section.
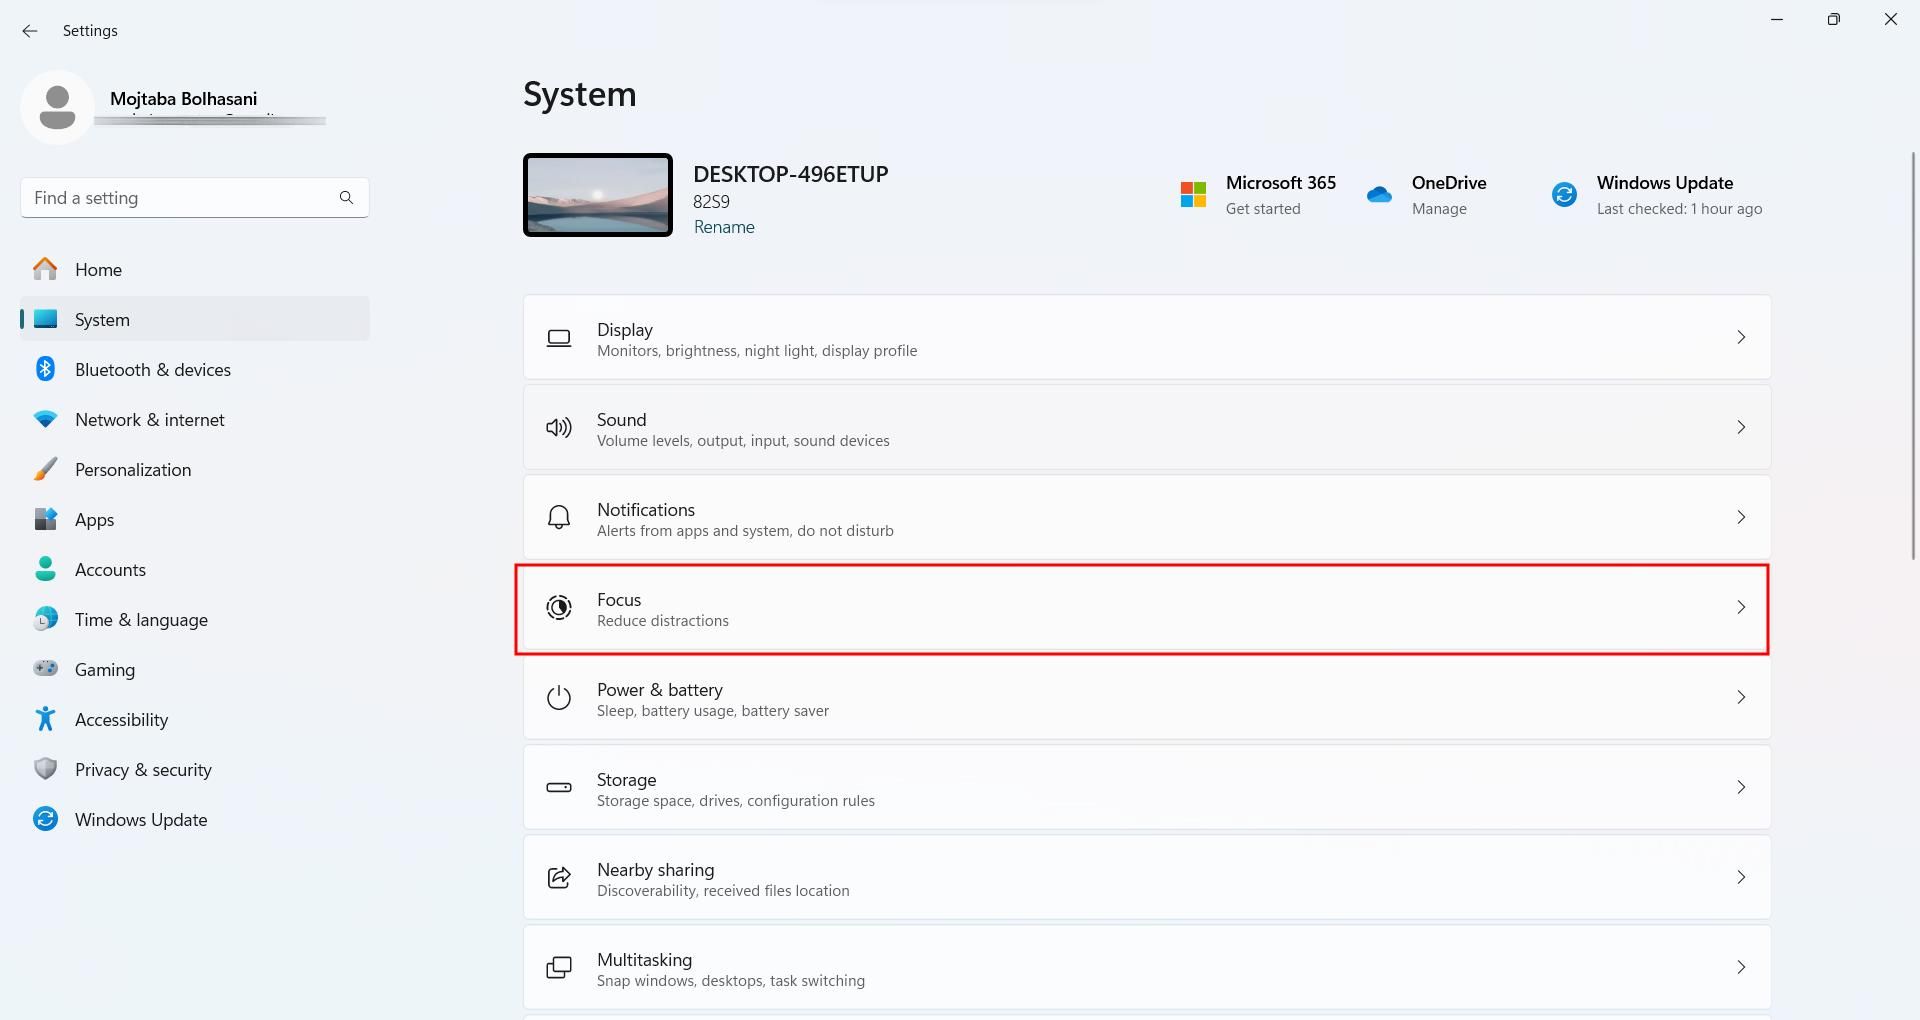
In this section, you can disable all kinds of notifications, application notification badges, and other things to eliminate distractions while working.
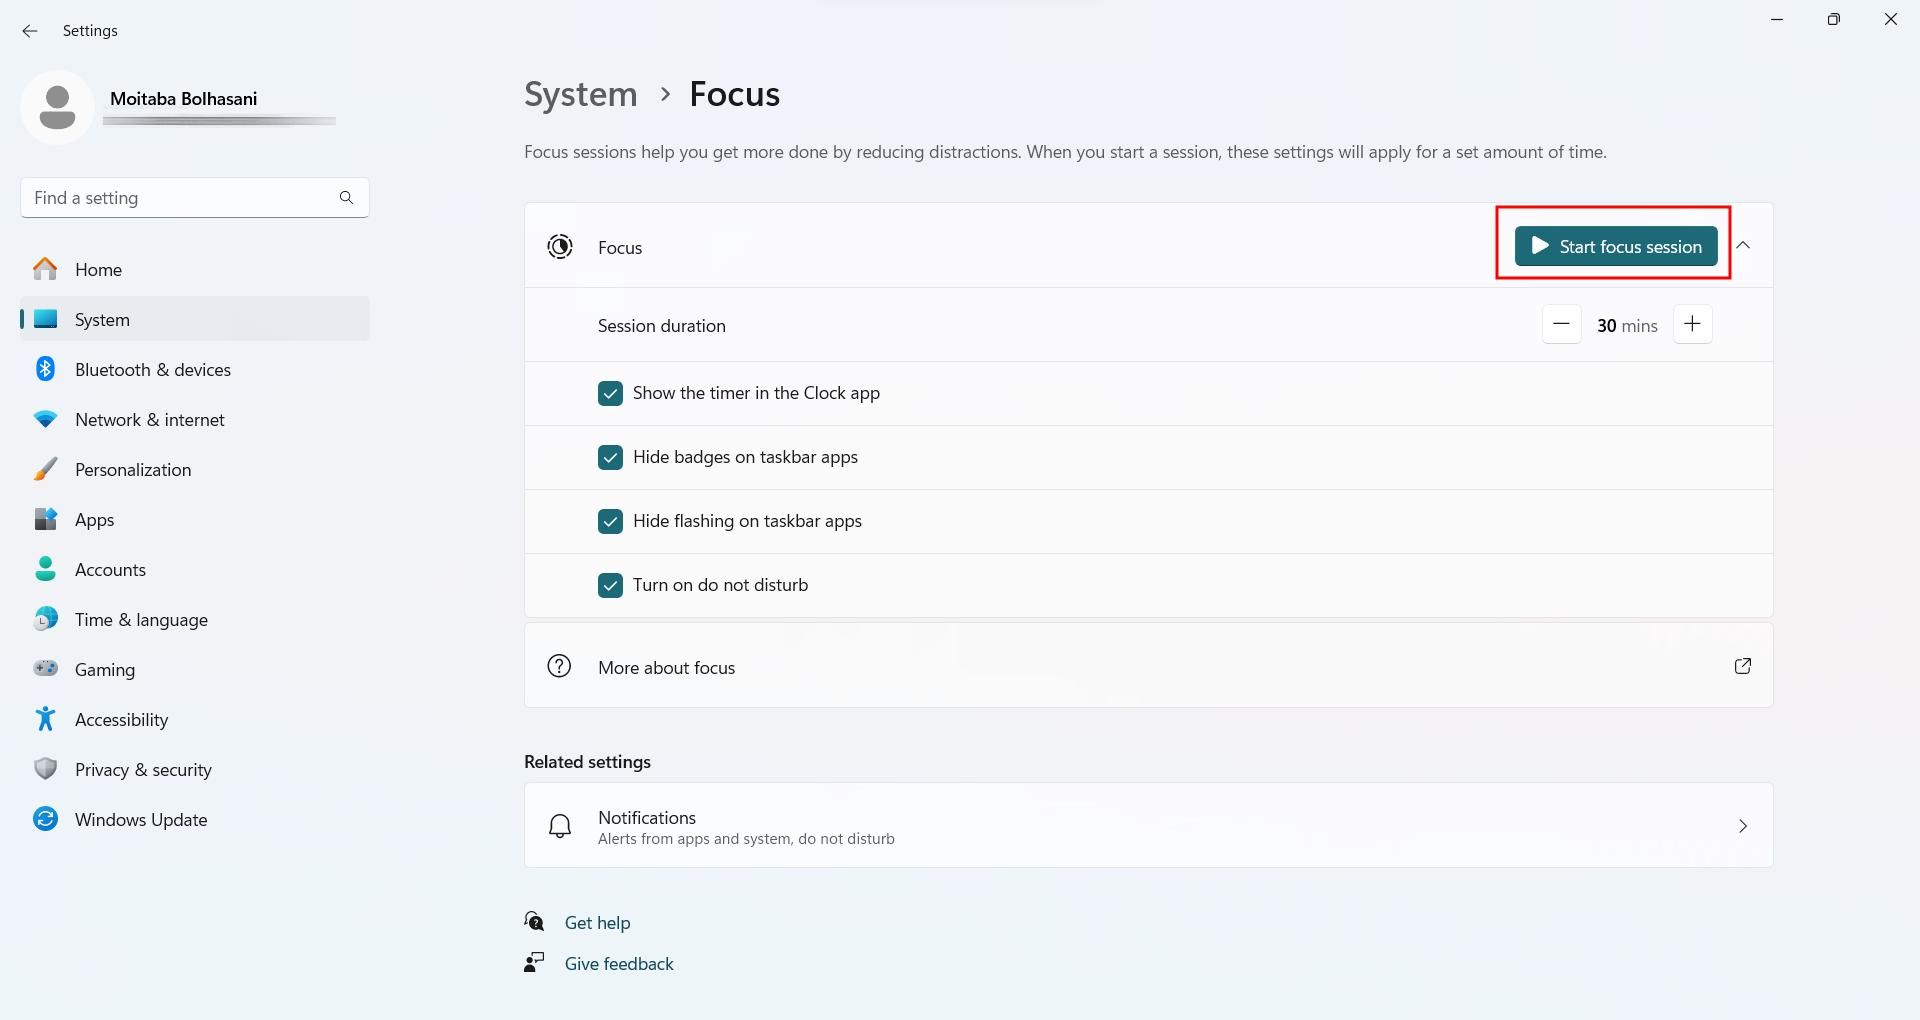
On this page, you can also use the timer to determine how long the focus mode will remain active. After applying the options you want, click on the Start focus session button to activate the focus mode.
8. Edit images
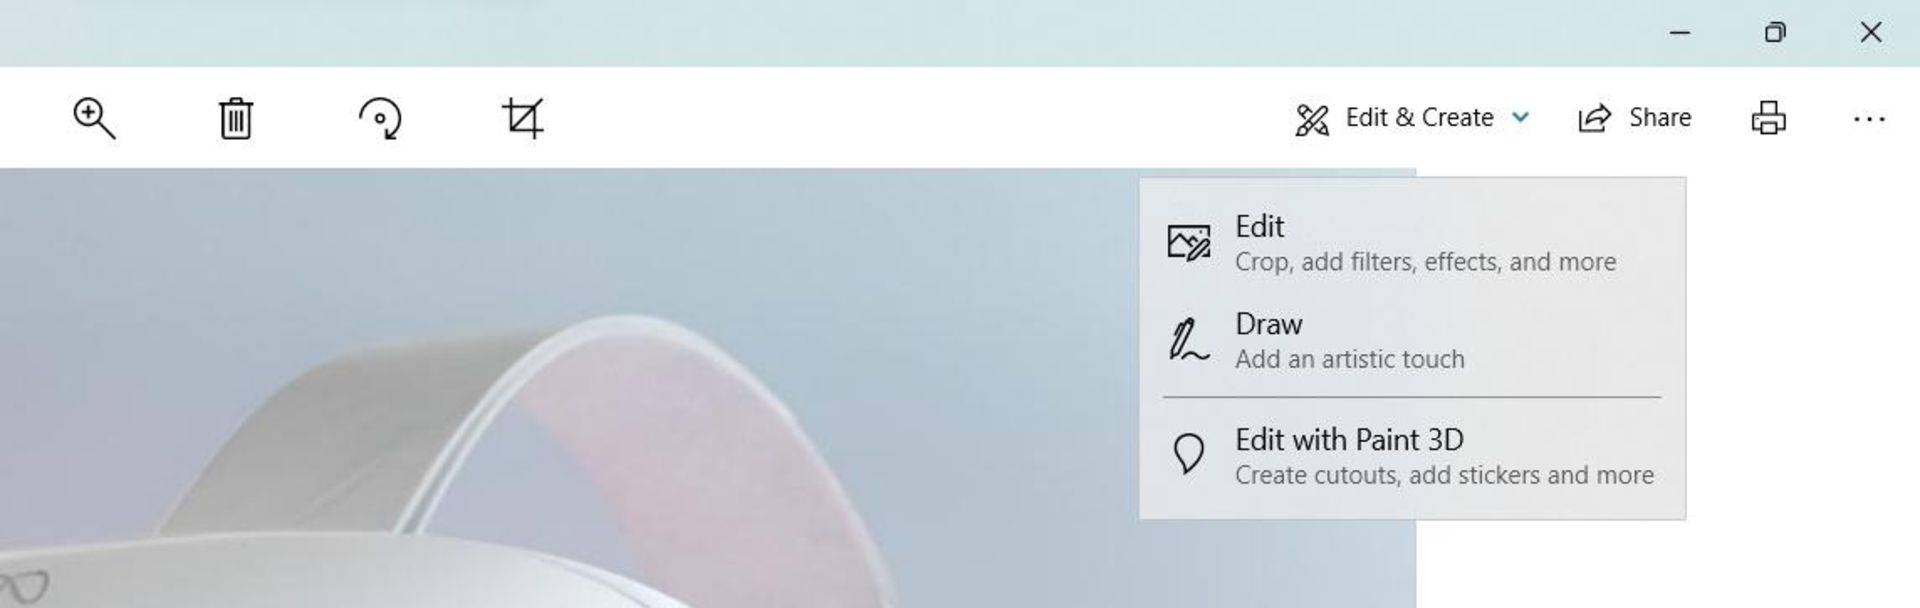
Windows 11 provides you with very useful tools for editing images that most users do not pay attention to. When you open a photo in Windows 11, click Edit & Create on the toolbar at the top of the Photos app. At this stage, you have two options: the Edit option for editing, cutting, applying filters, and more, and the Draw option for drawing a picture or sketch on the desired photo.
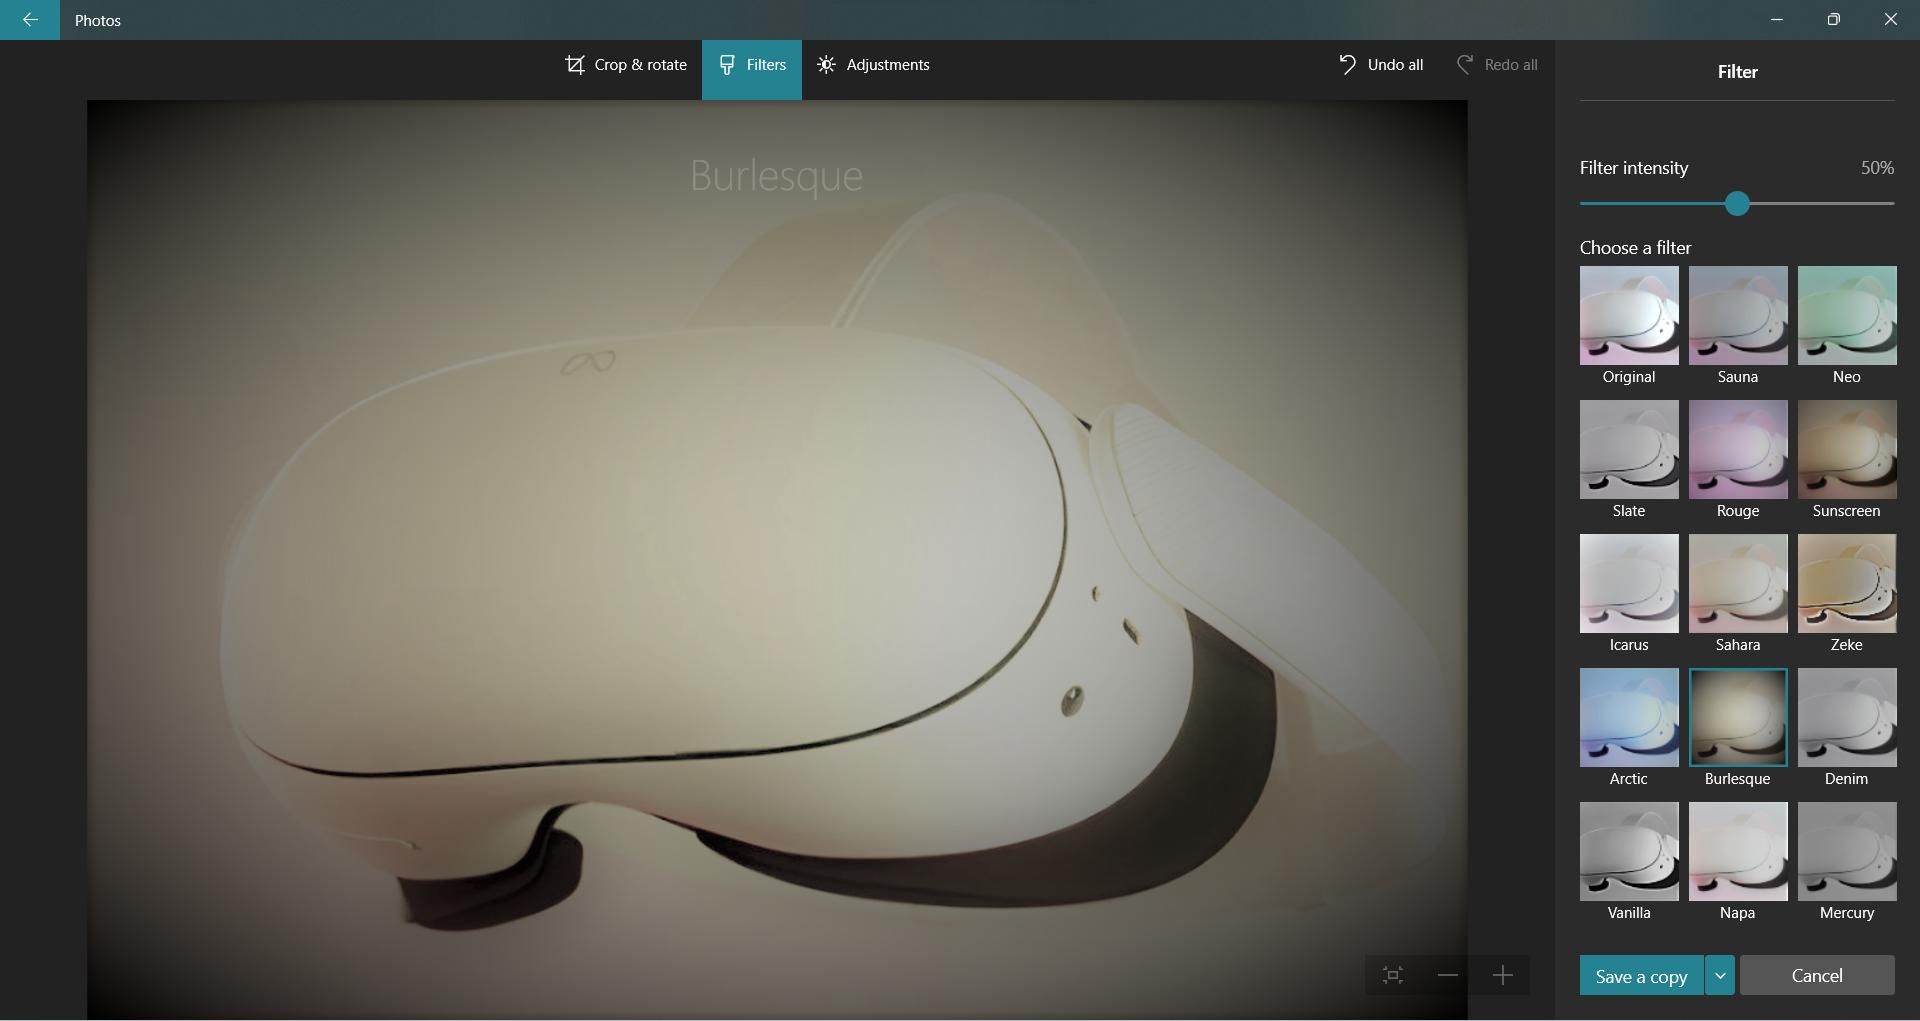
Using built-in Windows 11 tools, you can do various things on photos without installing additional software. For example, you can apply various filters, cut and change dimensions, change contrast, and other things.
Source:pcWORLD


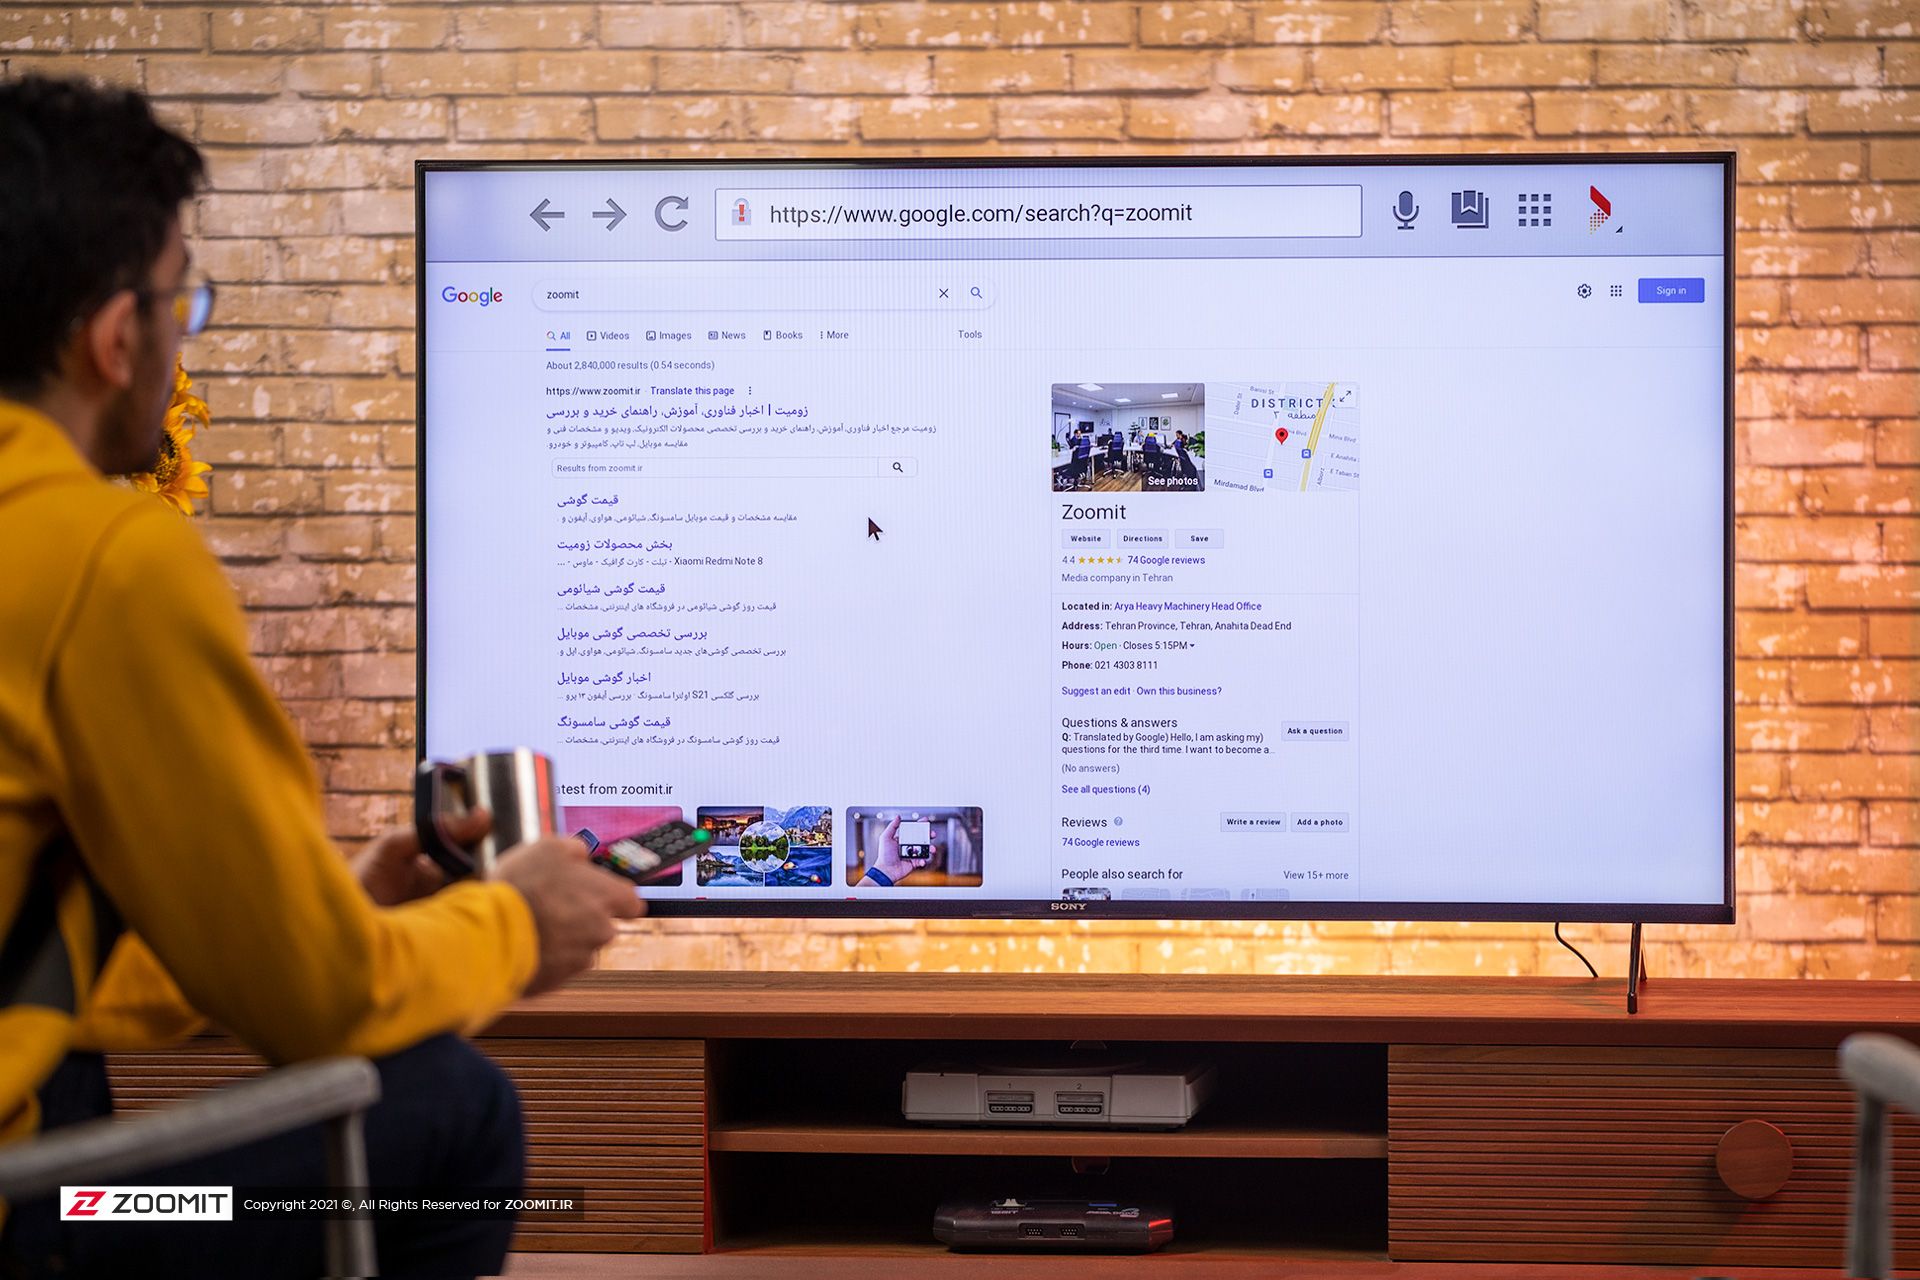
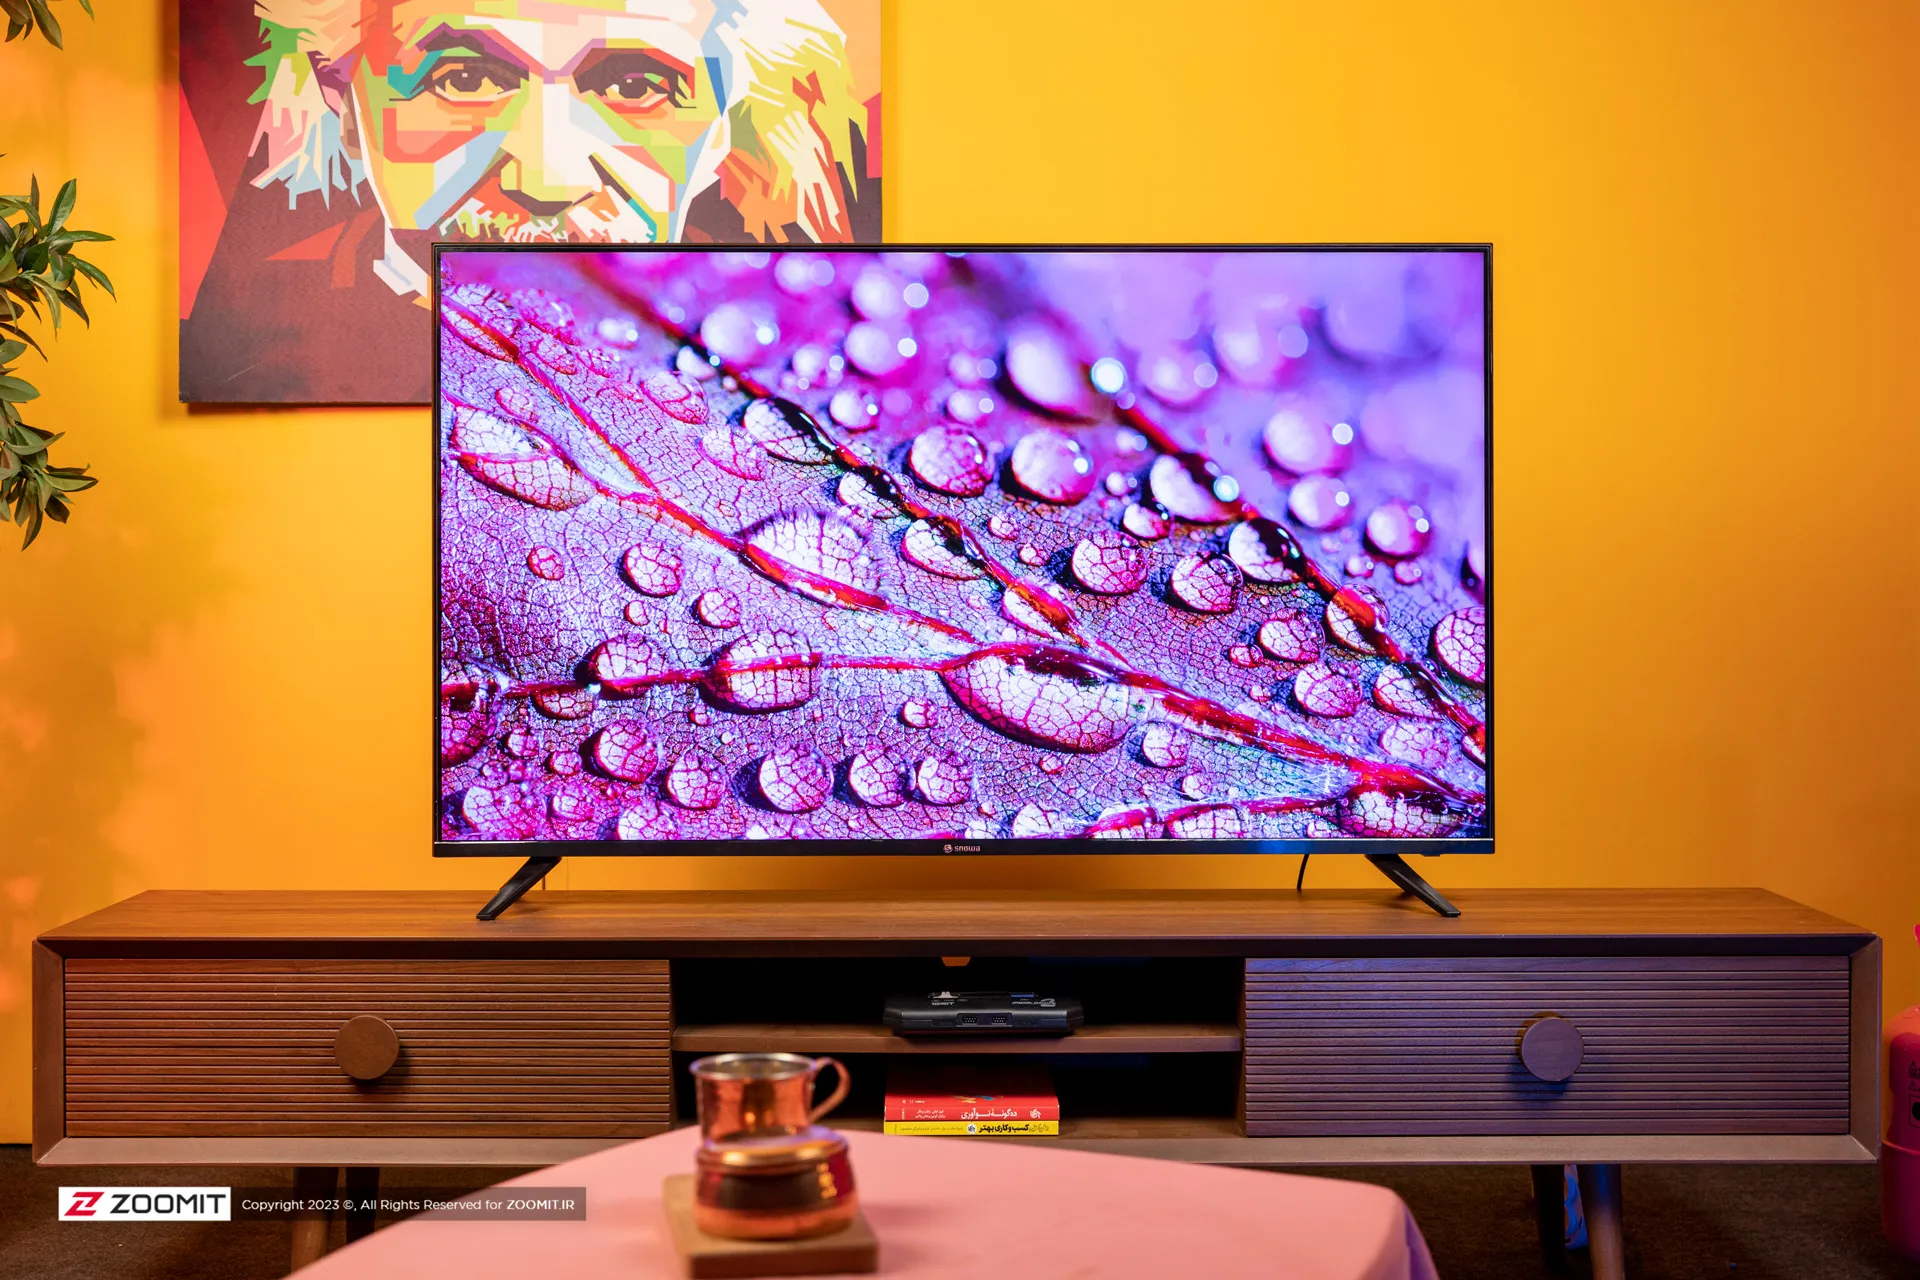
How to connect to the TV with a Samsung phone?
It doesn’t matter if you have a Samsung TV or you are using a Sony TV or an Xvision TV, in this article we will teach you how to connect your Samsung phone to the TV so that you can view the contents of your phone on the TV.
-
Connecting Samsung phone to Samsung TV
-
Connecting a Samsung phone to a Samsung TV with Screen Mirroring technology
-
Connecting a Samsung phone to a Samsung TV with an HDMI converter
-
Connecting Samsung phone to Samsung TV with Samsung DeX
-
Connecting Samsung phone to Samsung TV with Wi-Fi Direct
-
Connecting Samsung phone to LG TV
-
Connecting Samsung phone to LG TV with Smart View
-
Connecting Samsung phone to LG TV through USB-C to HDMI converter
-
Connecting a Samsung phone to a Sony TV
-
Connecting a Samsung phone to a Sony TV through Screen Mirroring
-
Connecting a Samsung phone to a Sony TV with a cable
-
Connecting Samsung phone to Android TV
Connecting Samsung phone to Samsung TV
Connecting a Samsung phone to a Samsung TV with Screen Mirroring technology
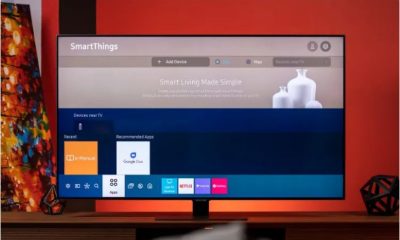
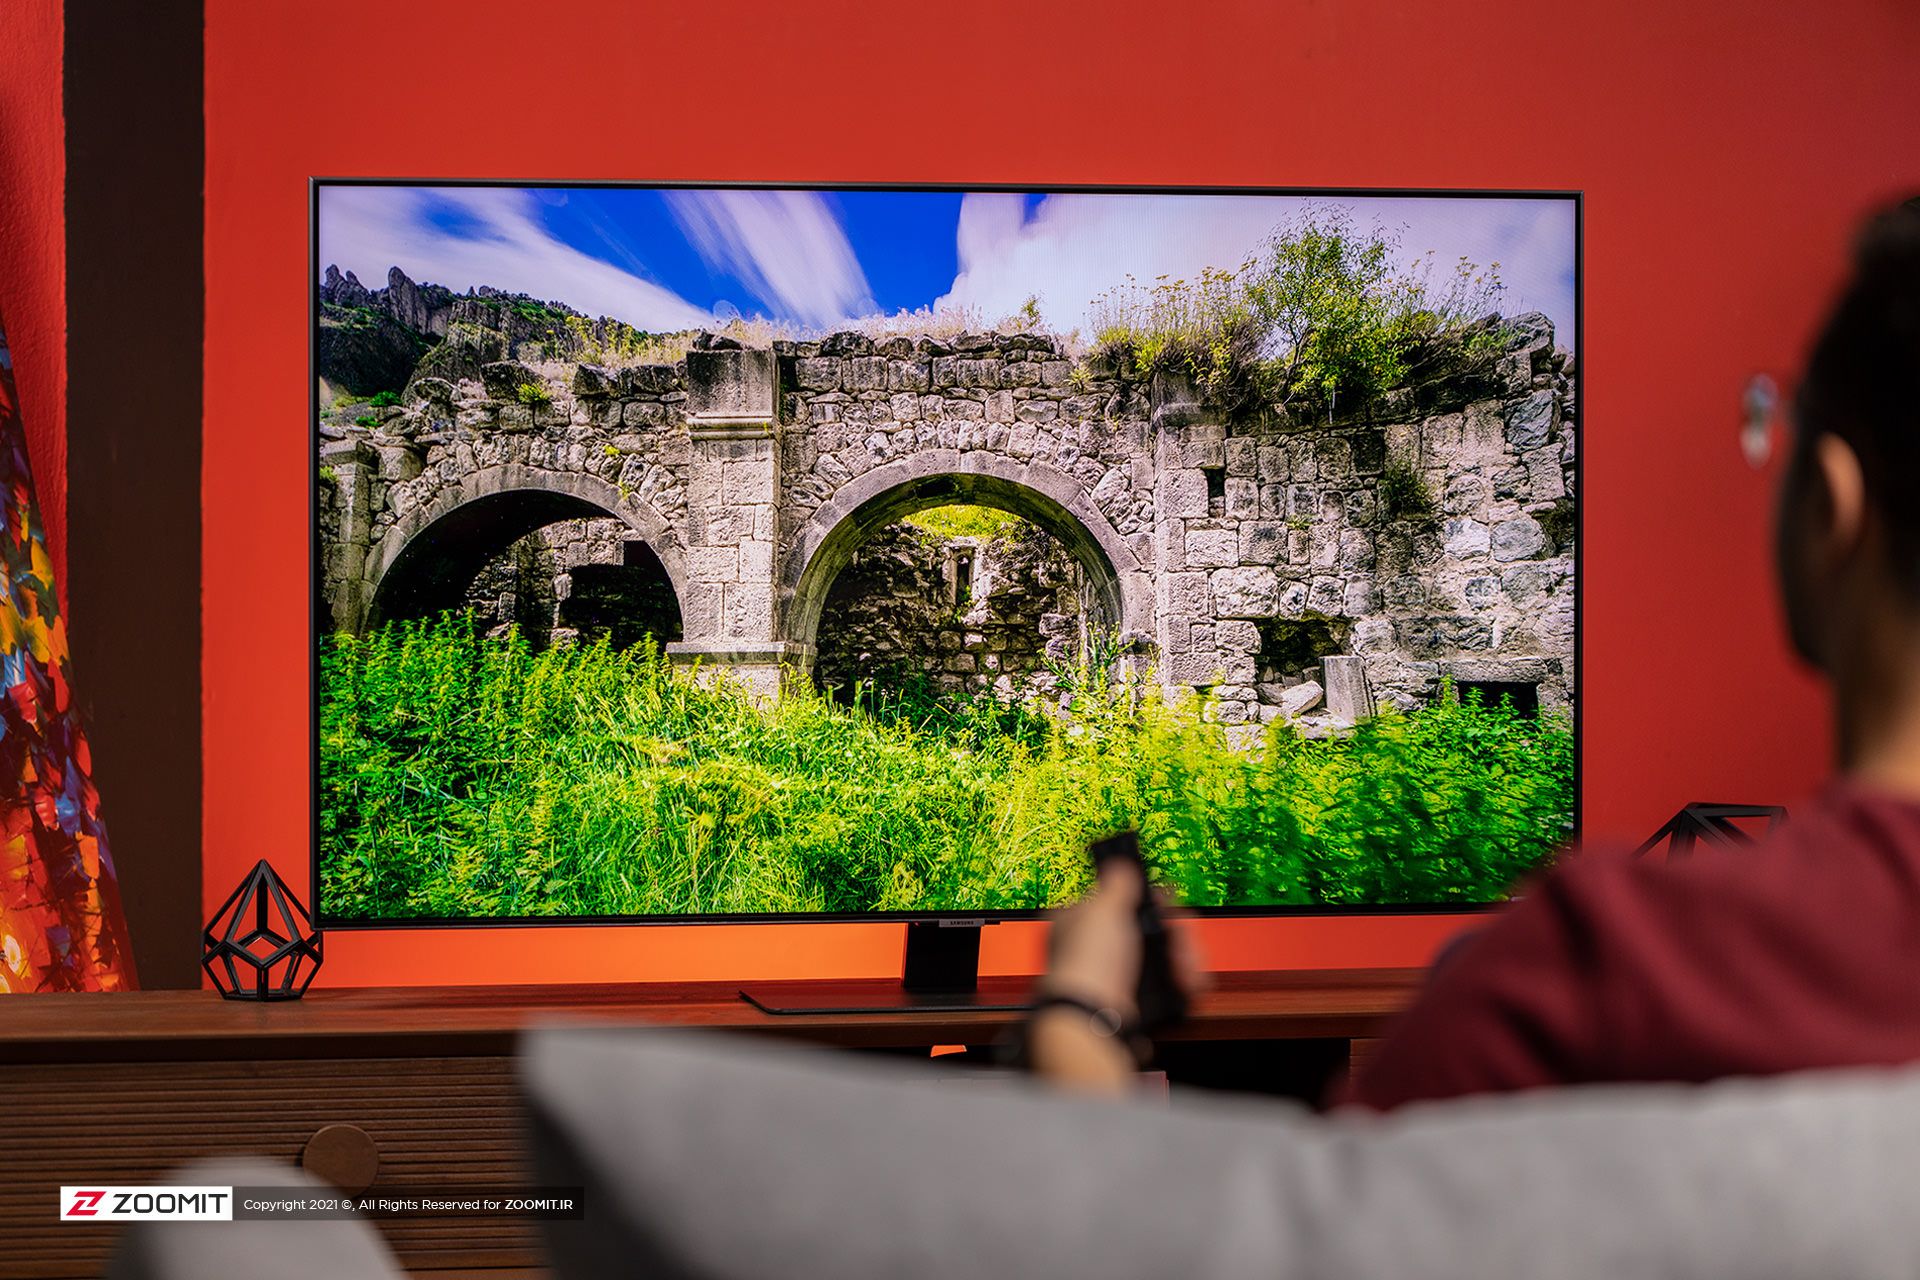
Screen Mirroring is a technology that allows the screen of your phone to be transferred to the TV screen as it is so that you can view the content on the big screen. The SmartThings app and Smart View feature allow you to quickly and easily connect to your Samsung Smart TV.
To wirelessly connect your phone screen to your TV, your TV needs a Wi-Fi connection. For non-smart TVs, connecting via cable will be an easy and practical method that we will explain below.
Connecting Samsung phone to Samsung TV with Smart View
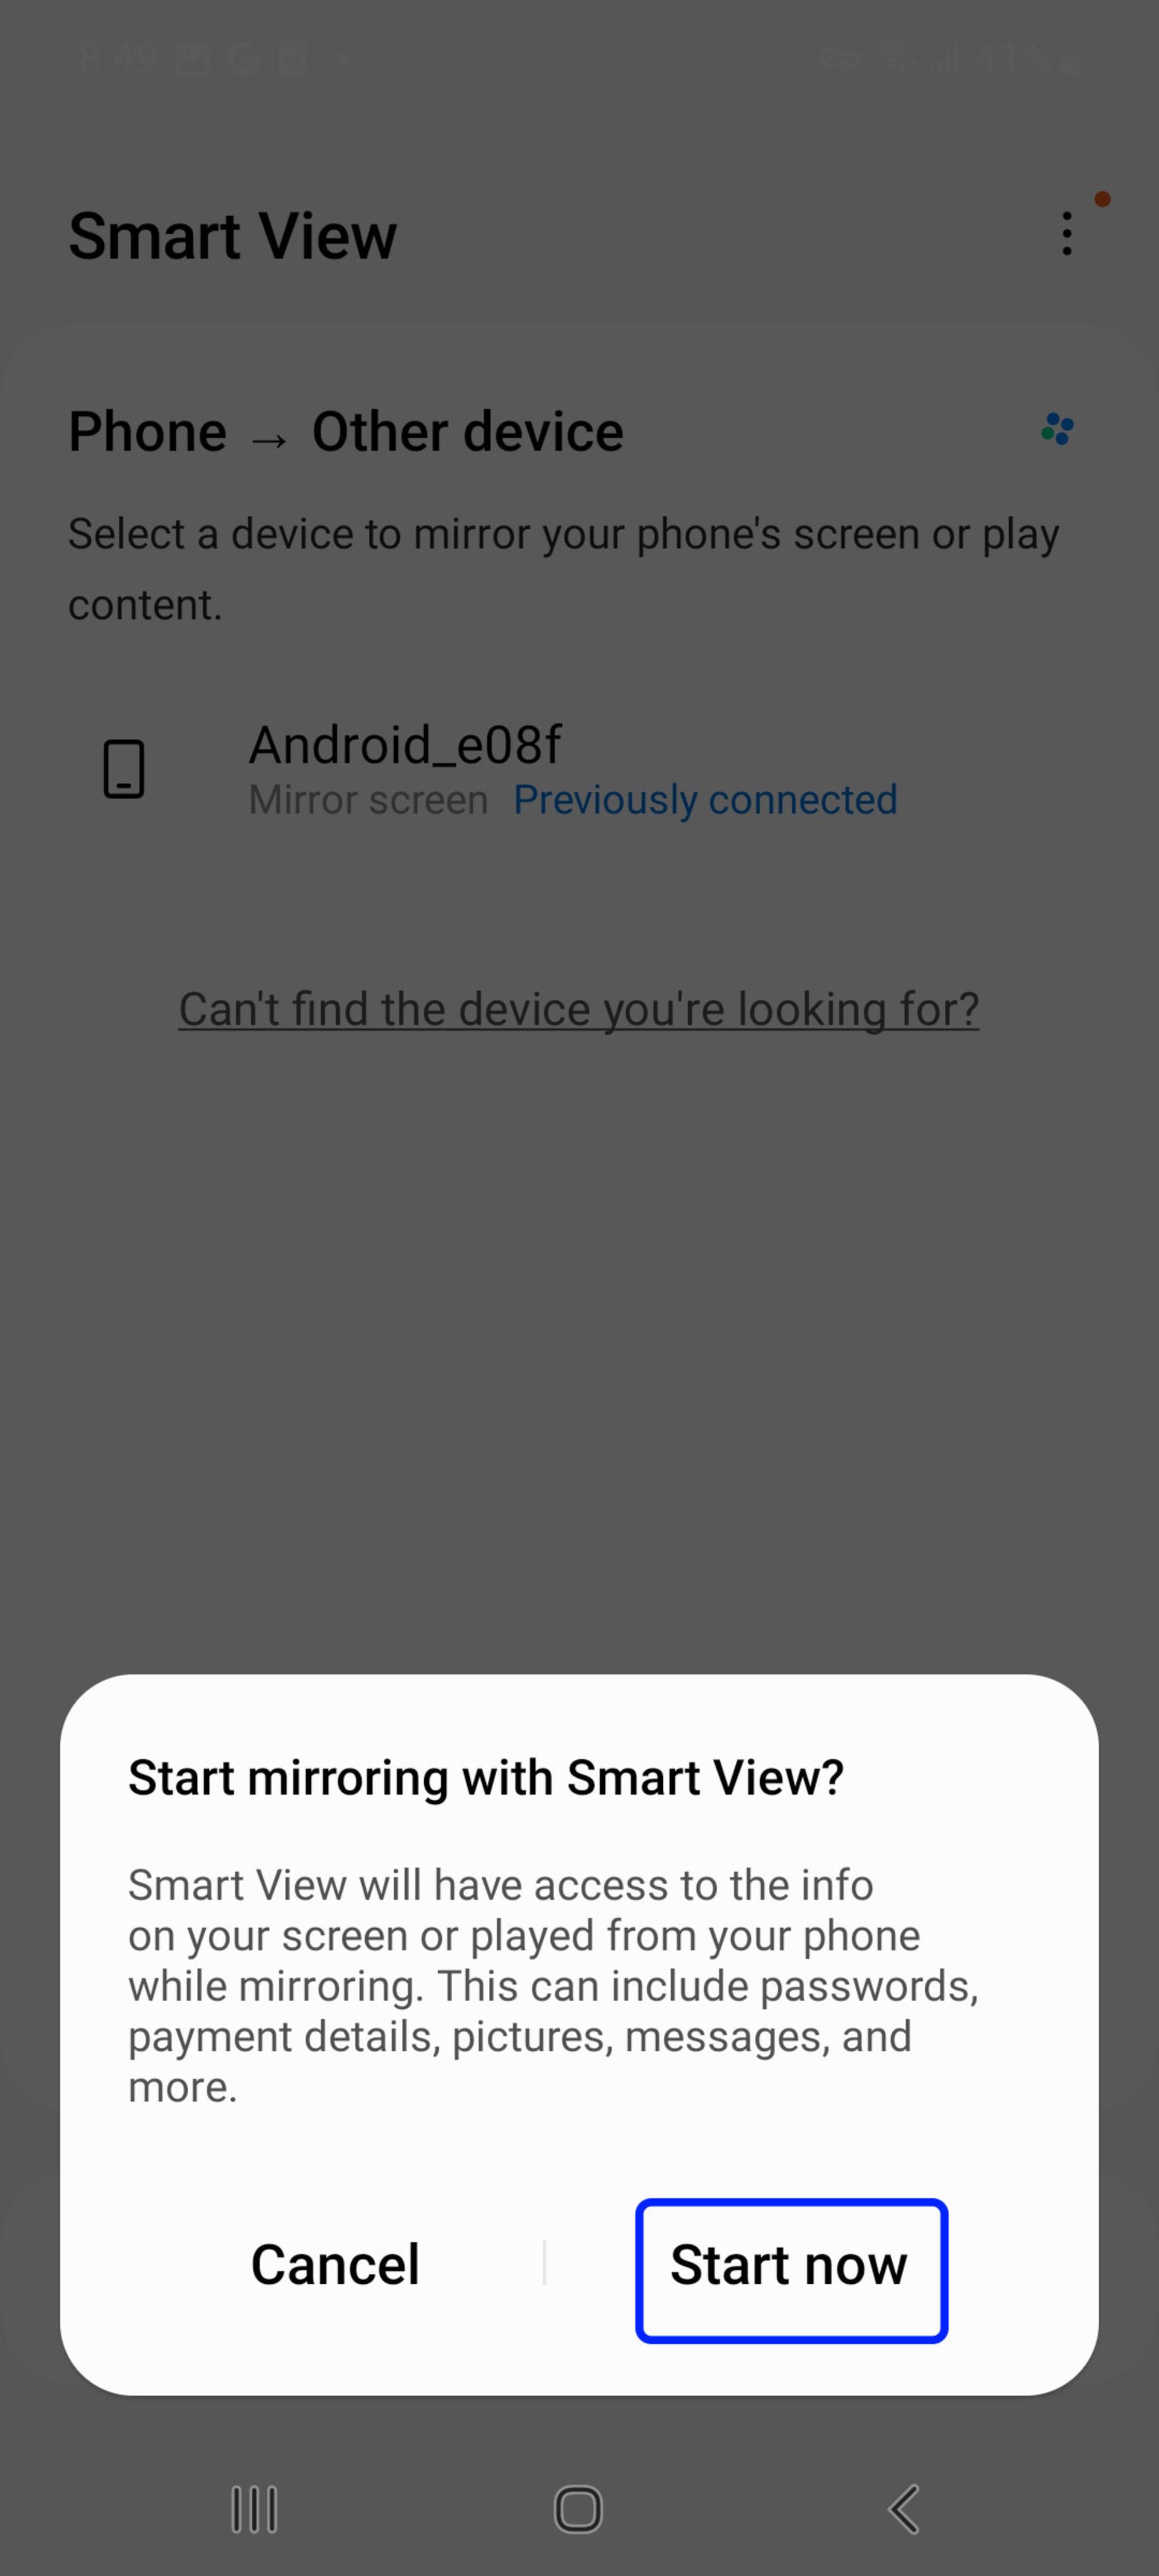
With the Smart View feature, you can view your phone’s screen wirelessly on a large TV screen. Follow the steps below to use Smart View on your Samsung phone:
- First of all, make sure your phone and TV are connected to a Wi-Fi network and VPN is not connected.
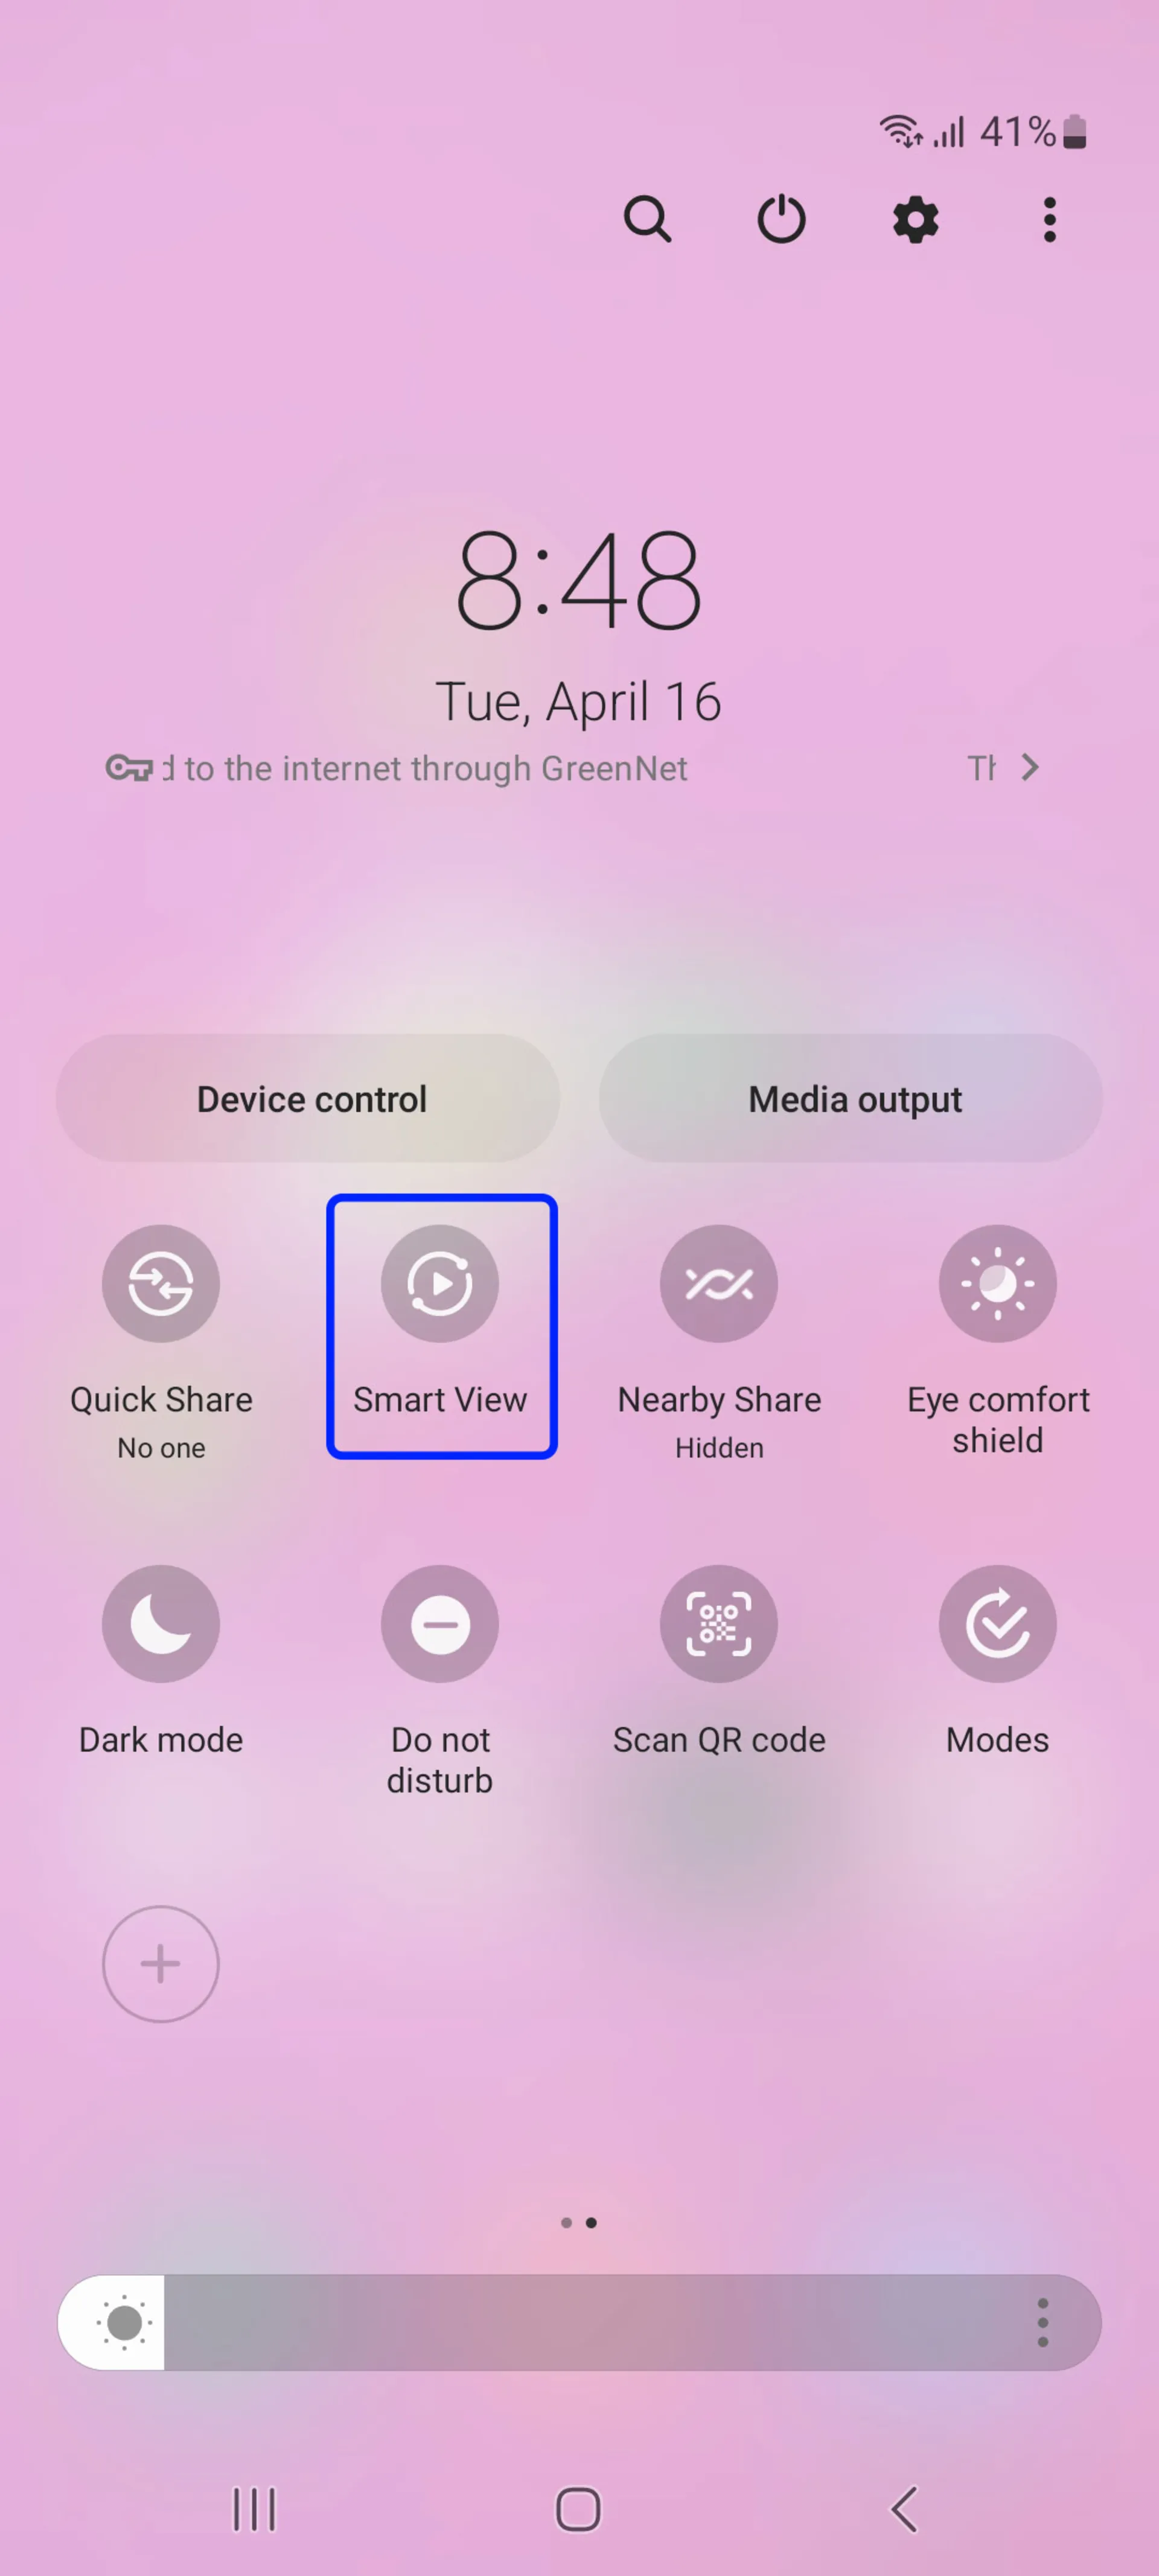
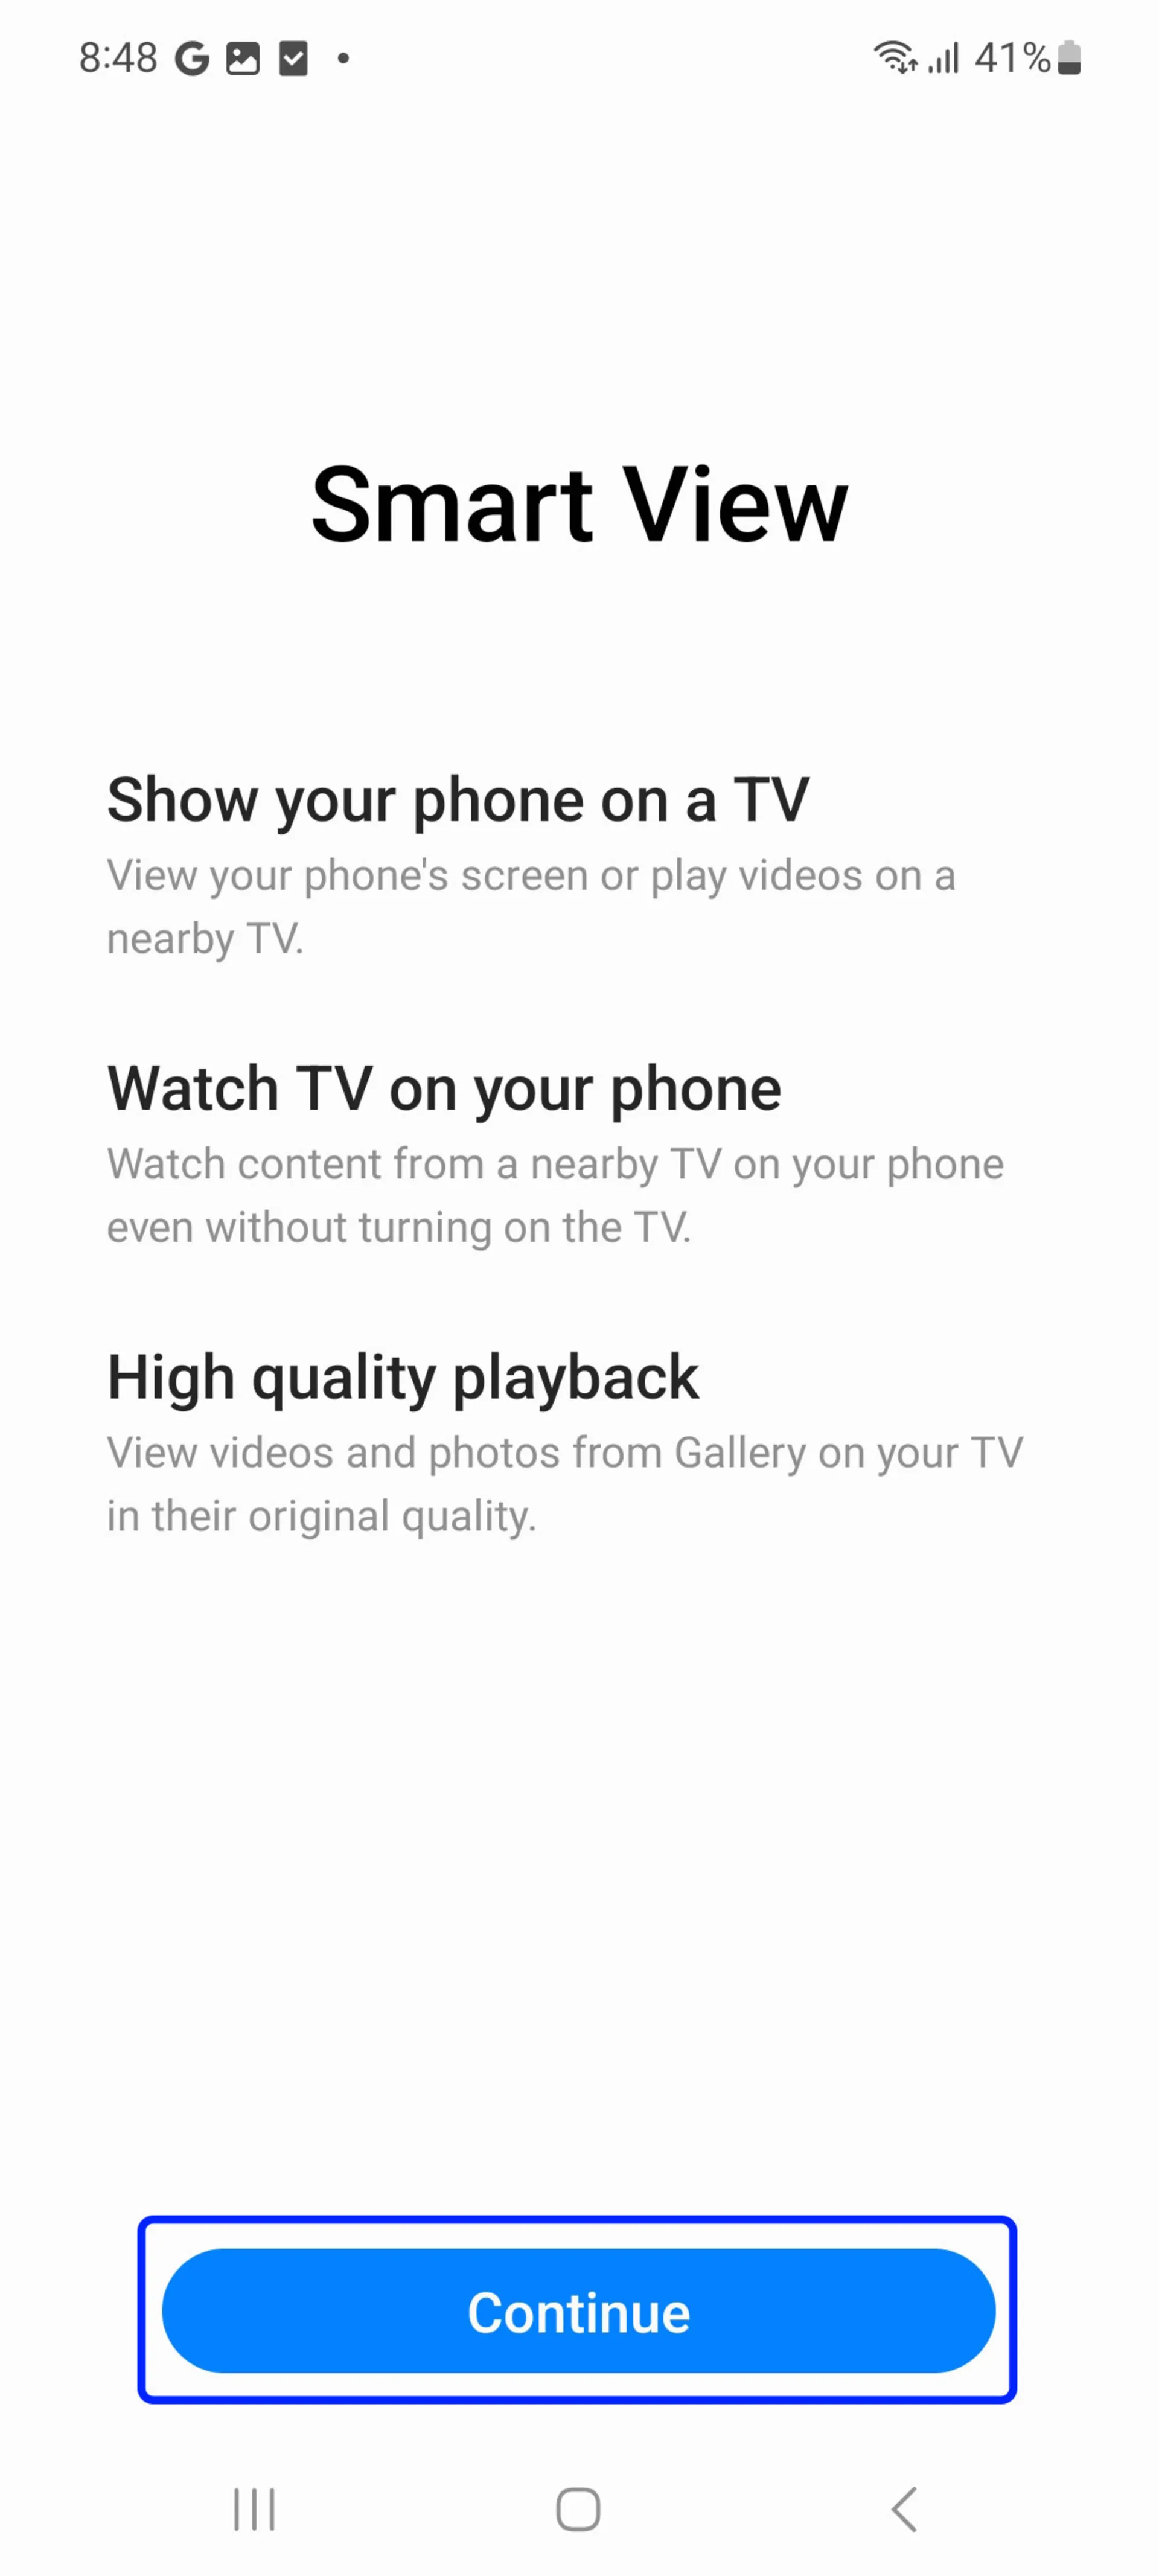
- Now on your phone, swipe down twice to open the Quick Settings panel and select Smart View.
- If you don’t see Smart View, please move it to the left or right or tap the edit button and then add Smart View.
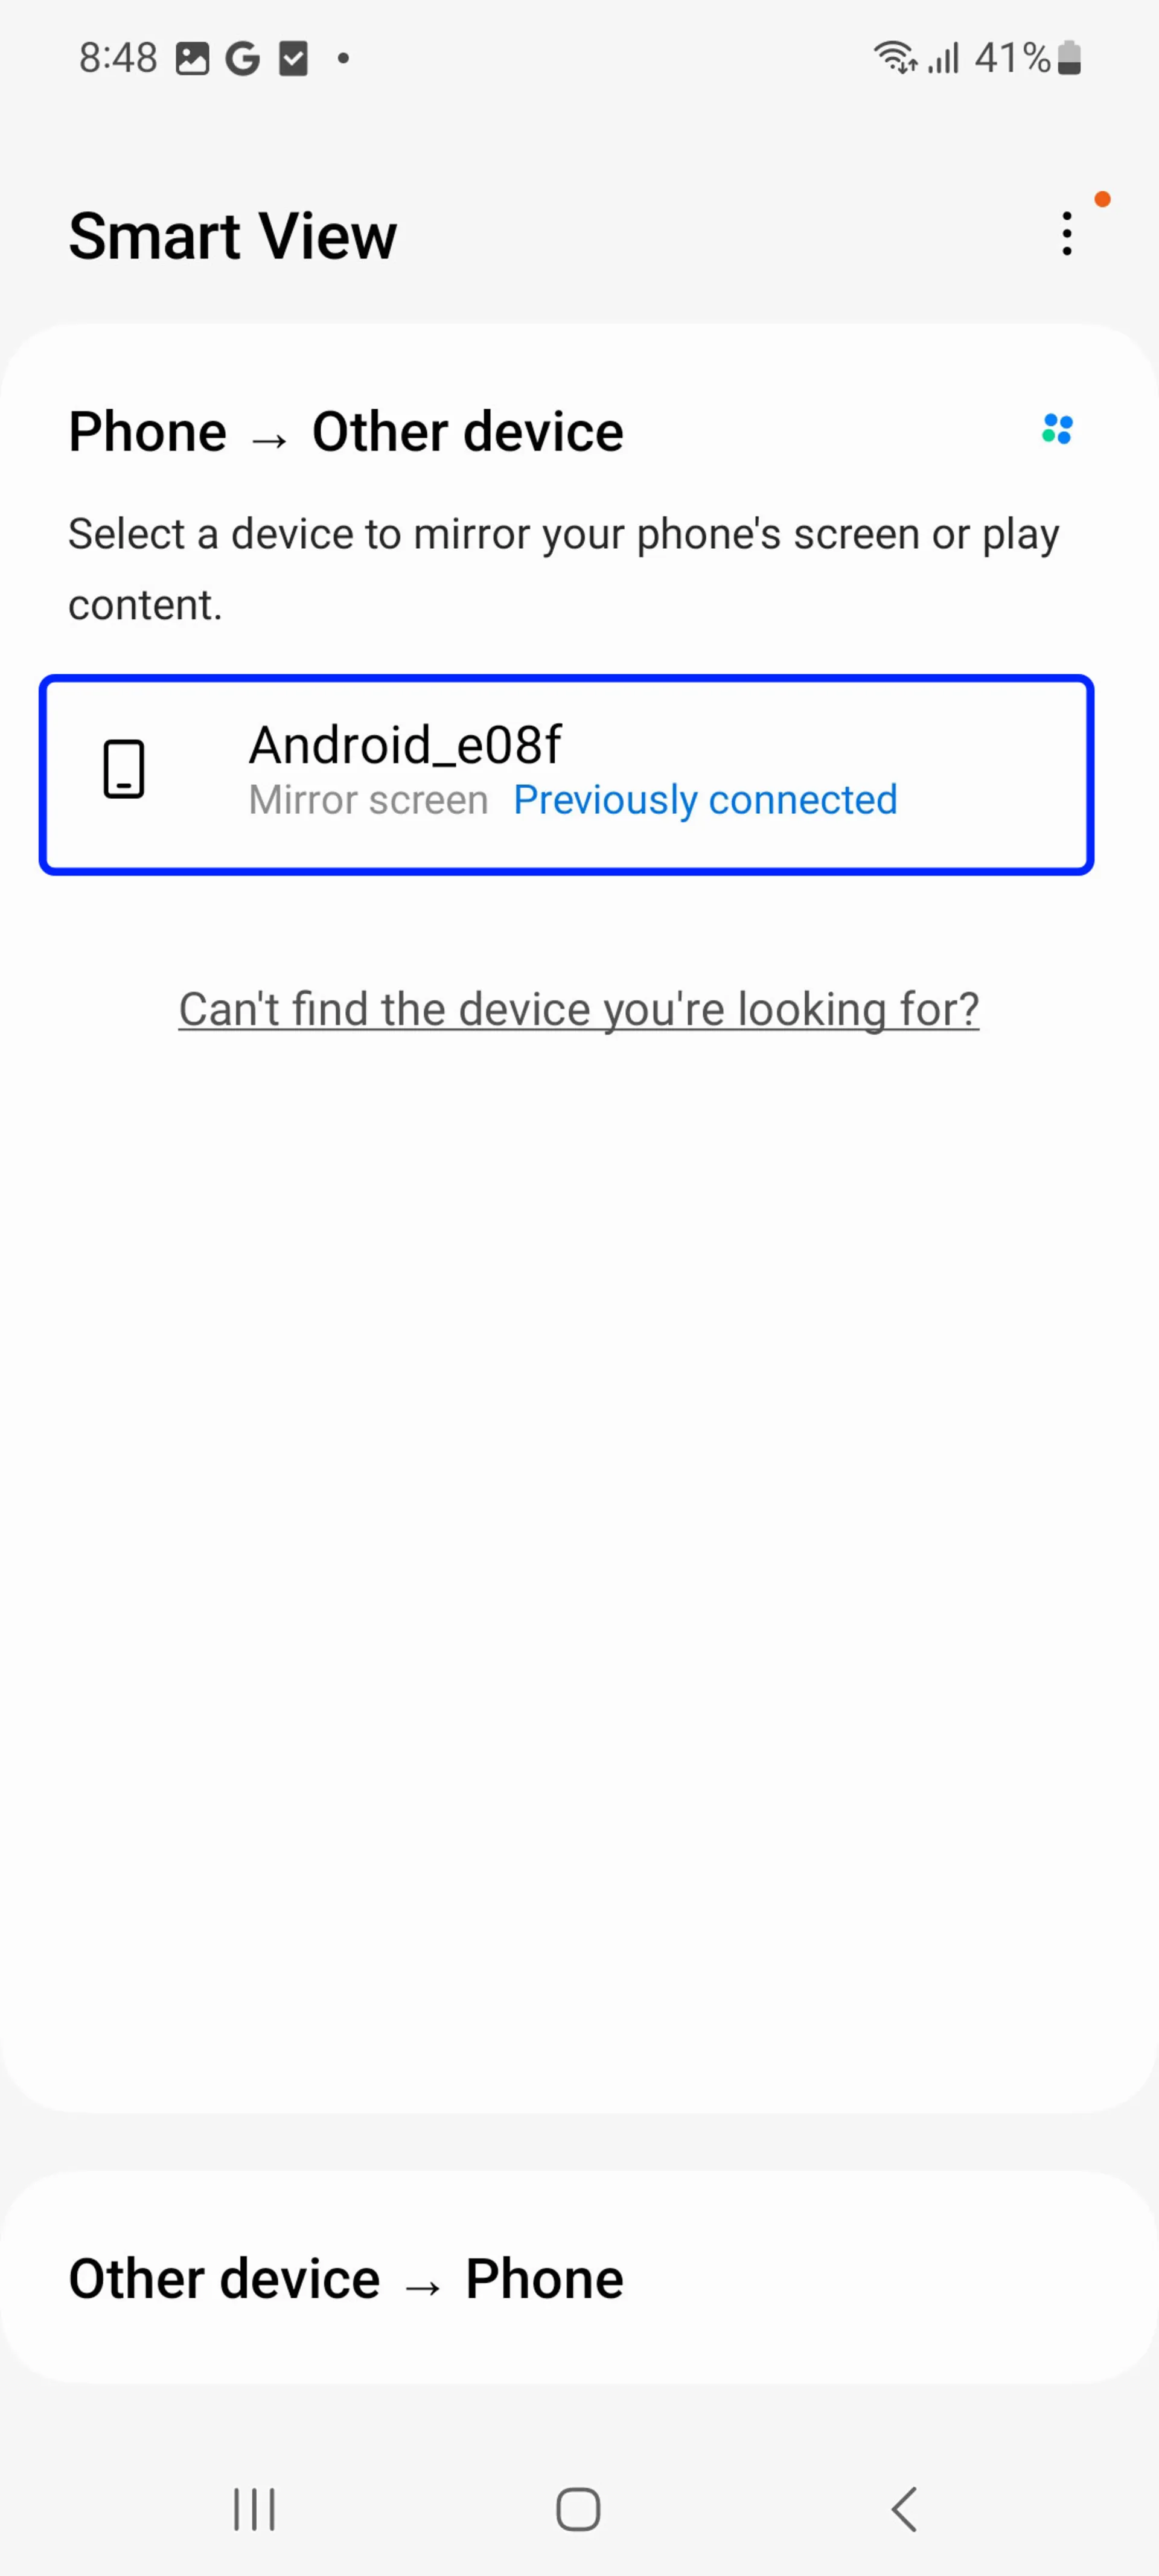
- Select the desired TV to connect to the phone and then click Start Now.
- Finally, select Allow if displayed on the TV screen.
Note: If the TV refuses to connect to the phone, do the following steps to activate the connection:
- Go to Settings, and click on All Settings.
- Tap Connections and then External Device Manager.
- Select Device Connect Manager.
- Select the desired mobile device from the Device List and change the status to Allow.
To disable Smart View, disconnect from your phone or press the Return Button on the TV remote.
The device menus may be different depending on the model and software version. Please read the TV manual for more information.
Connecting Samsung phone to Samsung TV with SmartThings application
SmartThings is a remote control application for Samsung products that can be installed on Android phones and iPhone phones. SmartThings enables automatic connection to most Samsung TVs manufactured from 2016 onwards.
- Connect your Samsung Smart TV and Samsung phone to a Wi-Fi network.
- Download and install the SmartThings app on your phone. If you already have the SmartThings app installed, update it.
- Open the SmartThings app.
- Tap Add Device.
- All devices in SmartThings will be displayed. If you can’t see your device, make sure it’s turned on. If it still doesn’t show up, try turning it off and on again and restarting the SmartThings app.
- Select or scan your TV.
- Tap on the TV name and connect to your phone.
- Now your TV is connected to SmartThings and you can use your phone as a second remote control for your TV. You can also use Smart View to display photos, videos, and music from your phone.
- To do this, tap on the name of your connected TV at the top of the application and select More Options or the three-dot icon.
- Select Mirror Screens (Smart View). Make sure your phone is close to the TV to connect successfully.
Connecting a Samsung phone to a Samsung TV with an HDMI converter
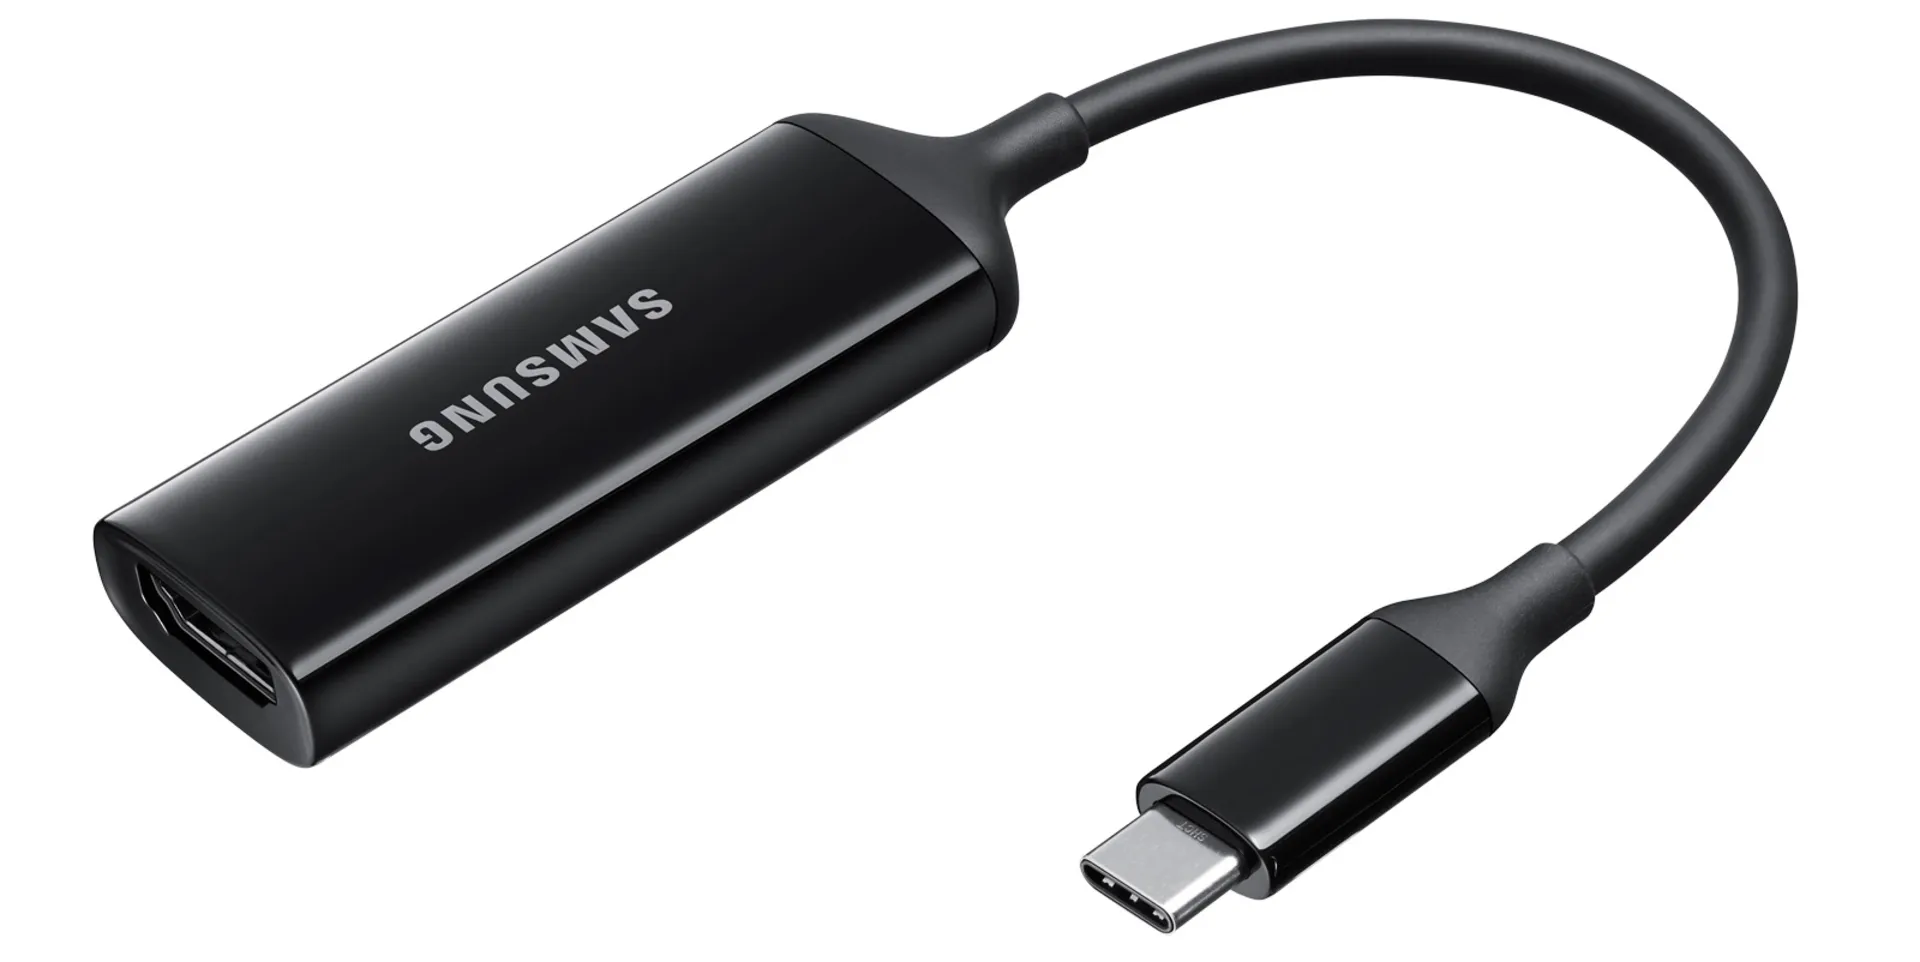
If you have trouble connecting wirelessly, you can use an HDMI converter to connect your device to your TV. Original Samsung HDMI converters support devices with USB-C ports.
If you’re using an older device without a USB-C port, you may be able to find a compatible interface cable, but functionality cannot be guaranteed.
- Connect an HDMI cable to the HDMI converter.
- Connect the other end of the HDMI cable to the HDMI port of the TV.
- Connect the HDMI converter to the USB port of your phone.
- Turn on the TV and change the input to the HDMI port you are using.
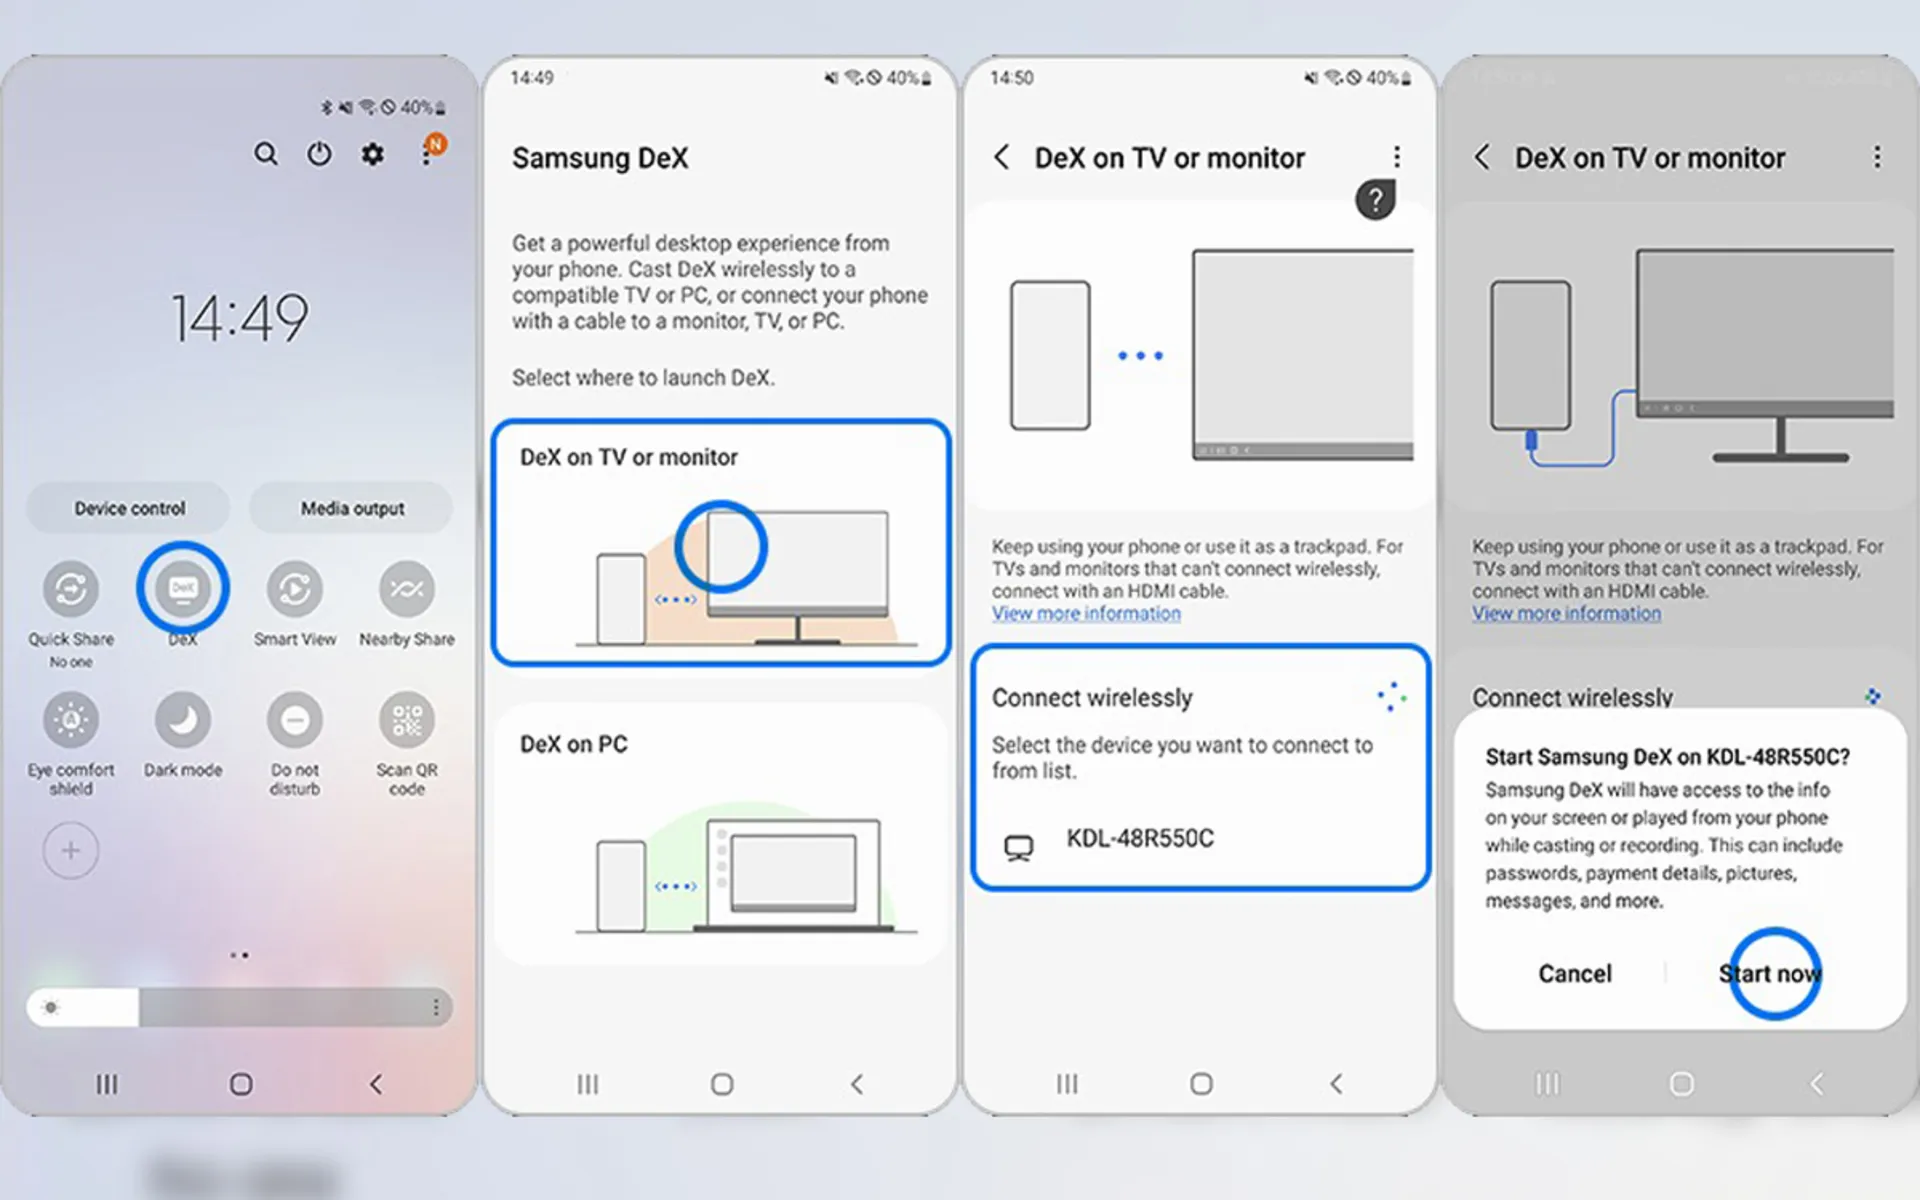
Connecting Samsung phone to Samsung TV with Samsung DeX
- Swipe your phone down twice to open the quick settings menu. Note that this feature may not be available on some phones.
- Tap the DeX button to activate this feature.
- Select DeX on the TV or monitor option.
- Accept the connection request on the TV.
- Then follow the instructions on the screen. Once completed, the Samsung DeX screen will appear on the target TV.
Note that the function of this function will be different depending on the type of TV for wireless connection. We recommend using Samsung Smart TVs 2019 or newer.
Connecting Samsung phone to Samsung TV with Wi-Fi Direct
With Wi-Fi Direct, you can directly connect your phone to the TV without an existing Wi-Fi network. With this, your favorite images and videos will be displayed on the TV screen. Note that both the TV and phone must have Wi-Fi direct capability for this feature to work.
To check whether the Wi-Fi direct feature is equipped on the TV, go to the settings. Now follow the steps below to use Wi-Fi Direct on Samsung TV:
- First, open the TV menu to enable Wi-Fi Direct. Then go to Network and Wi-Fi Direct.
- Now activate the phone’s Wi-Fi Direct. To enable Wi-Fi Direct on your Samsung phone, go to Settings, then Connections, enter the Wi-Fi section, tap the three-dot icon at the top, and enable the Wi-Fi Direct option. After scanning, the phone will display a list of available devices. The name of the phone also appears on the TV.
- Select the device from the list to start the connection. If a connection request is made by the phone, a message will appear on the TV and vice versa. Accept the request to connect the phone to the TV.
Connecting Samsung phone to LG TV
Connecting Samsung phone to LG TV with Smart View
You can also use the Smart View feature on LG TVs like Samsung TVs. Here is the step-by-step guide to enable this feature:
- Swipe down on your phone screen and select Smart View.
- Make sure your TV and phone are both connected to the same Wi-Fi network.
- Select your TV from the list of available devices.
- Thus, your phone screen should be reflected on the TV in a few moments.
Connecting Samsung phone to LG TV through USB-C to HDMI converter
You can connect your phone to the TV using a USB-C to HDMI converter. The steps are as follows:
- Connect the USB-C end of the adapter to your phone.
- Connect the HDMI end to the HDMI port on your TV.
- Tap “Accept” when the connection request appears on your phone
- After connecting, your phone screen will be mirrored on the TV screen.
This method is simple and hassle-free to use, especially when wireless options are not available.
Connecting a Samsung phone to a Sony TV
Connecting a Samsung phone to a Sony TV through Screen Mirroring
Fortunately, you can use the same Smart View feature of Samsung phones to connect to Sony TV. Thus, it becomes easy for you to seamlessly connect to any of the devices.
- Swipe down twice to reveal the Quick Panel.
- Select the Smart View icon.
- From there, you should see a list of devices compatible with the display. Click on your Sony TV.
- You should get a message asking if you are ready to connect. Select “Start Now”.
If your TV does not appear in the list of devices, you need to make sure that the TV is compatible. Note that only Sony Bravia TVs manufactured between 2013-2020 have Screen Mirroring capability.
Connecting a Samsung phone to a Sony TV with a cable
MHL technology provides the possibility of connecting the phone to the Sony TV with a cable. Phones and tablets compatible with this feature can be connected to the TV through an MHL to HDMI cable. If you can’t use wireless to connect your phone to the TV, then a wireless connection and HDMI conversion is another way you will have.
Connecting Samsung phone to Android TV
If you are looking for a wireless connection between your phone and TV, the Smart View feature on Samsung phones is the best way to share data on Android TVs, especially Iranian smart TVs. We have explained the activation method in the above sections.
On the other hand, if your TV is not smart, using cable will help you. As mentioned, you’ll need an HDMI cable and a USB-C to HDMI converter for this. Connect the USB-C end to your phone and then connect an HDMI cable between the converter and your TV. After connecting the converter and cable, the screen of your Samsung phone will appear on the TV.
Connecting a Samsung phone to a TV is not particularly complicated, especially when both devices are in the Android ecosystem. Earlier, we also checked the method of connecting the iPhone to Samsung TV; In addition, you can use the best programs to connect the iPhone to the TV so that more options are available to you.
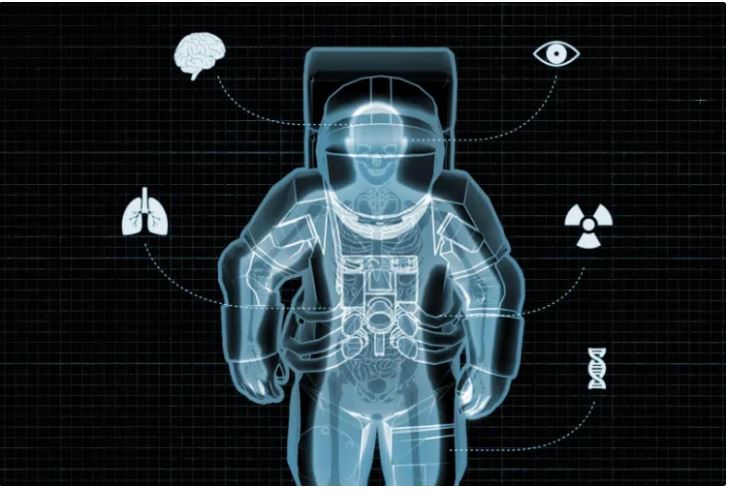
The strangest things that can happen to humans in space
When it comes to space and astronautics, we all remember very interesting movies in which strange things happen to astronauts. Movies with exciting stories, most of which are nothing but the authors’ imaginations; But there are other very amazing stories happening in space that are completely real and have nothing to do with human imagination. In this article, we try to discuss some examples of these events and introduce you to the wonders of space travel.
Strange things that happen to humans in space
The human heart changes shape in space
It may seem a bit strange and even unbelievable that traveling to space can change the shape of the heart, But such a thing happens in reality and scientific studies have proven it. Less work of the heart and less pumping of blood leads to a decrease in the volume of the muscles of this organ, and this ultimately causes the hearts of astronauts to become more spherical by about 9.4%.
Despite the temporary nature of these conditions, some doctors believe that the reduction in the volume of the human heart during space travel may have serious consequences. According to NASA, researchers are researching this issue, and the results of this study will not only help astronauts but will also affect ordinary people and the inhabitants of the planet.
There is a possibility of mental problems in space
Living in the extraterrestrial atmosphere is associated with many problems. Changing living conditions and experiencing a completely different environment with very specific conditions imposes many psychological pressures on astronauts. These issues cause astronauts to experience special psychological conditions and are susceptible to various problems such as anxiety and depression.
Being away from family, lack of simple facilities such as sunlight or even fresh food, and heavy work are among the reasons that expose astronauts to various mental illnesses.
Human vision decreases in space
Visual impairment caused by intracranial pressure or VIIP is another space travel wonder faced by astronauts. This problem was observed for the first time in 2005 and in an astronaut named John Phillips. The Washington Post investigates this issue in an article and states that Phillips experienced a significant loss of vision after returning from his space trip. This incident prepared the groundwork for the researchers’ research for further investigations.
Additional research showed the changes in the appearance of the astronauts’ eyes and the loss of their vision after returning from space travel. Currently, the only possible reason that has been proposed for the occurrence of such conditions is the lack of gravity and the creating double pressure on the astronauts’ skulls; Of course, the research in this field continues and it is still not possible to say with certainty a specific reason for the occurrence of these conditions.
The body’s immune system weakens in space
Traveling to space, along with its excitement and surprises, also brings many problems for humans. One of these problems is the weakening of the body’s immune system in space, which was first discovered by astronauts during the Apollo mission. The story was that the astronauts in this mission experienced problems such as irregular heartbeat, dehydration, and inner ear disorder, and faced many problems after returning from the mission.
Studies conducted in this field have shown that after leaving the Earth’s atmosphere, the immune system of astronauts weakens, in part due to the abnormal activation of a type of immune cells called T-regulatory lymphocytes. This weakening is sometimes so severe that it causes astronauts to deal with latent viruses such as chicken pox in addition to simple infectious diseases such as colds after returning from space travel.
Astronauts can lose their fingernails
As you know, astronauts wear special clothes to carry out their missions in space, which includes astronaut gloves. These gloves are designed in such a way that they put a lot of pressure on the astronauts’ hands and nails; This will eventually lead to their nails falling off.
It is true that the fall of fingernails or their swelling is not a simple matter that can be easily passed over, But it seems that doing more research to design more suitable gloves can minimize the possibility of this problem and astronauts will not face such a problem in the future.
Human height grows taller in space
Another wonder of space travel, which makes it one of the favorite trips of ordinary people, is the increase in height that occurs during this trip. As soon as you leave the Earth’s atmosphere, the gravity is close to zero, and this causes the pressure on the spine to decrease significantly. The reduction of this pressure, in turn, causes the height of the astronauts to grow a few centimeters.
One of the studies that confirms the truth of this issue is the research that NASA scientists conducted on two twin brothers. In this study, one of the twins had a 342-day trip to space and the other brother was examined on Earth. The results of this and other research determined that the height of astronauts increases by 2 to 5 cm on average after space travel.
 Mark Kelly (left) and Scott Kelly (right) made it possible for researchers to study the health effects of long-duration space travel by studying NASA twins.
Traveling to space leads to weakening of muscles
Another strange thing that happens to astronauts in space and affects their health is the weakening of muscles or atrophy. Long space travel causes muscle wasting in astronauts, so they are trained to exercise continuously during their journey.
NASA is working on this issue to find solutions to prevent the problem of muscle wasting. The reason for the importance of this issue is the need for astronauts to have strong muscles and a healthy body so that they can perform their difficult missions in space in the best possible way.
Space swells astronauts’ faces
A large volume of our body is made up of liquid. On Earth, gravity pulls this fluid down and collects some of it in the lower limbs; But in space, where microgravity prevails, our body fluids are more evenly distributed; As a result, astronauts’ faces look puffier than normal, and on the other hand, their legs appear thinner than when they are on Earth.
According to the Washington Post, “the phenomenon of puffy-faced bird’s legs” appears when blood and other body fluids accumulate on the side of the upper body due to low gravity and stay there; As a result, the heads swell and the legs shrink. In this situation, the appearance of the astronauts can change by swelling their faces. Astronauts may experience excessive blood pooling; As if their head is constantly cold. However, after a few weeks in space, your body will adjust to the change in gravity and some of the facial puff will fall asleep.
Space travel may increase the risk of cancer
Astronauts who spend 6 months in space are exposed to almost as much radiation as a thousand chest X-rays. Exposure to different types of radiation exposes the body to the risk of cancer, damage to the central nervous system, bone loss, and some cardiovascular diseases. However, it has been difficult to accurately calculate the level of risk so far. Also, scientists’ information about the impact of radiation in long-duration space missions to deep space destinations such as the Moon and Mars is still limited.
The more time a person spends in space, the more radiation they are exposed to and, theoretically, the more DNA damage they accumulate. It is not possible to say with certainty whether this DNA damage actually increases the risk of cancer; Because cancer is affected by many environmental and genetic factors. For example, it’s probably fair to say that today’s astronauts are probably some of the fittest people on the planet. They probably eat a healthy diet, exercise a lot, and don’t smoke or drink much alcohol. All these things reduce the possibility of getting cancer.
Strange events for astronauts during space travel have always been one of the most fascinating topics for ordinary people. The wonders of space travel are not limited to the things we have mentioned, and at the same time as science advances and the scope of research increases, we will definitely see more interesting news in this field in the near future.
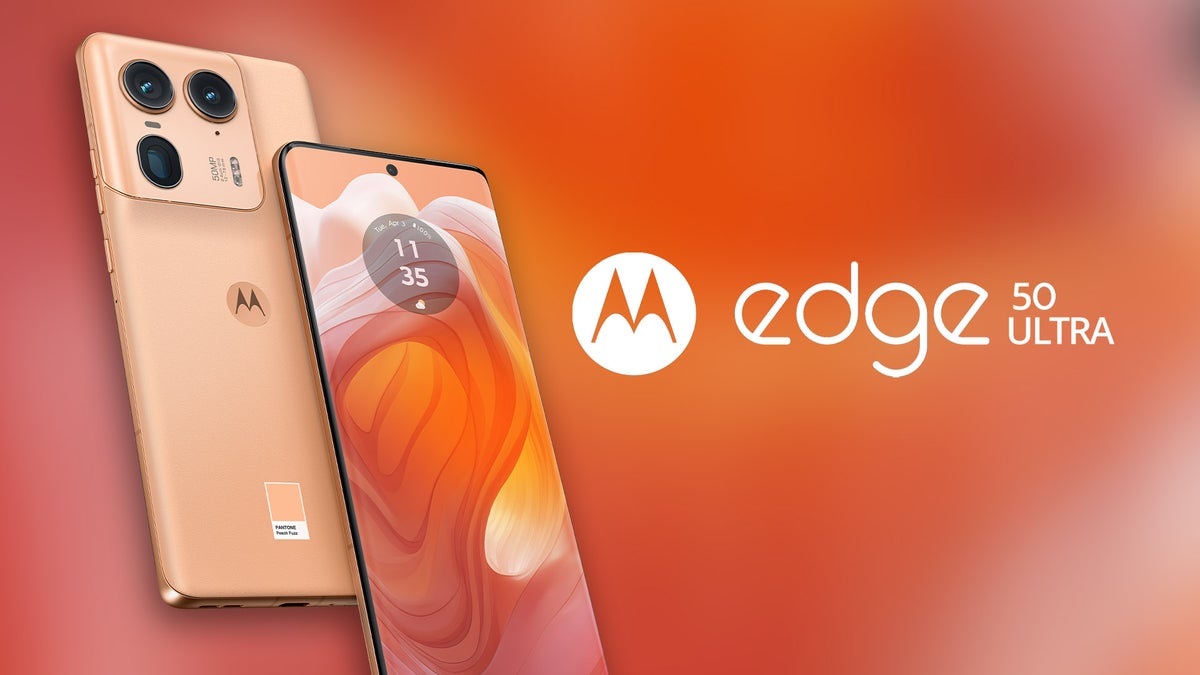
Reviews of Motorola Edge 50 Ultra phone, price, technical specifications, design, screen, software, hardware, battery life and charging, and other specifications of this phone.
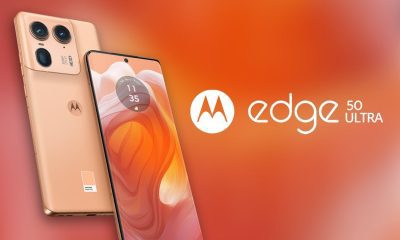
Motorola Edge 50 Ultra review
The Motorola Edge 50 continues to grow today with new additions to the lineup. After launching the Edge 50 Pro earlier this month, the OEM is now introducing the Edge 50 Ultra and Edge 50 Fusion. As expected, the Ultra is at the top of the range, while the Fusion is the most affordable of the three.
We will take a closer look at the Edge 50 Ultra and its flagship features. After all, this is Motorola’s top-of-the-line smartphone for 2024, and it offers a ton of premium features, including AI capabilities and a Pantone-calibrated display and cameras for more accurate and vivid color reproduction.
Motorola Edge 50 Ultra specifications at a glance:
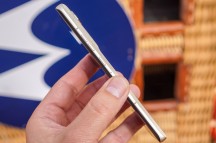
- Body: 161.1 x 72.4 x 8.6mm, 197g; Victus gorilla glass front, acetate back (wood based) or silicon polymer back (vegan leather), aluminum frame; IP68 dust/water resistant (up to 1.5m for 30 minutes).
- Display: 6.70 inch OLED, 1B color, 144Hz, HDR10+, resolution 1220x2712px, aspect ratio 20.01:9, 444ppi.
- Chipset: Qualcomm SM8635 Snapdragon 8s Gen 3 (4nm): Octa-core (1×3.0 GHz Cortex-X4 & 4×2.8 GHz Cortex-A720 & 3×2.0 GHz Cortex-A520); Adreno 735.
- Memory: 512 GB RAM 12 GB, 1 TB 16 GB RAM; UFS 4.0.
- Operating System/Software: Android 14.
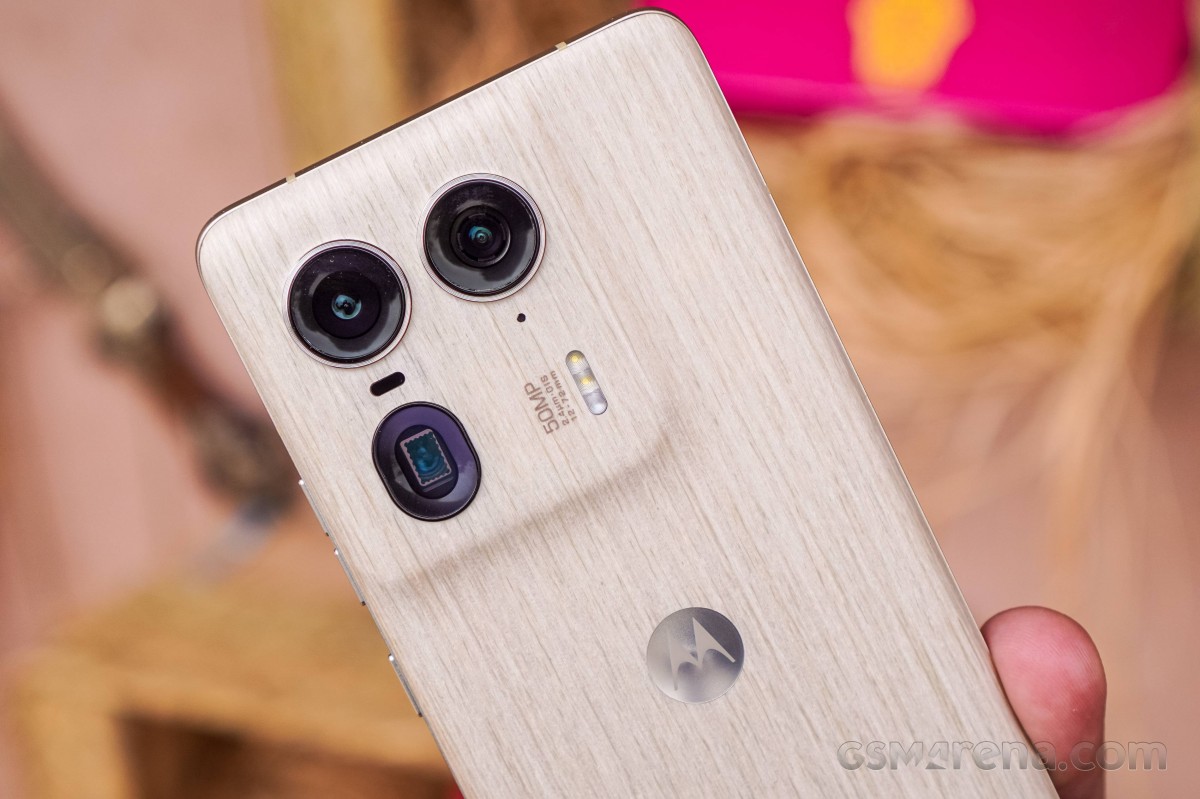
- Rear camera: Wide (main) : 50 MP, 1/1.3-inch f/1.6, 2.4 µm, multi-directional PDAF, laser autofocus, OIS; Telephoto : 64 MP, f/2.4, 1.4 µm, PDAF, OIS, 3x optical zoom; Ultra wide angle : 50 MP, f/2.0, 1.28 µm, 122 degrees, AF.
- Front camera: 50 MP, f/1.9, 1.28 µm, AF.
- Videography: Rear camera : 4K@30fps, 1080p@30/60, 10-bit HDR10+, gyro-EIS. Front camera : 4K@30fps, 1080p@30/60fps.
- Battery: 4500 mAh; 125W wired, 50W wireless, 10W reverse wireless.
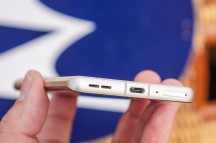
- Connectivity: 5G; two SIM cards; Wi-Fi 7; BT 5.4; NFC, UWB, USB-C 3.1 Gen 2 with DP 1.4 support.
- Other specifications: fingerprint reader (under the display, optical); stereo speakers; Ready to support 6.
AI functions are possible thanks to the new Qualcomm Snapdragon 8s Gen 3 chipset, which sits between last year’s Snapdragon 8 Gen 2 and this year’s Snapdragon 8 Gen 3. while maintaining a relatively low price. Motorola seems to be looking for a more affordable flagship segment.
But despite the small agreement in the chipset department, Motorola does not make cameras, displays and chargers. The 6.7-inch OLED panel packs all the punch, runs at up to 144Hz and can charge up to 125W (wireless is 50W). The camera hardware looks good on paper. We’ve got a 50MP main sensor assisted by a 50MP ultra-wide unit and a 64MP 3x telephoto camera with a reliable f/2.4 aperture. Even the selfie unit is 50MP with autofocus, which is rare even in the ultra-premium segment.
Designing
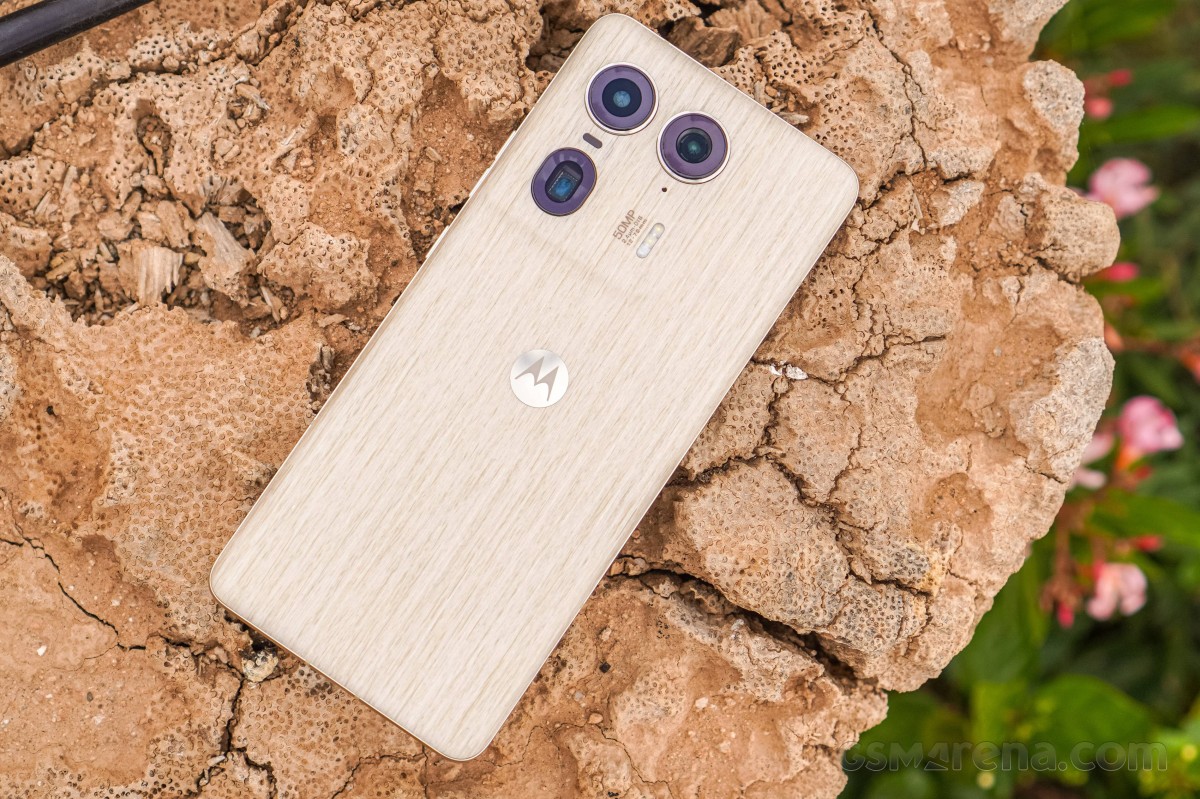
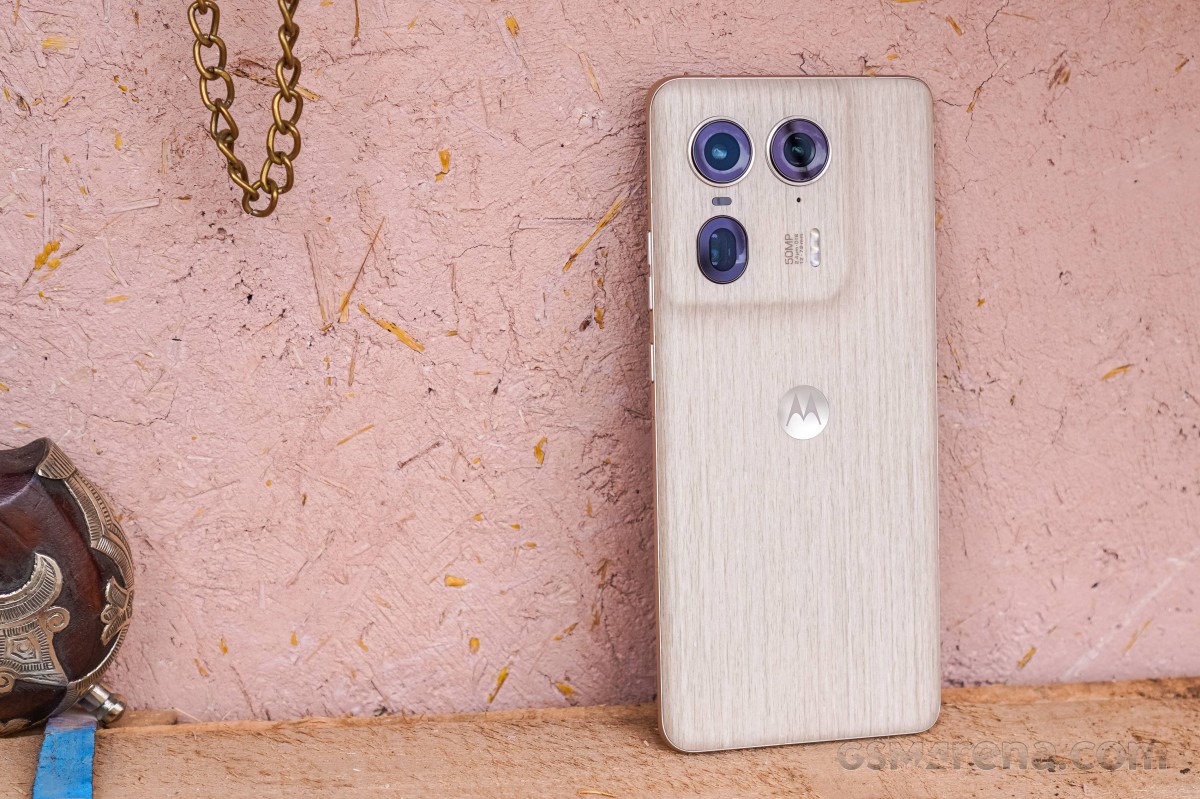
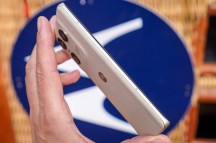
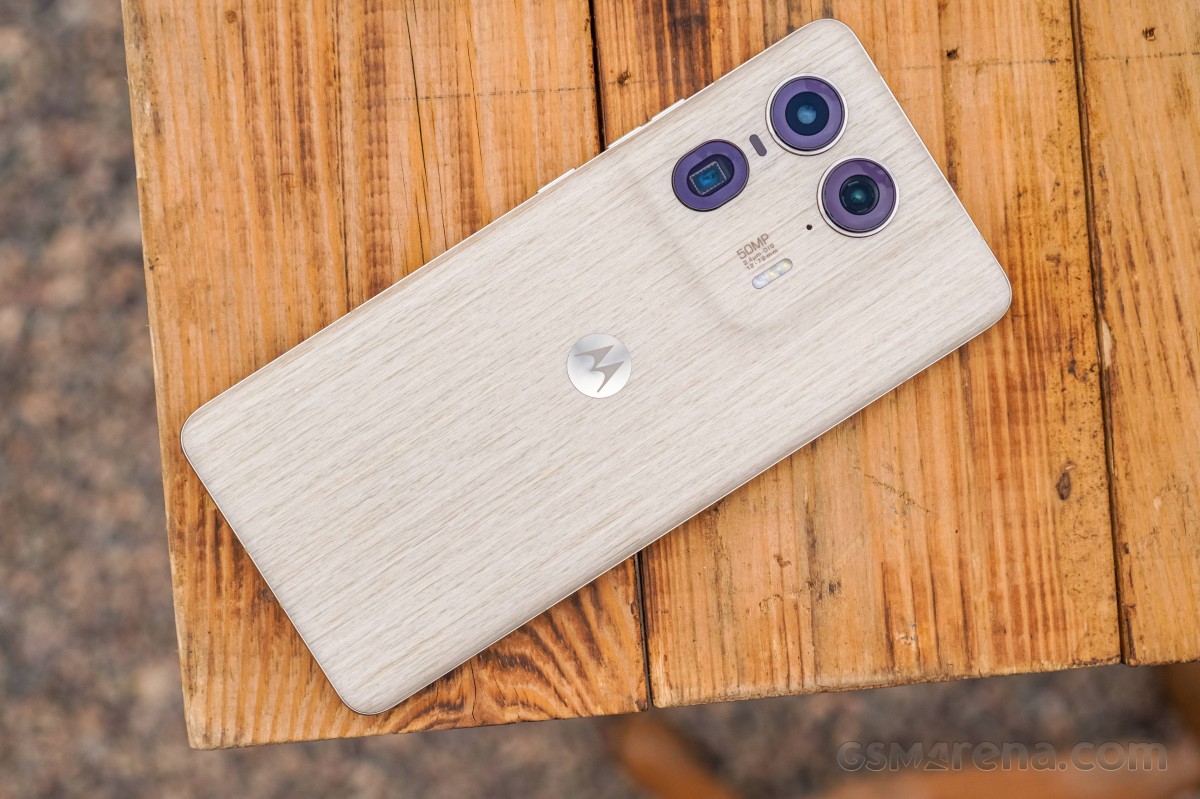
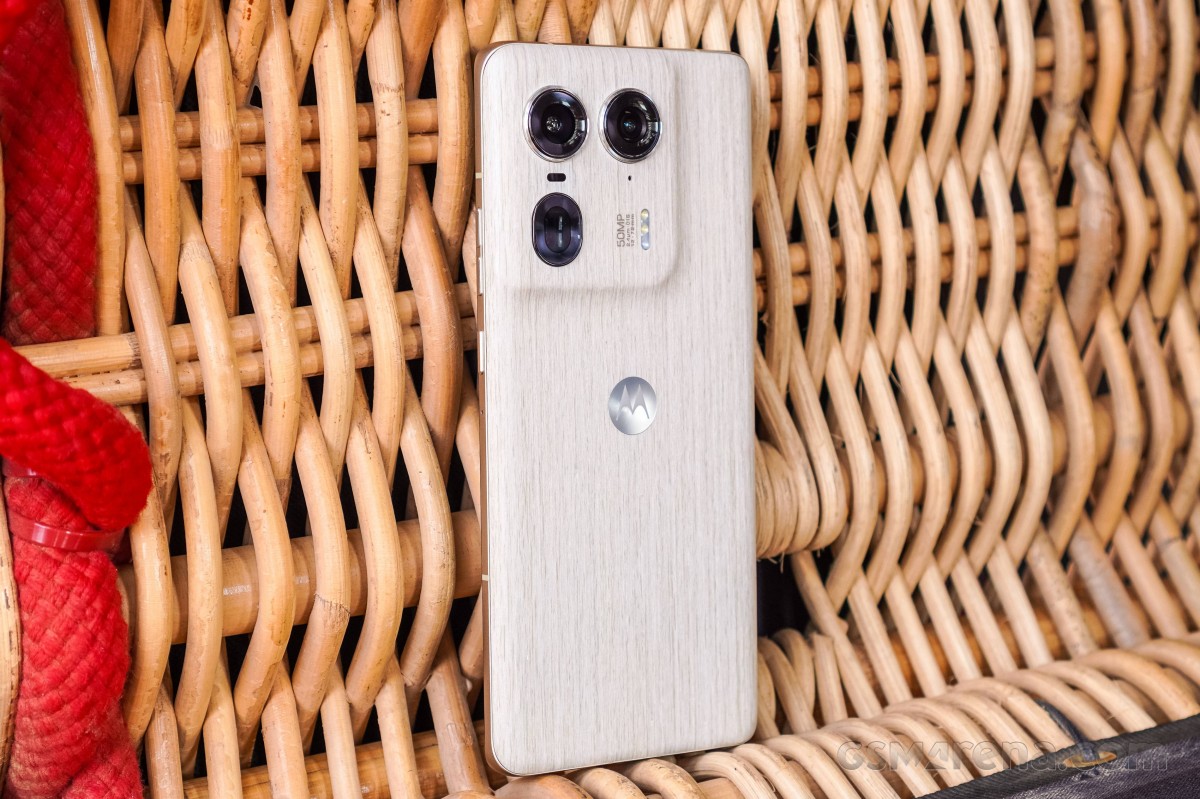
The overall design language of the Edge 50 Ultra follows the Edge 50 family, and since the screen is the same as the Edge 50 Pro, the two phones feel the same in the hand. The Ultra comes in two variants – with a vegetable leather or wooden back. The latter is a bold approach, but will likely appeal to some.
Available colors include Forest Gray and Peach Fuzz (both vegetable leather options) and Nordic Wood (pictured below).
Of course, the wooden back is not pure wood. Motorola has used a special coating for the surface that preserves the wood-like texture while protecting it from water and oil, so it doesn’t change color or lose its appearance. Either way, the imitation is pretty good – almost like real wood.
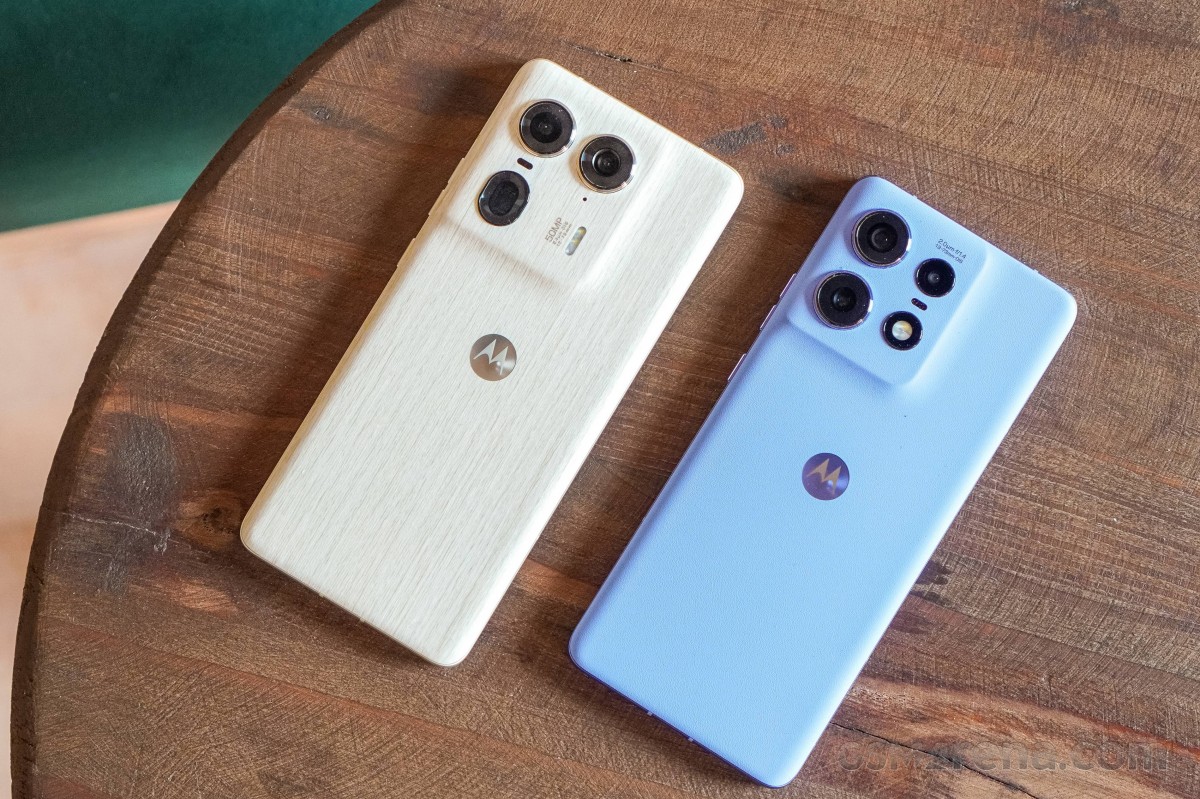
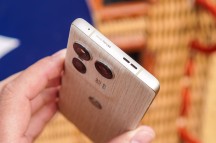
The Edge 50 Ultra and the Edge 50 Pro look so similar that it would be hard to tell them apart if they both had plant-based leather. Camera hardware ditches the Edge 50 Ultra, as the telephoto uses a periscope lens and the round LED flash is replaced by a smaller, vertical flash.
 Motorola Edge 50 Ultra vs Edge 50 Pro
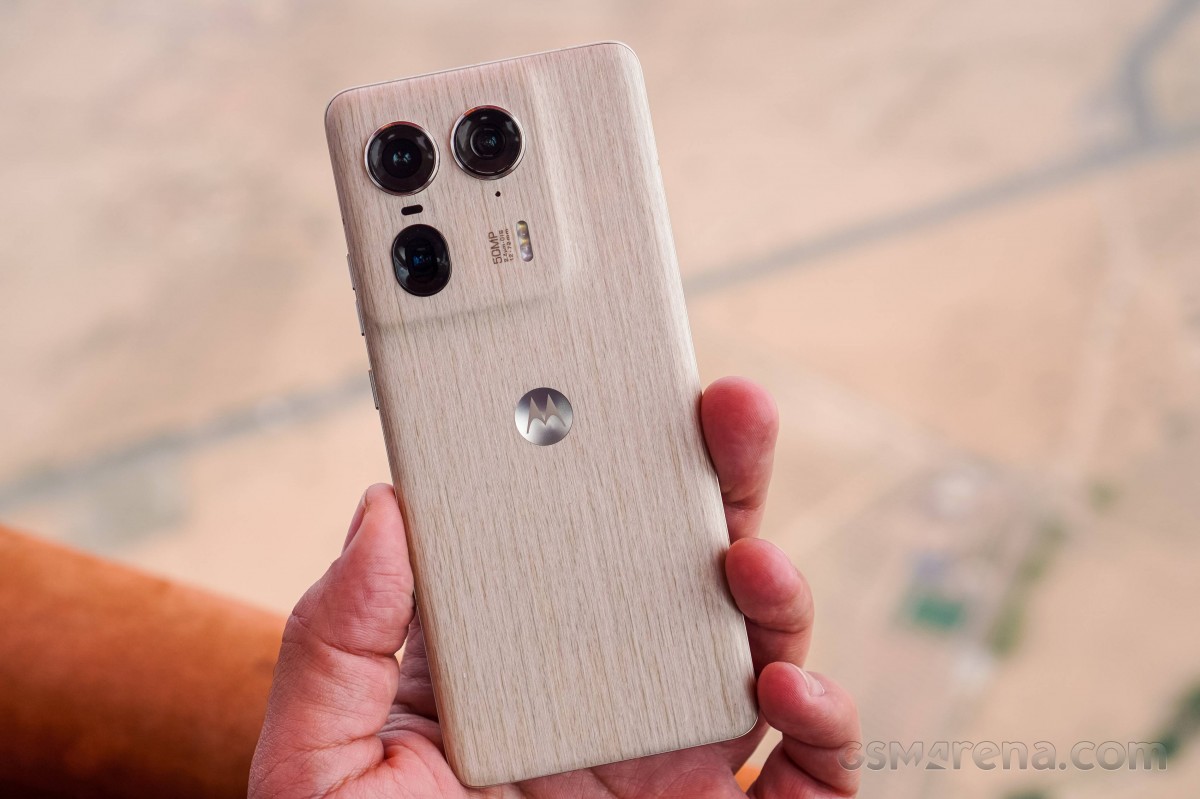
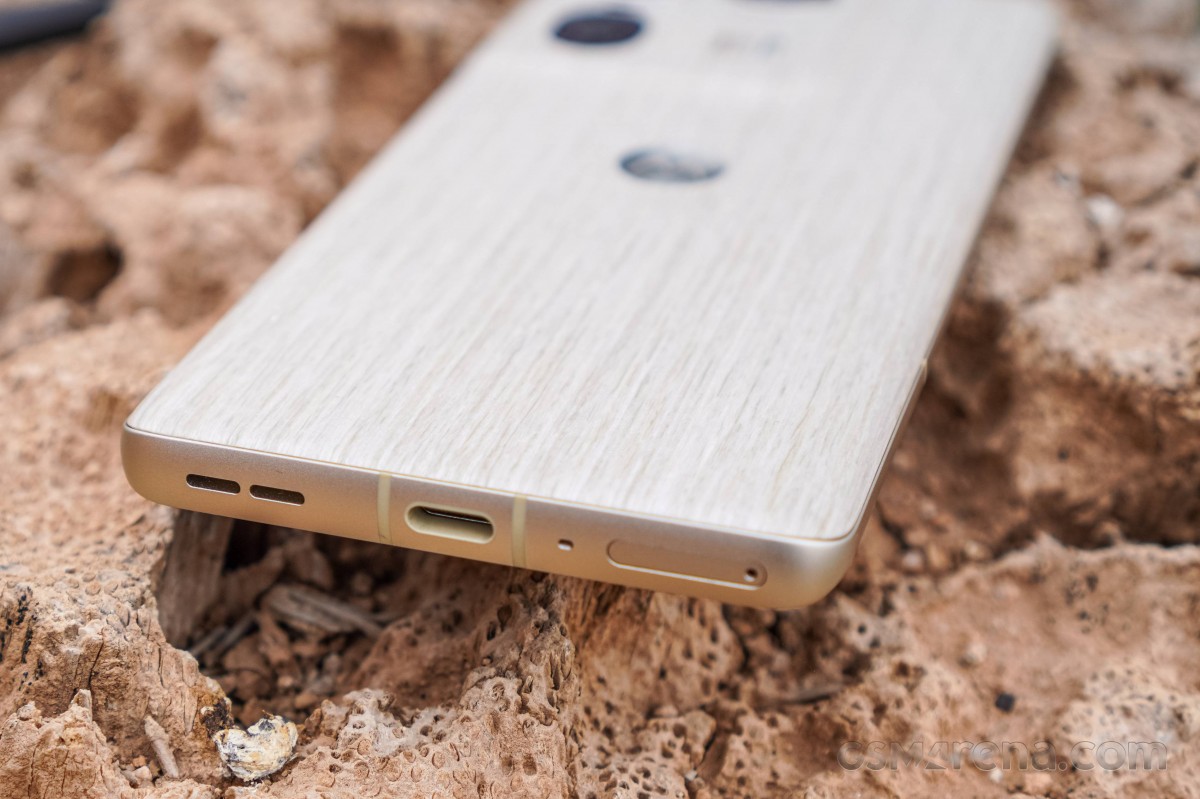
The front and back panels are still rounded, which helps with grip, and to be honest, the wooden back is easier to hold. It also brings back a distant memory of Motorola’s Moto X in 2013 with its bamboo and wooden back.
The side frame is still aluminum, while the front glass is Gorilla Glass Victus. And for a 6.7-inch device with this many cameras, the weight gain at 197 grams is pretty impressive. Leather and wood are lighter than glass, so that could be an explanation.
As expected from a high-end smartphone like the Edge 50 Ultra, the device has IP68 ingress protection.
Hardware
The Edge 50 Ultra and Pro have very similar hardware for the most part, but as we mentioned earlier, the Edge 50 Ultra has a more powerful Snapdragon 8s Gen 3 chip that delivers flagship-level performance and features. One notable limitation is the chipset’s inability to record 8K videos. 4K is capped.
Motorola Edge 50 Ultra vs Edge 50 Pro
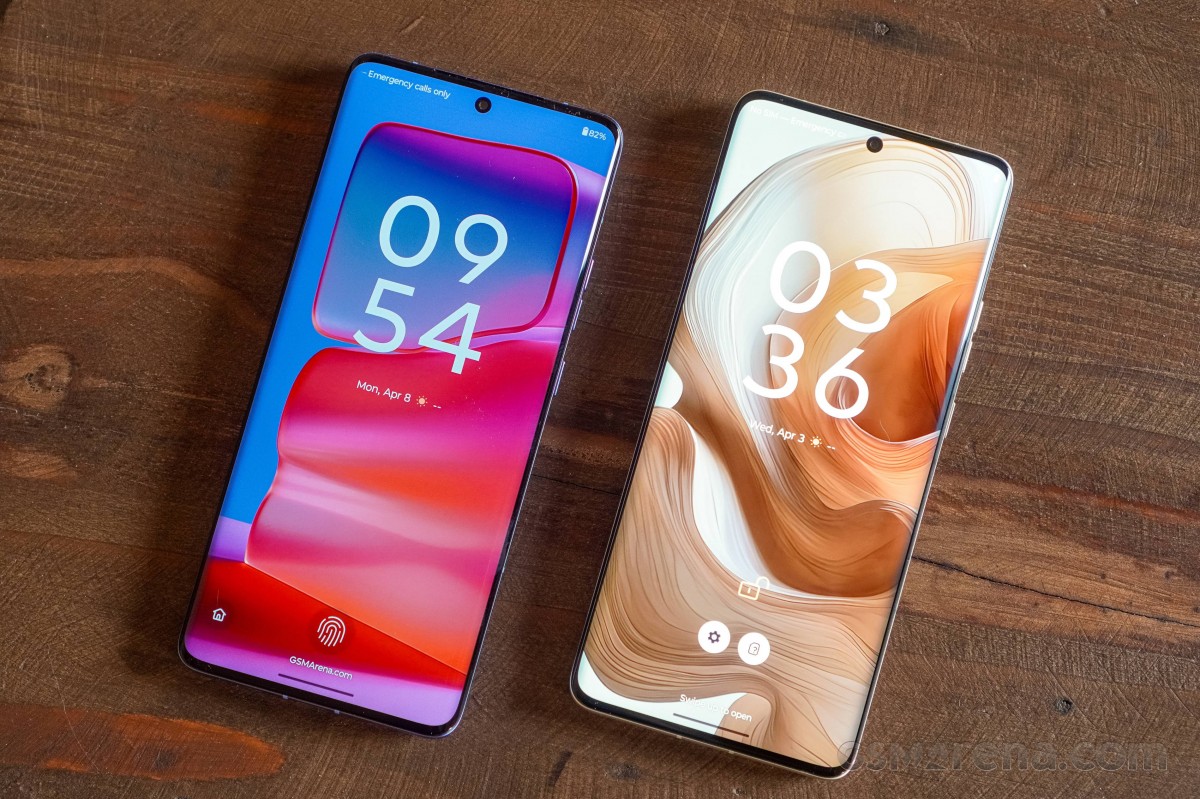
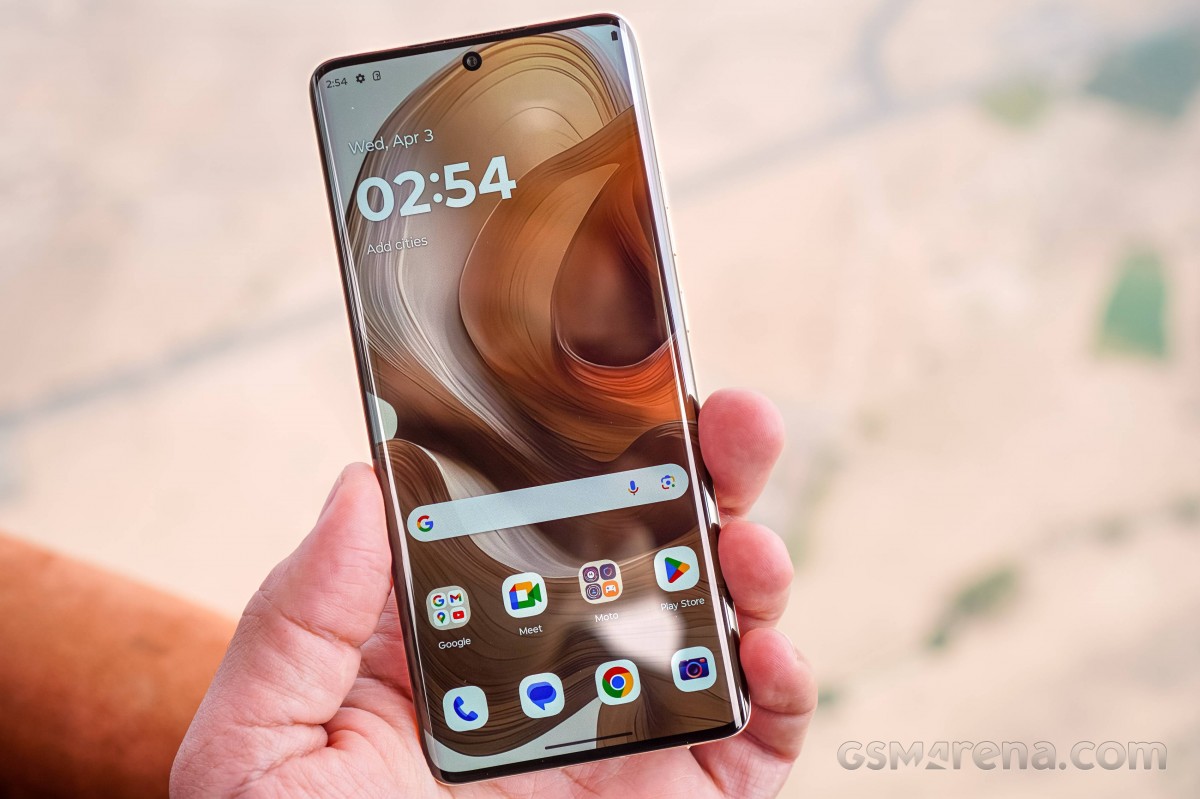
The curved OLED panel is a small step above the competition in terms of refresh rate, as the Edge 50 Ultra’s 6.7-inch display supports a 144Hz refresh rate. It remains to be seen whether Motorola has been able to make the best use of the display’s capabilities.
In addition to the 144Hz refresh rate, the panel also has support for HDR10+, 10-bit color depth, and DC dimming for those who might be sensitive to regular PWM dimming. It can also push up to a maximum brightness of 2,500 nits, but we suspect this will be achievable in small patches during HDR video playback.
For a complete multimedia experience, Motorola has put more effort into the speakers as well. They are tuned by Dolby Atmos and support Dolby Head Tracking.
A fairly average 4,500 mAh battery keeps the lights on, but capacity isn’t everything. We’ll see if Motorola’s hardware and software tweaks can compensate for the smaller-than-usual battery pack. It is good that Edge 50 Ultra is equipped with 125W wired charging and 50W wireless charging.
The Motorola Edge 50 Ultra also has two significant hardware advantages over some of its competitors. It supports ultra-wideband connectivity (a feature only seen on a handful of Android smartphones) and USB 3.1 gen 2 with DisplayPort 1.4 compatibility. It works well with Motorola’s Ready For desktop environment.
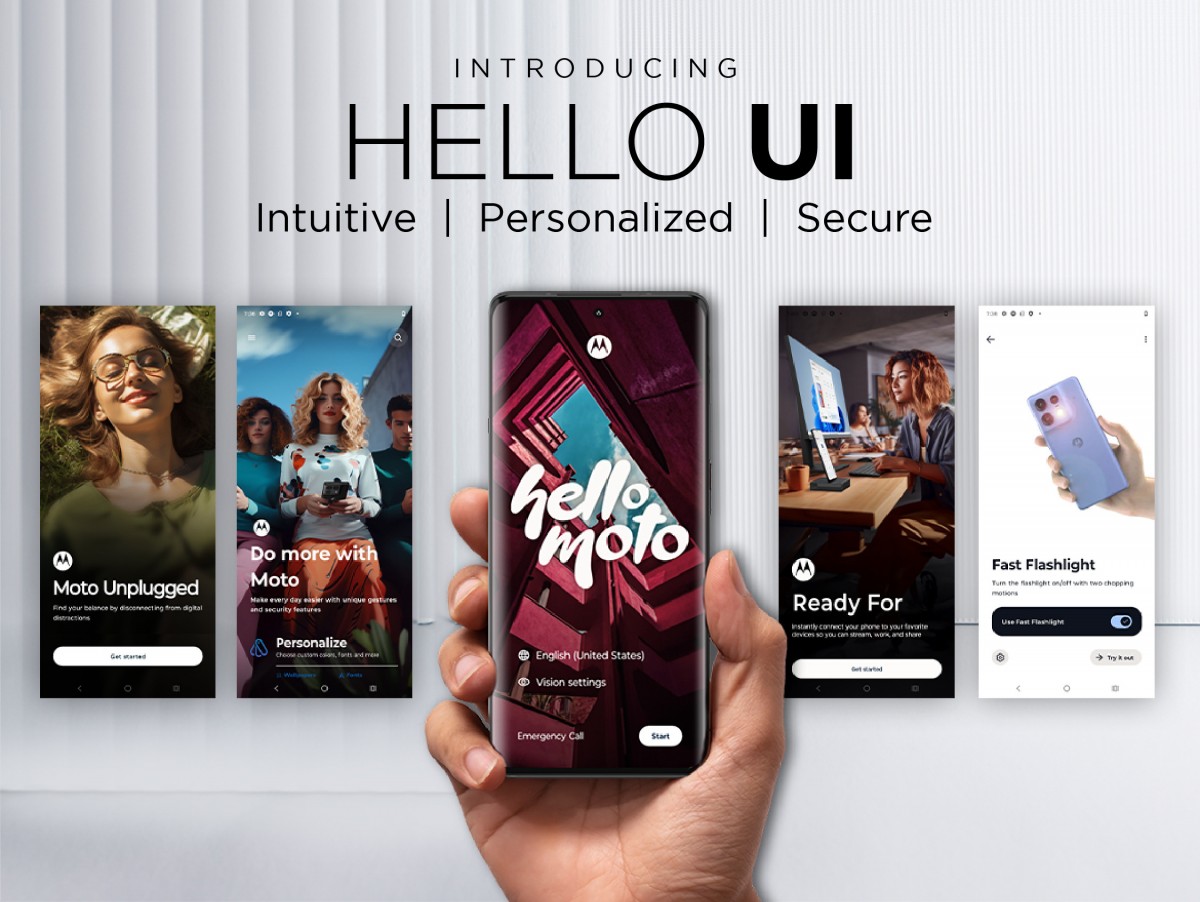
Of course, the Edge 50 Ultra runs on the latest Android 14 with Motorola’s own features. Motorola offers productive AI capabilities for wallpaper customization purposes, but other than that, AI is almost non-existent in Motorola’s current software.
 However, the OEM insists on implementing system-wide AI algorithms that work in the background. AI-based algorithms are supposed to optimize performance, battery life, and search.
Camera
Undoubtedly, one of the main features of Edge 50 Ultra is its camera. Motorola hosted a special press event in Morocco where we had a chance to try out the pre-production Motorola Edge 50 Ultra unit along with the rest of the Edge 50 lineup. The camera samples here were all taken over the course of a day at locations and events organized by Motorola.
- Wide (primary) : 50 MP, 1/1.3-inch f/1.6, 2.4 µm, multi-directional PDAF, laser autofocus, OIS; 2160p@60fps
- Telephoto camera : 64 MP, f/2.4, 1.4 μm, PDAF, OIS, 3x optical zoom; 2160p@30fps
- Ultra-wide angle: 50 MP, f/2.0, 1.28 µm, 122 degrees, AF. 2160p@30fps
- Front camera: 50 MP, f/1.9, 1.28 µm, AF. 2160@30fps
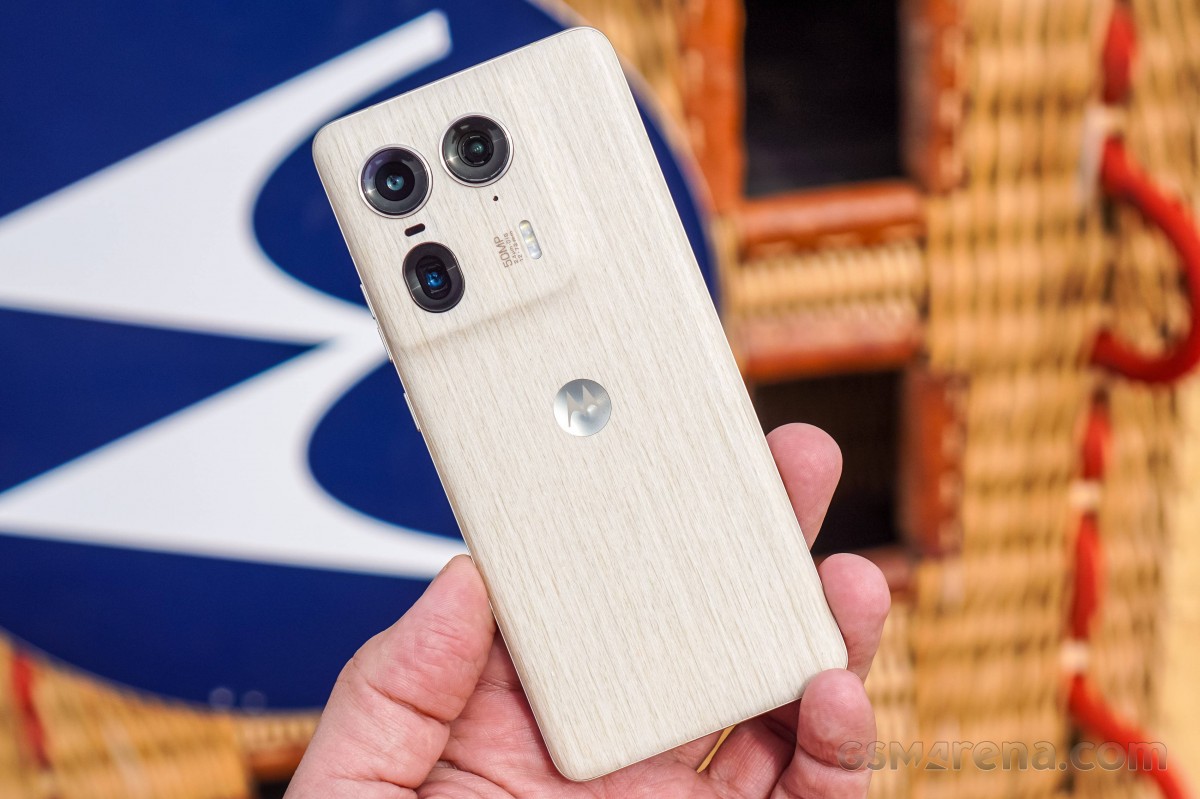
When it comes to camera hardware, the Ultra stands out in the Edge 50 family with a total of four powerful cameras. The main camera uses a large 50-megapixel 1/1.3-inch sensor with a wide f/1.6 aperture and stabilized optics.
Examples of original Daylight cameras


Examples of the main camera in low light


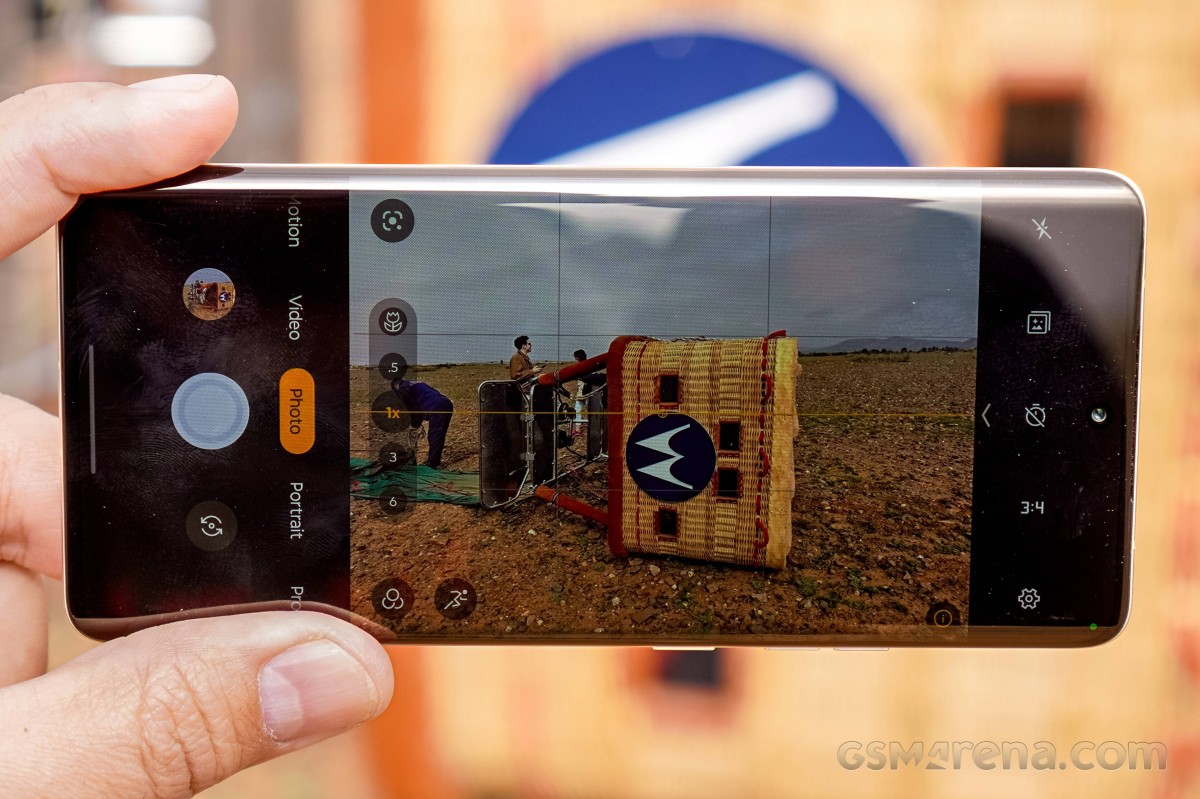
The 64-megapixel telephoto camera has a 3x optical zoom and f/2.4 aperture.
Examples of telephoto cameras during the day


Examples of cameras with 6x zoom


Examples of telephoto cameras in low light


And the secondary secondary camera is a 50-megapixel ultra-wide unit with a wide 122-degree FoV, f/2.0 aperture, and autofocus support for macro shots.
Examples of ultra wide daylight cameras


Close-ups: Main camera • Ultra-wide camera

An example of a low-light ultra-wide camera

The selfie camera is impressive, at least on paper, with a 50-megapixel resolution, f/1.9 wide aperture, and autofocus support. It’s 2024 and we hardly ever see phones with AF-equipped selfie cameras, so kudos to Motorola for adding this feature.
Selfie photos


But not only the hardware of the camera itself, its software features and optimization as well. Although AI isn’t the main focus on the software side, Motorola benefits greatly from AI-based camera optimizations.
Related article: Motorola Edge 50 Pro phone review, technical specifications
Let’s start with the action shot. The camera software automatically increases and adjusts the shutter speed in low-light environments to minimize motion blur. We did a brief test of the feature and found that in some cases, the shutter speed went from 1/50 to 1/200, while at the same time, the ISO doubled from 3100 to 6200. This is without any significant increase in noise thanks to the AI-based noise reduction algorithm. Here is a short example.
Examples of action shots


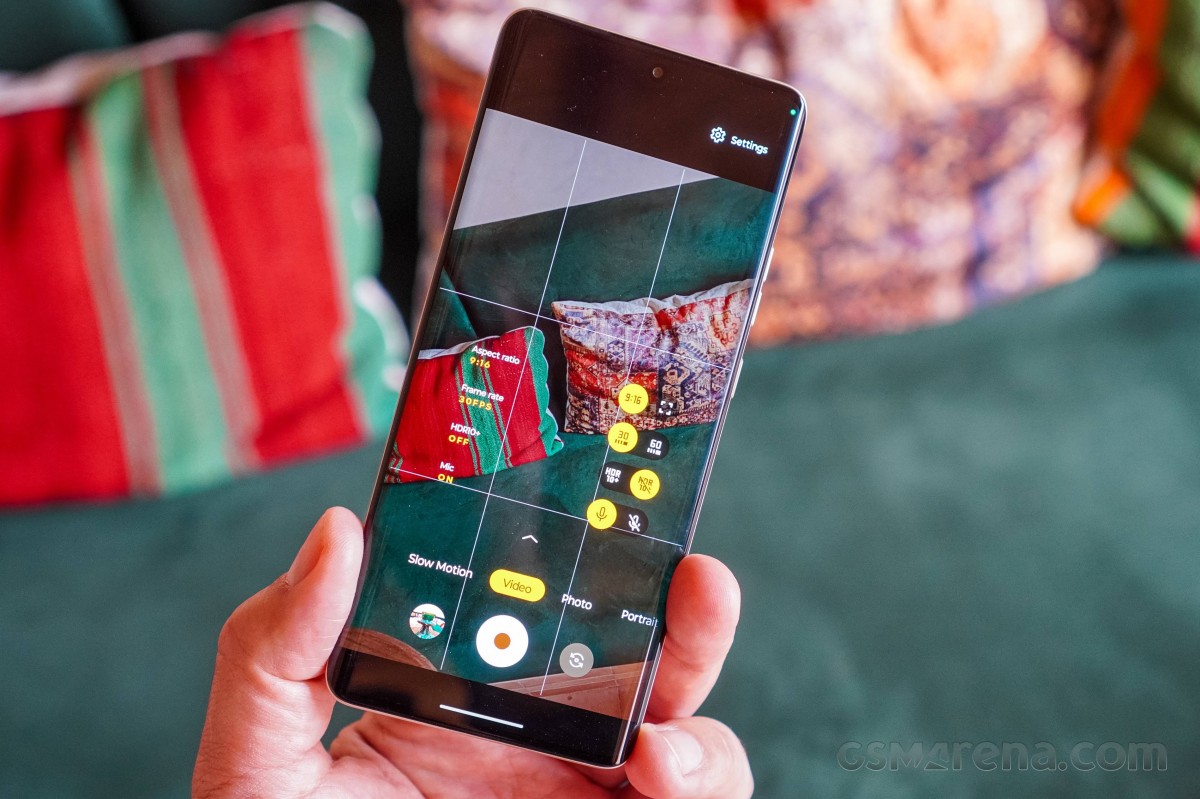
Adaptive stabilization works in video mode and dynamically adjusts the level of stabilization based on your hand movement and scenario.
 Autofocus tracking is another video-based feature that improves the sharpness of footage from subjects moving quickly through the frame. This one will be available with the next update.
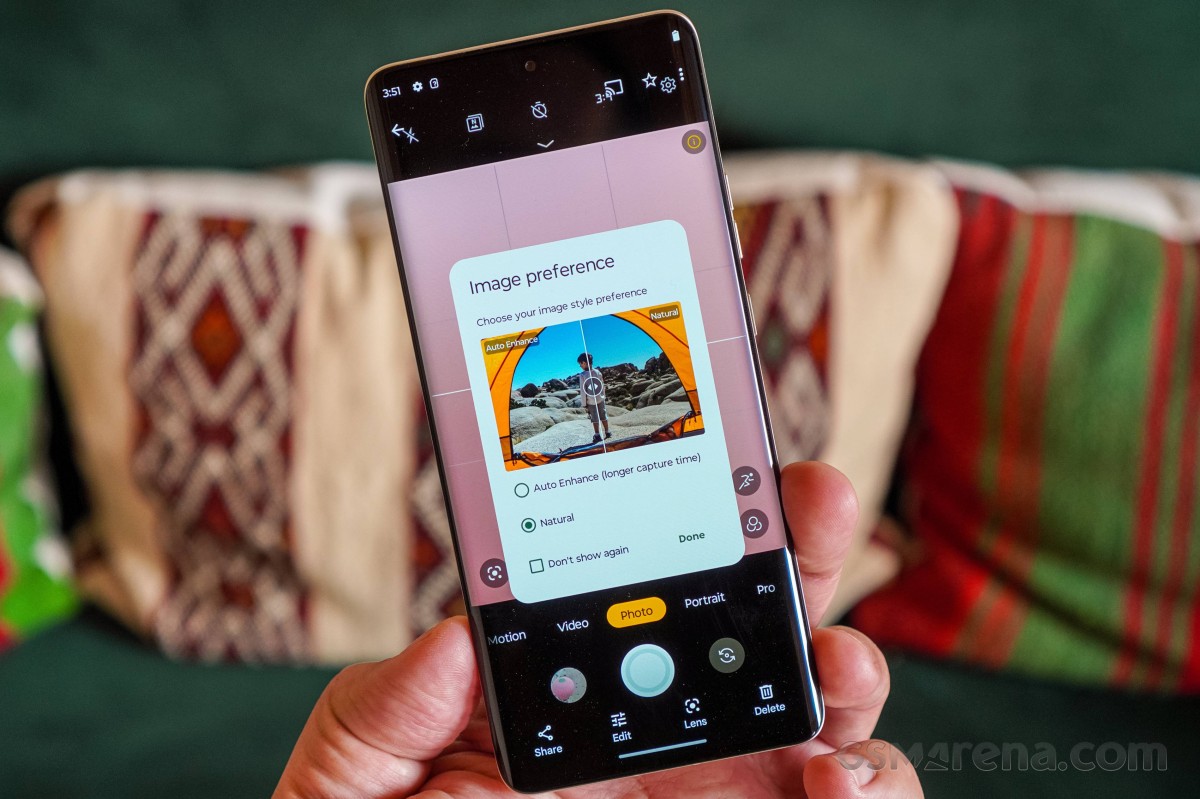 It’s worth noting that Motorola offers a choice between natural and auto-enhanced shooting modes, with the former being the default mode. Auto-enhancement mode apparently takes longer to capture images, but we didn’t notice a slowdown when using it. . Also, this isn’t exactly a Motorola exclusive. This is actually the Auto Enhance feature that we all know from the Google Photos app. Motorola decided to integrate this feature into the camera app for convenience, but the system only saves “enhanced” photos, not “normal” photos.
 It’s a bit early to comment on the camera quality as we took samples with the pre-production unit. But before we get a production-ready phone, let’s take a look at some videos taken with all the cameras.
Summary
As always, it’s a little early to say whether the Motorola Edge 50 Ultra is a good buy or not, but it’s certainly a promising one. The phone has all the features of a true flagship phone, while the price starts at €999, which is considered affordable in today’s flagship segment. Over time, the price will come down and the phone will become a more attractive option.
 In any case, despite the promising hardware, the full review will reveal whether the 4,500 mAh battery is enough for reliable endurance, and it will be interesting to see how the new camera system stacks up against the competition. The Moto Edge 50 Ultra is expected to hit the market by the end of May, and a lot can change between now and then.
Source: GSMARENA.COM

The highest observatory in the world officially started its work

Many mental disorders have physical roots

How to connect to the TV with a Samsung phone?

What is an exoplanet? Everything you need to know

Seven surprising discoveries about the planet Mercury

The secret of the cleanest air on earth has been discovered

Asus Zenbook 14 OLED laptop review

Motorola Edge 50 Pro

How extinct animals could be brought back from death?

Healing diabetic wounds with bacteria-killing hydrogel
-
Technology9 months ago
Who has checked our Whatsapp profile viewed my Whatsapp August 2023
-
Technology10 months ago
How to use ChatGPT on Android and iOS
-
Technology9 months ago
Second WhatsApp , how to install and download dual WhatsApp August 2023
-
Technology11 months ago
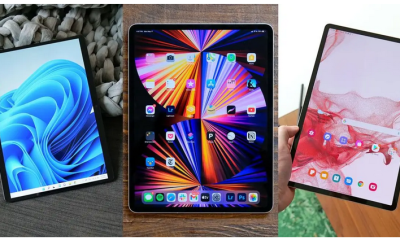
The best Android tablets 2023, buying guide
-
Humans1 year ago
Cell Rover analyzes the inside of cells without destroying them
-
AI1 year ago
Uber replaces human drivers with robots
-
Technology10 months ago
The best photography cameras 2023, buying guide and price
-
Technology11 months ago
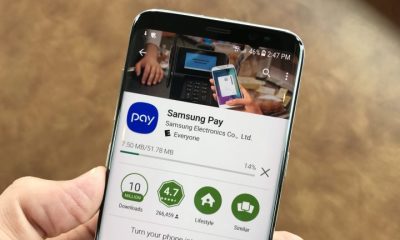
How to prevent automatic download of applications on Samsung phones