Introduction
The Poco X6 is a fantastic new addition to the popular Poco X series and brings a lot of updates over the hugely popular Poco X5 smartphone. Plus, this phone has to be one of the most affordable phones with a Dolby Vision display.
Therefore, the Poco X6 introduces a 6.67-inch AMOLED with a resolution of 1220p and a refresh rate of 120 Hz. It supports Dolby Vision and HDR10+, and there’s 1920Hz PWM lighting if you need it. The display sits on Poco’s fairly traditional design, now IP54-rated for dust and splash resistance.
The Snapdragon 7s Gen 2 is the heart of the Poco X6 – a chip that’s not quite as fast as the Snapdragon 7+ Gen 2, despite its ambiguous name. The base storage option for the Poco X6 is 8GB of RAM + 256GB of UFS 2.2 storage, which is pretty generous.
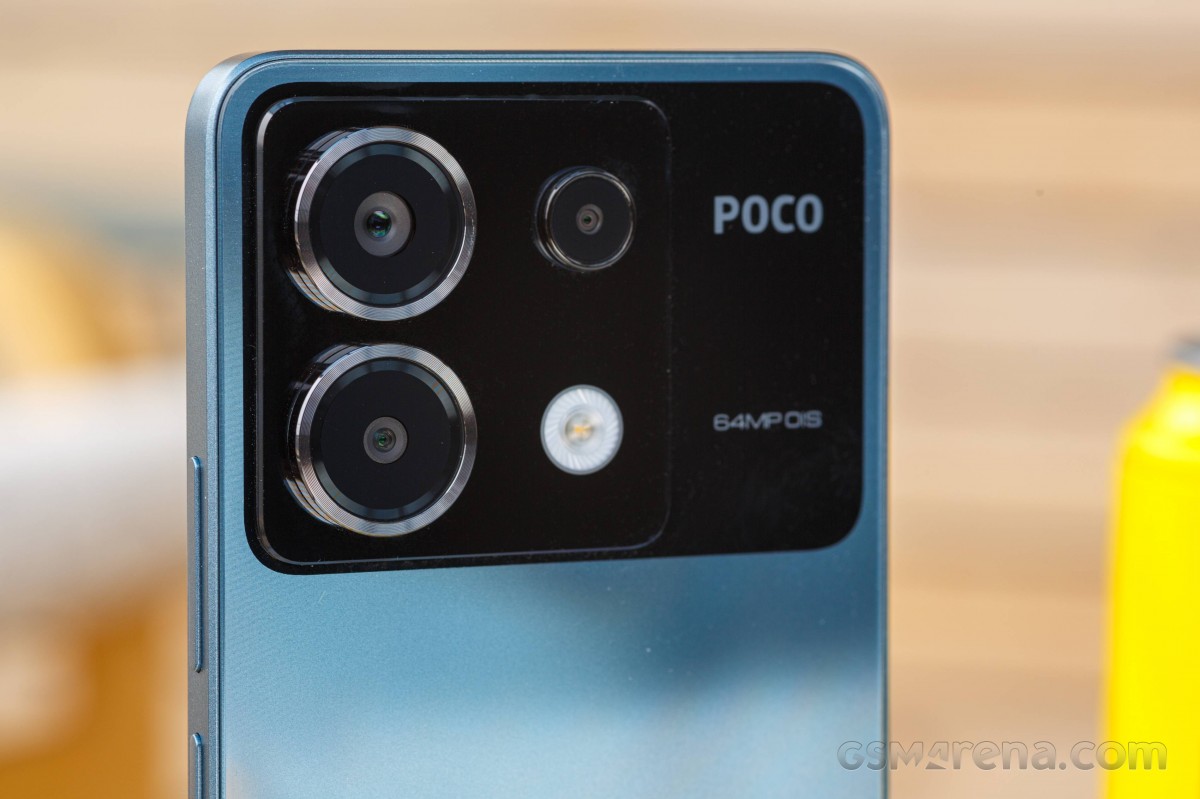
The camera department also has a few updates for the Poco X5. The rear setup has a higher-resolution 64-megapixel main camera, now with OIS, as well as an 8-megapixel ultra-wide and 2-megapixel macro shooter. The selfie camera is 16 megapixels. There is now an option for 4K video recording, which is a nice upgrade.

Other interesting parts of the Poco X6 are stereo speakers, a large 5,100mAh battery with 67W fast charging, and HyperOS, which will arrive as an OTA update just a few weeks after its launch.
Overall, the Poco X6 offers significant improvements in the display, chipset, camera, and fast charging departments, along with better intrusion protection. We consider this an appropriate annual update.
Specifications of Xiaomi Poco X6 at a glance:
- Body: 161.2 x 74.3 x 8.0mm, 181g; Gorilla Glass Victus front, plastic frame, plastic back; IP54, resistant to dust and water splash.
- Display: 6.67 inch AMOLED, 68B color, 120 Hz, Dolby Vision, 500 nits (typ), 1200 nits (HBM), 1800 nits (peak), resolution 1220×2712 pixels, aspect ratio 20.01:9, 46ppi.
- Chipset: Qualcomm SM7435-AB Snapdragon 7s Gen 2 (4nm): Octa-core (4×2.40GHz and 4×1.95GHz). Adreno 710.
- Memory: 256 GB 8 GB RAM, 256 GB 12 GB RAM, 512 GB RAM 12 GB; UFS 2.2.
- OS/Software: Android 13, MIUI 14, planned upgrade to Android 14, HyperOS.
- Rear camera: Wide (main): 64 MP, f/1.8, 25 mm, 0.7 µm, PDAF, OIS; Very wide angle: 8 megapixels, f/2.2, 118 degrees; Macro: 2 megapixels, f/2.4.
- Front camera: 16 MP, f/2.5, (wide).
- Videography: Rear camera: 4K@30fps, 1080p@30/60fps, gyro-EIS. Front camera: 1080p@30/60fps.
- Battery: 5100mAh; 67 watts wired, 100% in 44 minutes (advertised).
- Connectivity: 5G; two SIM cards; Wi-Fi 5; BT 5.2; NFC; infrared port; 3.5 mm jack
- Other specifications: fingerprint reader (under the display, optical); Dual speakers
Looking at the specifications of the Poco X6, the only thing we see as a possible problem is the selfie camera. Xiaomi has a penchant for using old, low-resolution Quad-Bayer sensors for its front-facing cameras, even on its most expensive phones, so we’re pretty sure this is another case of saving money.
Read more: Xiaomi Poco X6 Pro review
Poco X6 Unboxing
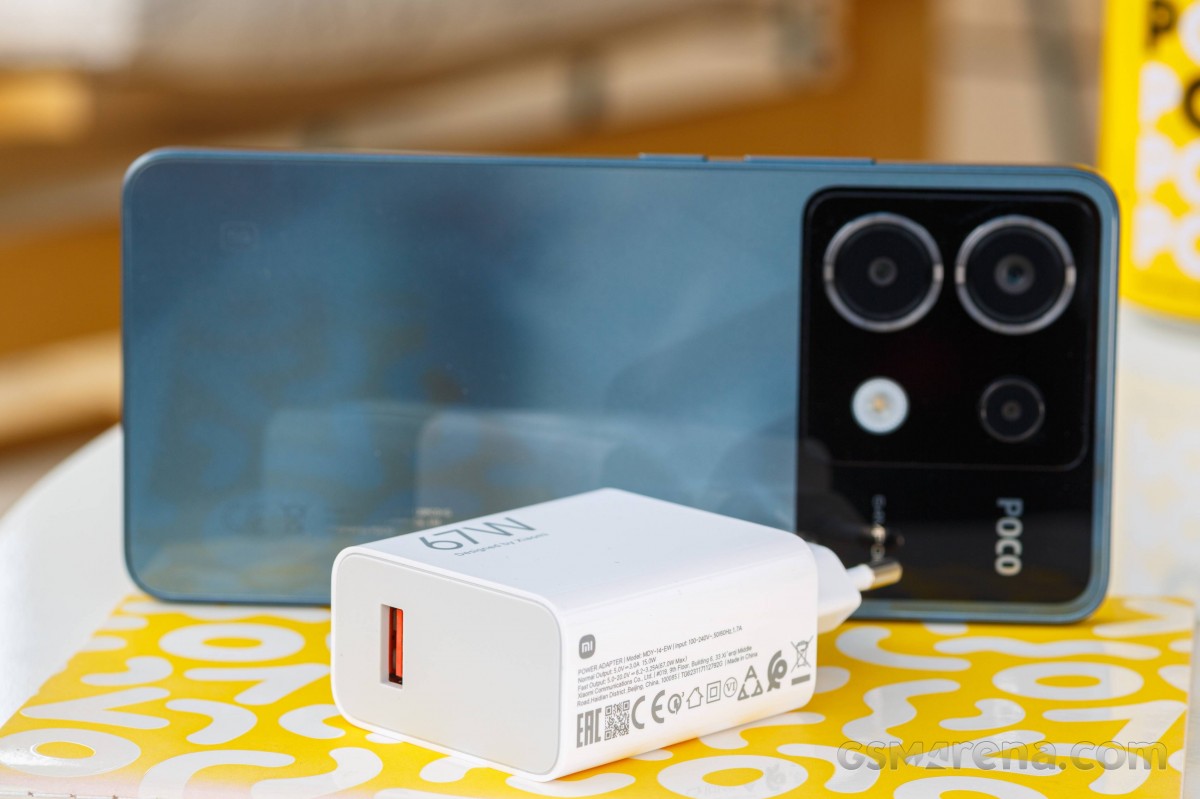
The X series is packaged in black boxes with yellow labels. The Poco X6 retail box includes a 67W charger, a USB-A-to-C cable, and a black silicone case.
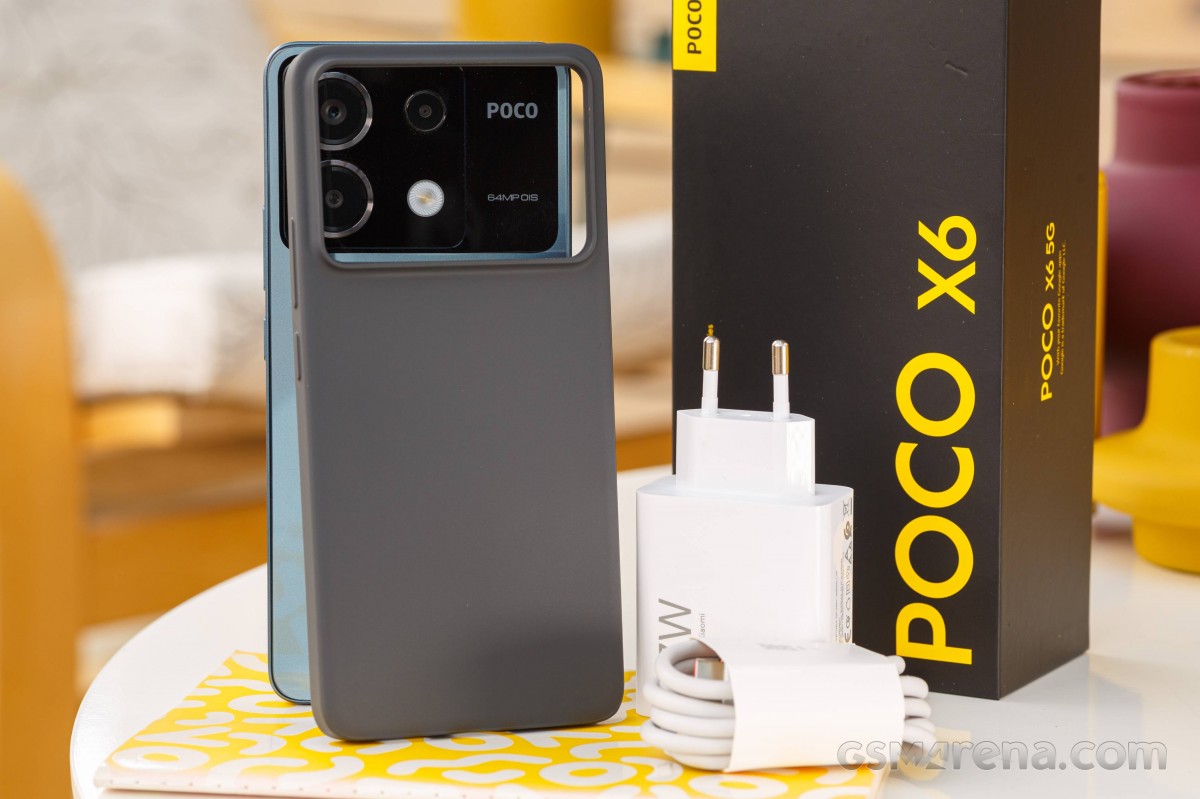
The Poco X6 comes with a thin protective layer over its screen, so if you’re worried about scratching the Gorilla Glass Victus, you might decide to keep it. We took it apart because it’s a real stain magnet.
Design, build quality, handling
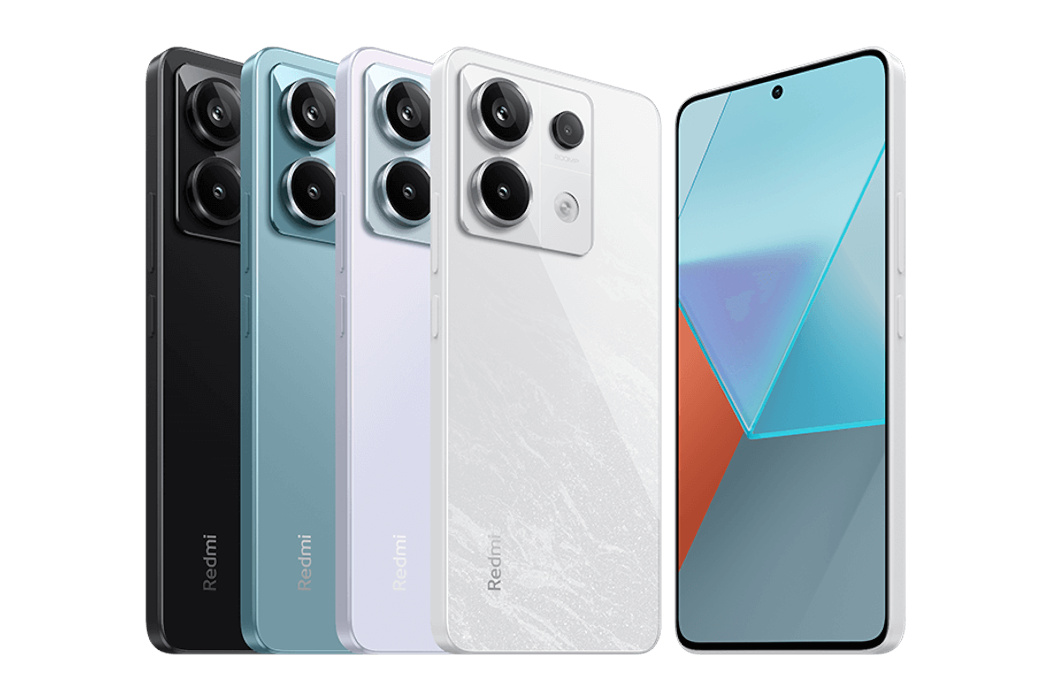
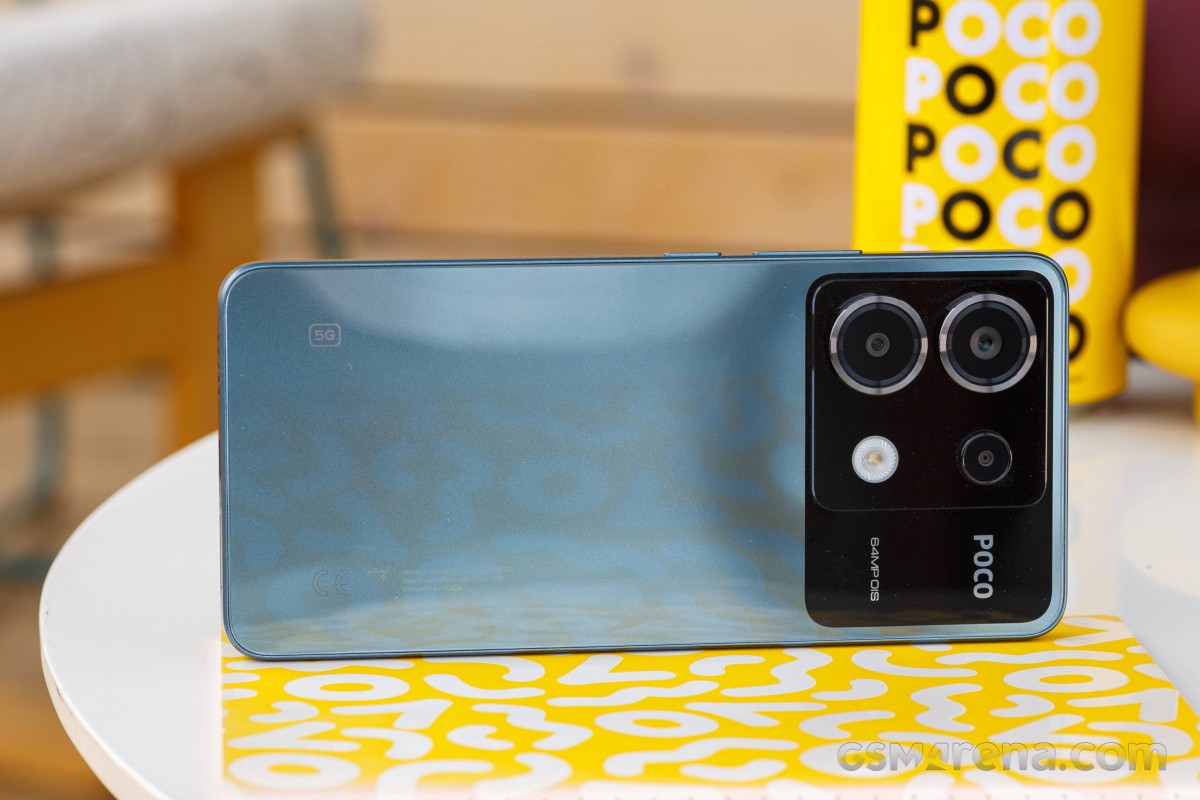
The Poco X6 has the familiar Poco design – no-nonsense, easy to spot, with a big black spot with the Poco logo around the camera.
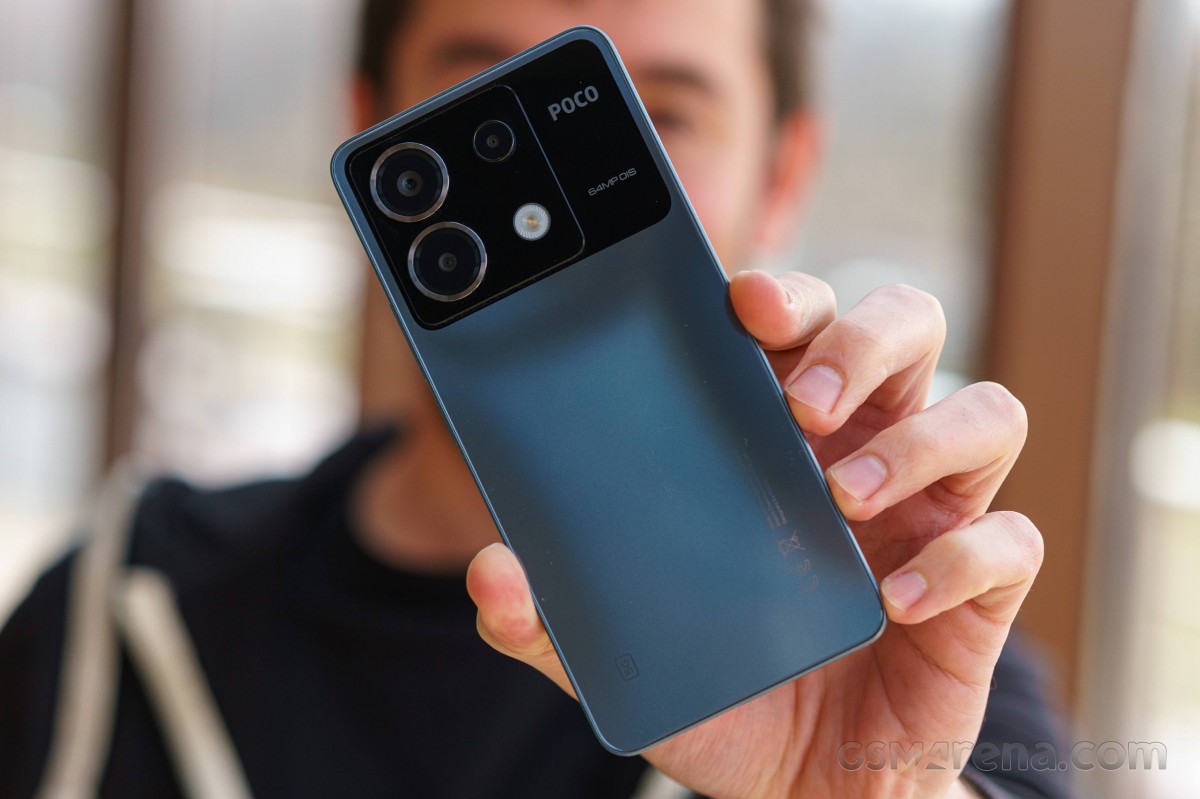
Poco X6 is a symmetrical smartphone with flat panels and flat frame. It has a sheet of Victus Gorilla Glass that keeps the screen safe, a sturdy plastic frame with a matte finish, and a smooth glossy plastic piece on the back.
Poco X6 is available in black, blue, and white colors. Our black and blue versions are mirror-like due to their glossiness and uniform color. They are also great fingerprint magnets. On the other hand, the white color has a marble texture under the first layer of plastic, which makes it more unique and its stains are not so obvious.
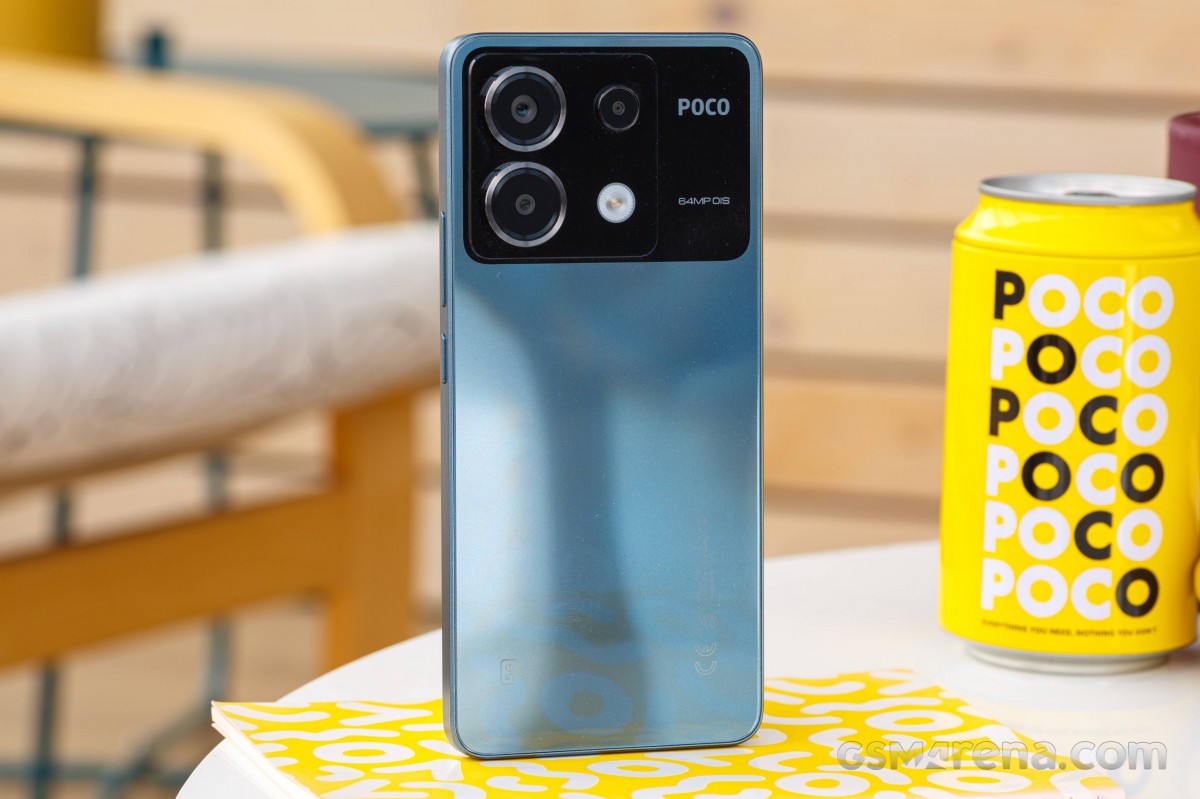
The square black camera housing has become something of a trademark for Poco phones, with the Poco logo inside this black dot outside the camera island.
The Poco X6 has an IP54 rating for protection against dust and splashes. While IPX4 means you can’t submerge this phone in fresh water, it should withstand heavy 360-degree splashes from all sides, something along the lines of heavy rain.
Now let’s take a closer look at the Poco X6.
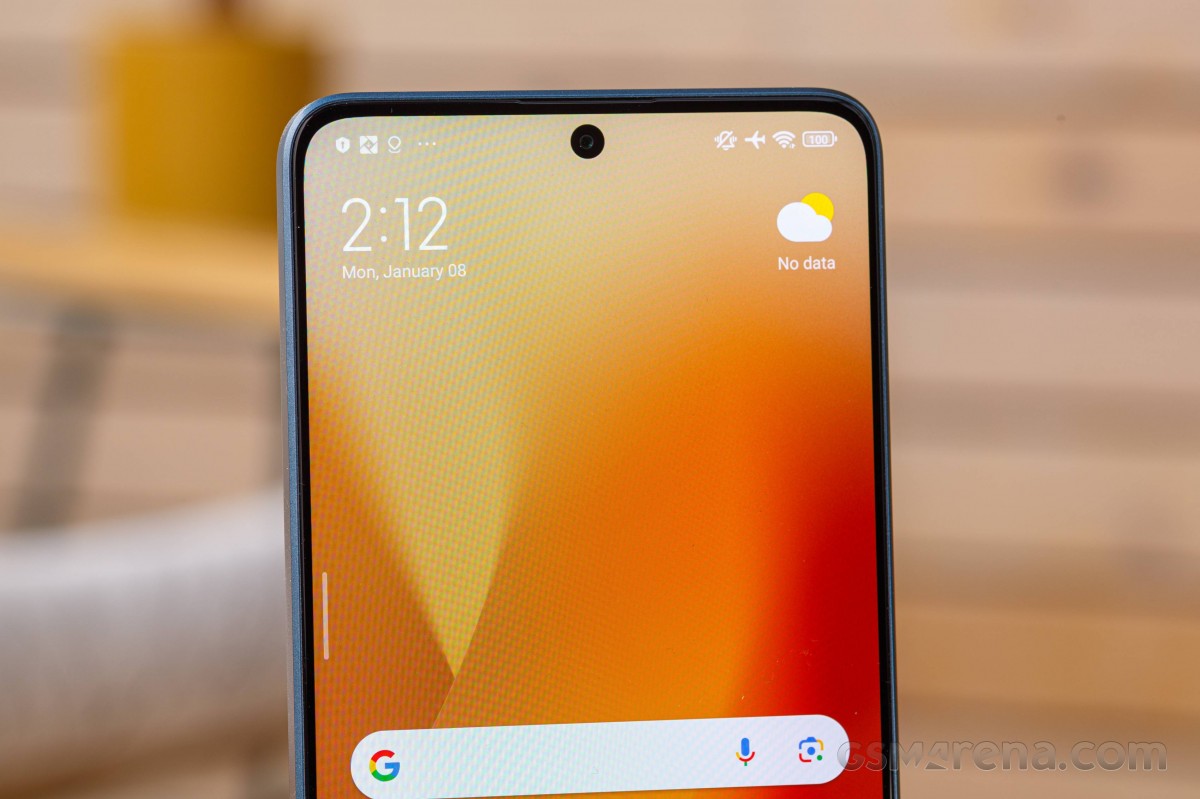
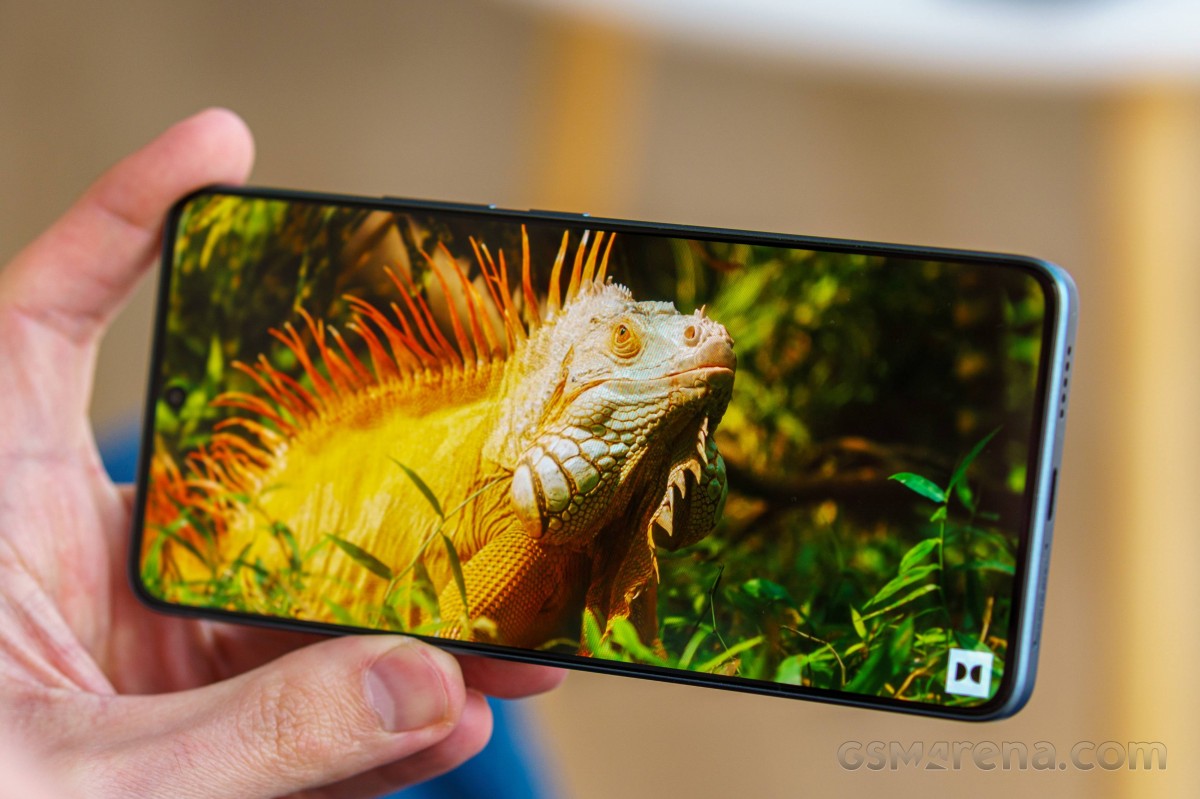
On the front is a large 6.67-inch CrystalRes Flow AMOLED Dot display, as Xiaomi calls it. It’s a 1220p OLED panel with a small punch hole at the top to make way for the 16MP selfie camera. The screen supports a 120 Hz refresh rate and Dolby Vision streaming.

The screen has uniform thin bezels on all sides. There’s a small port above the screen for the phone that doubles as a speaker, which is why it has another bezel at the top.
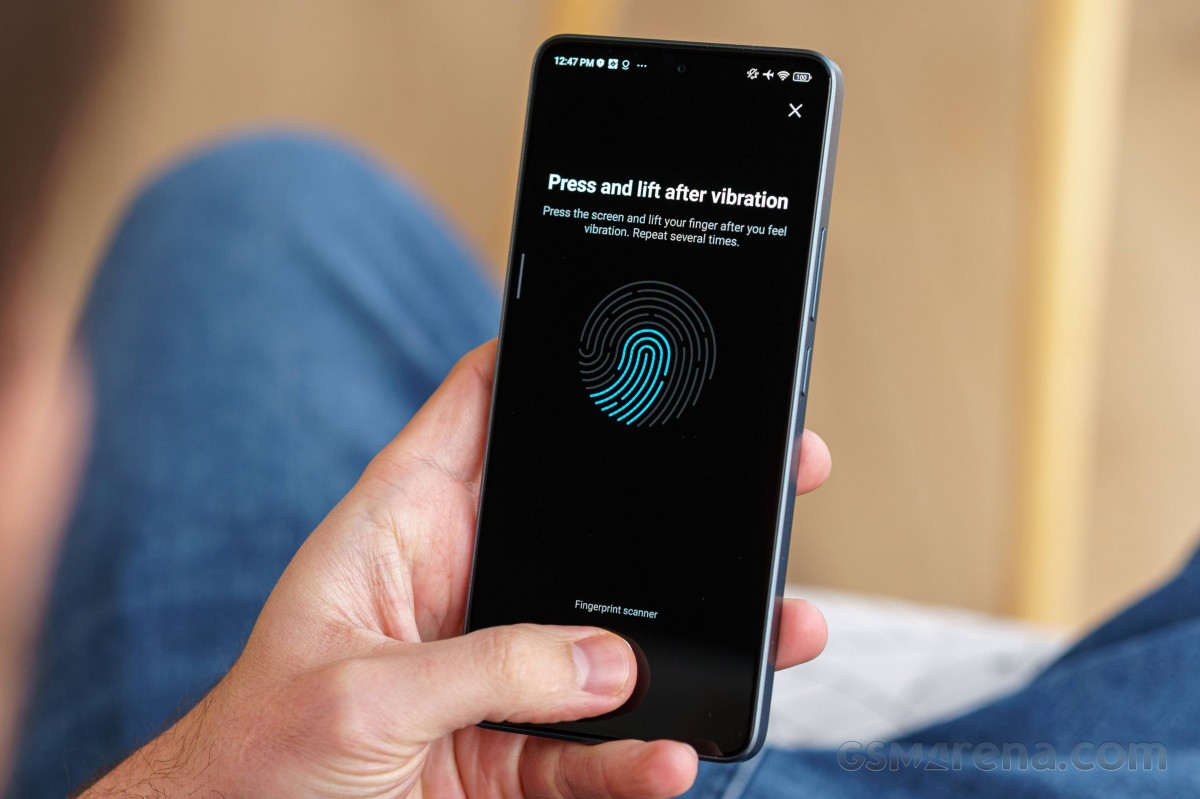
There’s also an optical fingerprint scanner under the display, and it’s as fast and reliable as it gets these days.
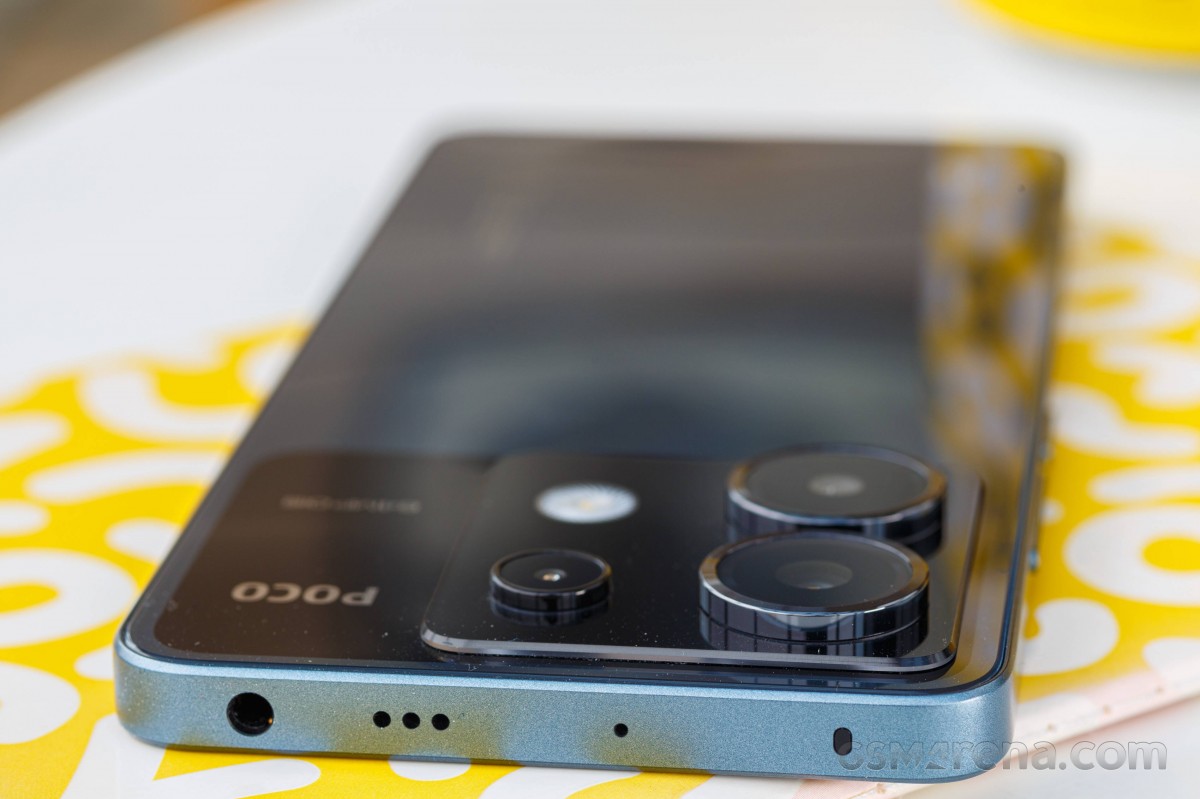
The triple camera on the back is inside a slightly protruding plastic piece. First is the 64-megapixel OIS main camera and the second is the 2-megapixel macro camera. The second row has an ultra-wide 8-megapixel camera and LED flash.
The frame is plastic on all sides.
There is nothing on the left.
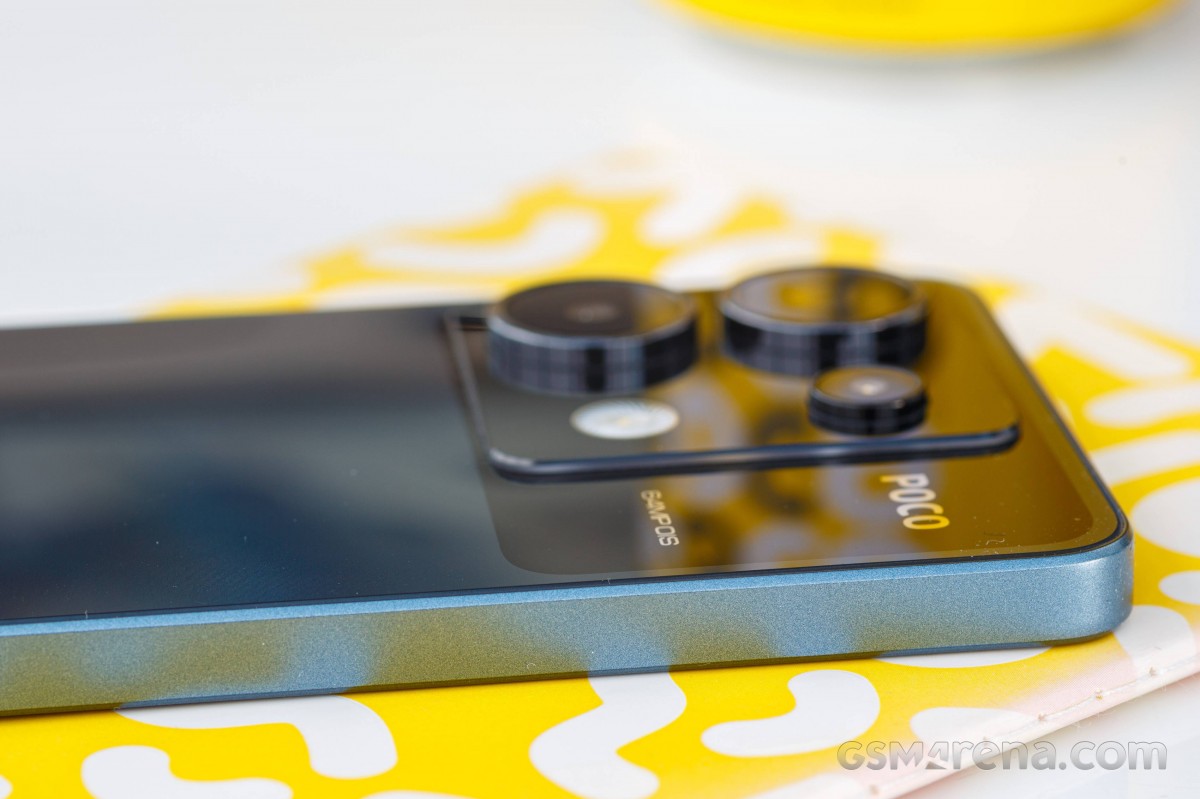
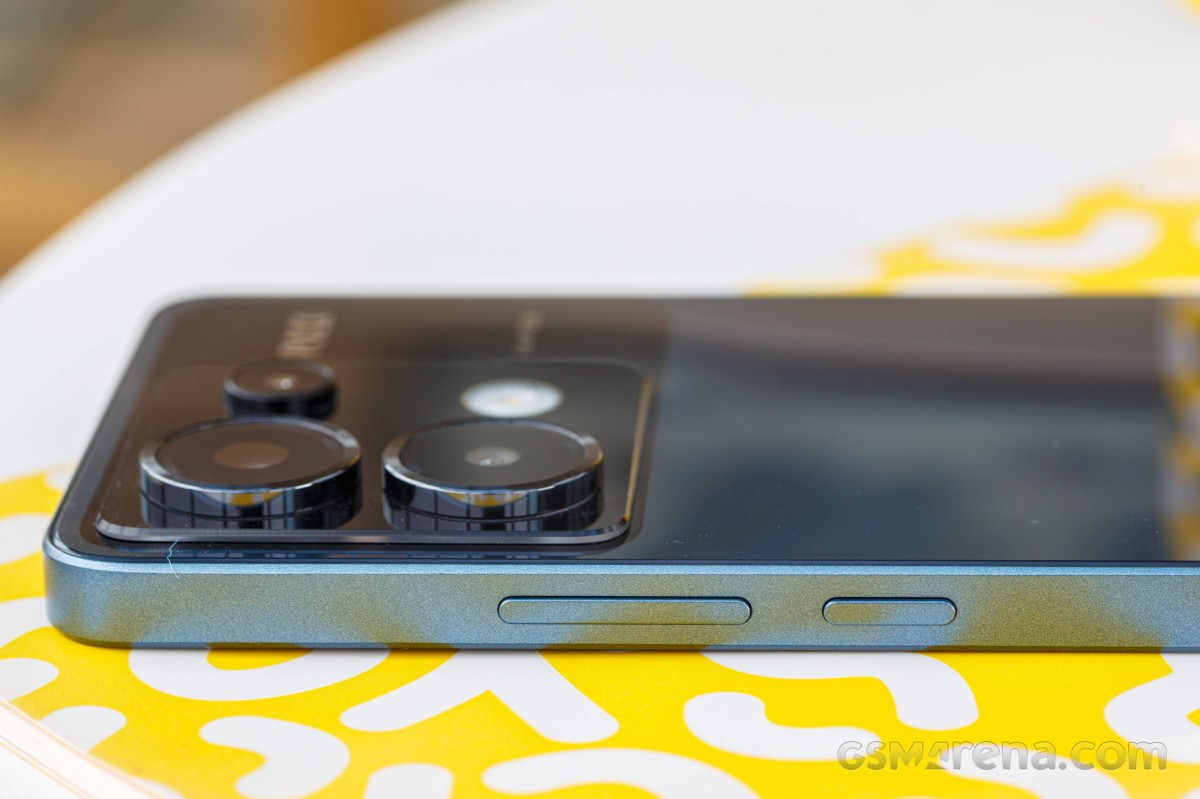
The power/lock and volume keys are on the right side.
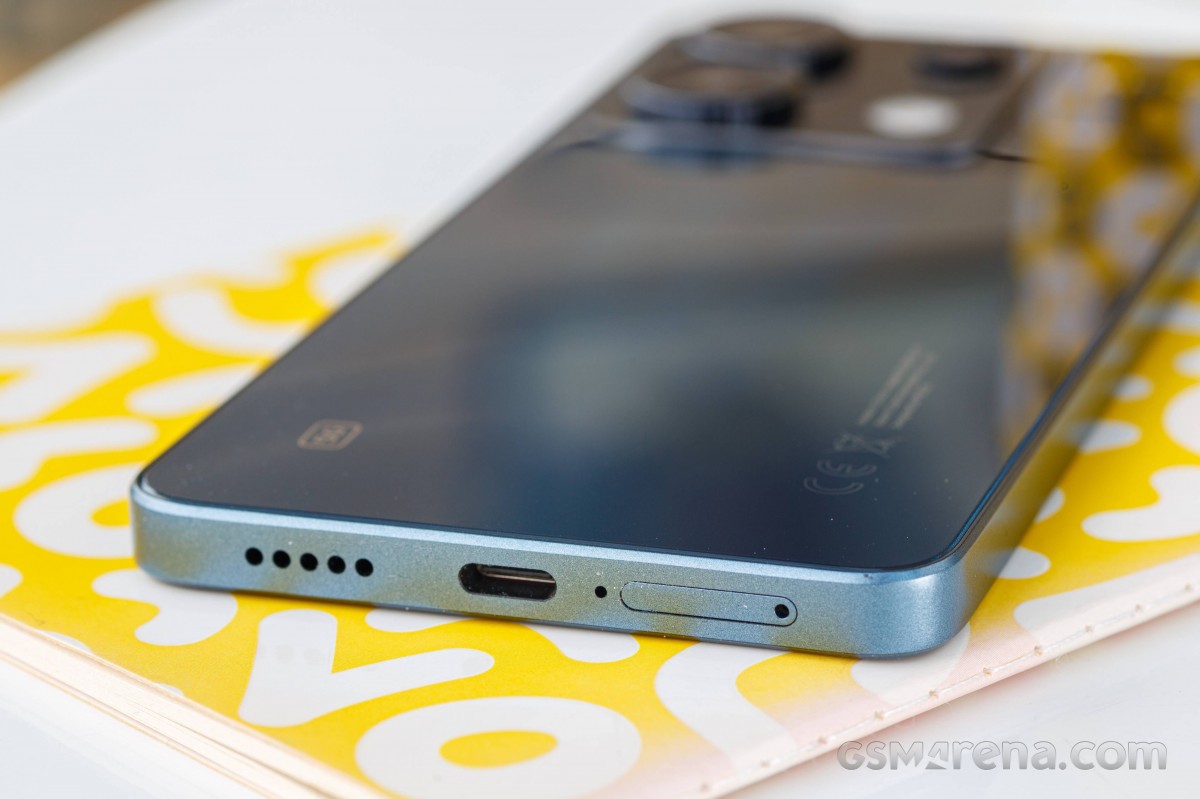
The top has a 3.5mm jack, an IR blaster, a microphone and a second output for the top speaker.
The lower part contains the dual-SIM card tray, the main microphone, the USB-C port, and the second speaker.
The Poco X6 measures 161.2 x 74.3 x 8.0mm and weighs 181g, which means it’s about 5mm shorter, 2mm thinner, and 8g lighter than the Poco X5, which has a similar screen and a slightly smaller battery. Is. The Poco X6 has smaller display bezels, hence the slightly smaller footprint.
The mostly glossy Poco X6 doesn’t offer the most gripping handling, that’s for sure. However, the frame helps, and most days, we didn’t need it for protection and grip purposes. The X6 was always covered in stains, which is probably why most of its users prefer to lighten the case.

However, the bare Poco X6 offers adequate grip, feels somewhat lightweight in your hands, and is comfortable to handle on a daily basis. We also appreciated its recognizable design and improved intrusion protection.
Display
The Poco X6 has a 6.67-inch OLED display with a resolution of 1220 x 2712 pixels or 446ppi. It supports 120Hz refresh rate, Dolby Vision HDR 10+, and 1920 PWM dimming. A sheet of Victus Gorilla Glass provides protection.
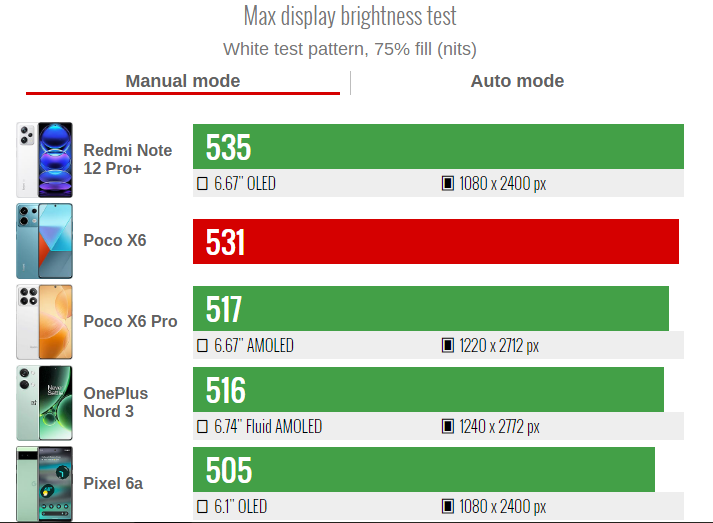
According to the official specifications, the screen has a maximum brightness of 1200 nits (ie sunlight mode) and a maximum brightness of 1800 nits.
We’ve completed our screen test and the numbers are in line with Poco’s official specs. When manually controlling the brightness slider, we recorded a maximum brightness of 531 nits.
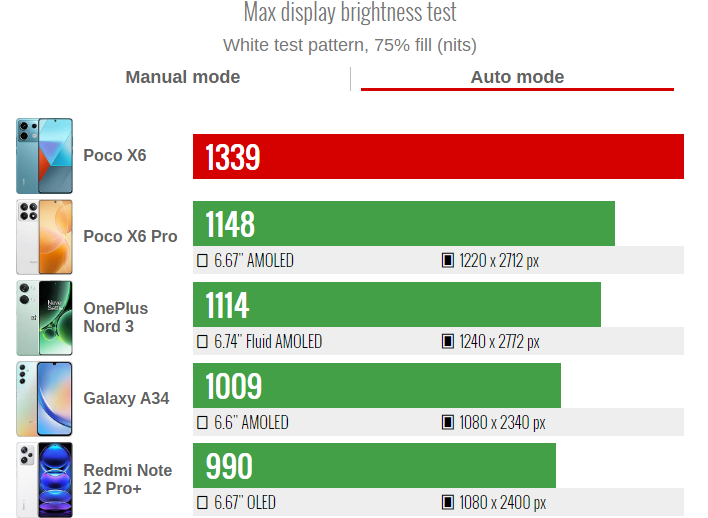
When using Auto Brightness mode or with Sunlight Boost enabled, the screen can be much brighter – 1,339 nits to be specific.
The minimum white point brightness was only 2.3 nits.
Color accuracy
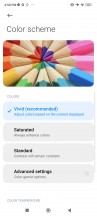
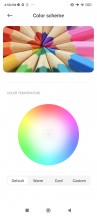
Poco X6 display supports wide color space DCI-P3. Display color options offer three different color models – Vivid (default, DCI-P3), Saturated (DCI-P3 with saturation boost), and Standard (sRGB). You can adjust the color temperature for each mode.
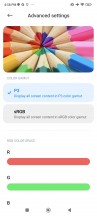
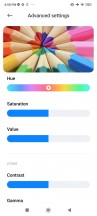
There is also a custom section where you can select the color gamut (primary, P3, sRGB) and adjust hues, saturation, hue, contrast and gamma.
The Vivid (default) option reproduces DCI-P3 faithfully, and we found it to be fairly accurate, with the exception of bluish and gray tones, but this can be remedied by choosing a warmer color temperature.
The primary color option conforms to sRGB and provides incredibly accurate rendering, including whites and grays.
Color options
refresh rate
The display supports up to 120Hz refresh rate and there are two refresh modes – Custom (choose between 120Hz or 60Hz refresh caps) and Default (automatic switching behavior).
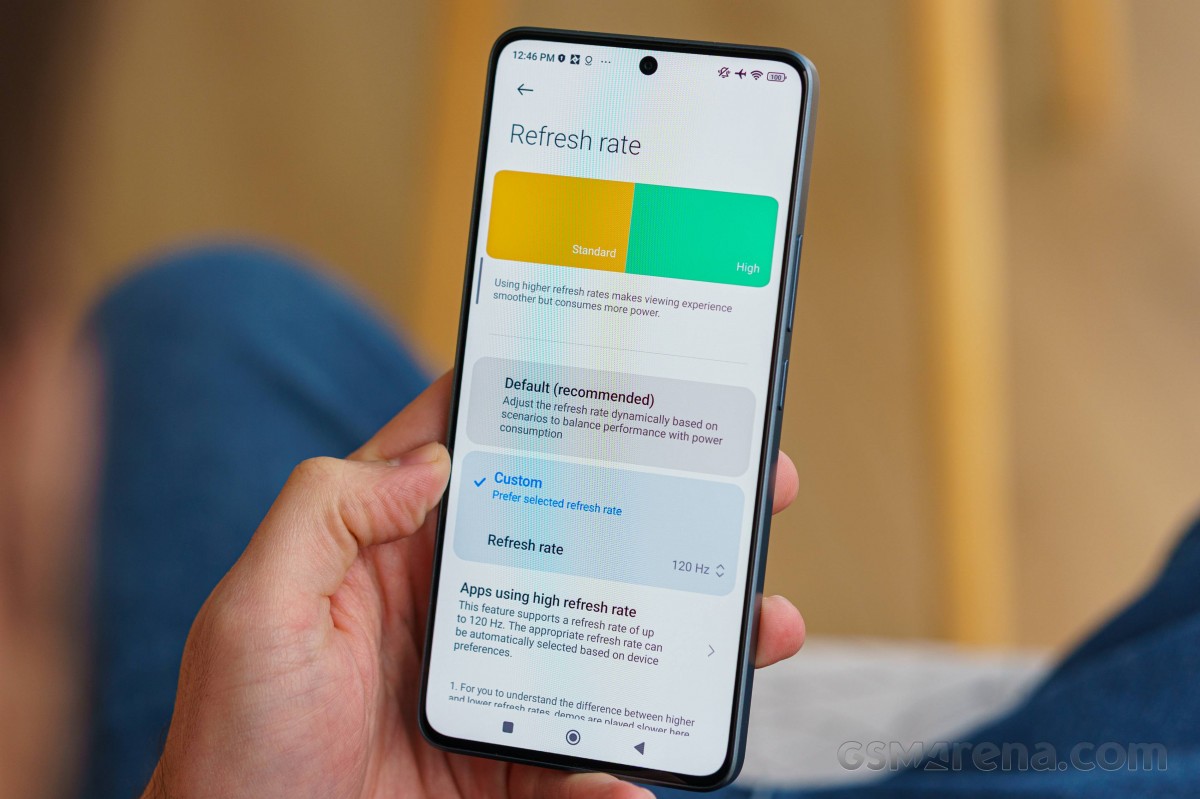
The display must support fixed phases of 30Hz, 60Hz, 90Hz and 120Hz.
The adaptive refresh rate works as expected – dropping to 60Hz when the screen is showing static content. All streaming apps are also limited to 60Hz for UI and streaming. And of course, HFR-incompatible apps like the camera app and Google Maps always render at 60fps.
The only time we saw the screen use 30Hz was for the always-on display, which can’t be on all the time, but only appears for 10 seconds.

renewal rate

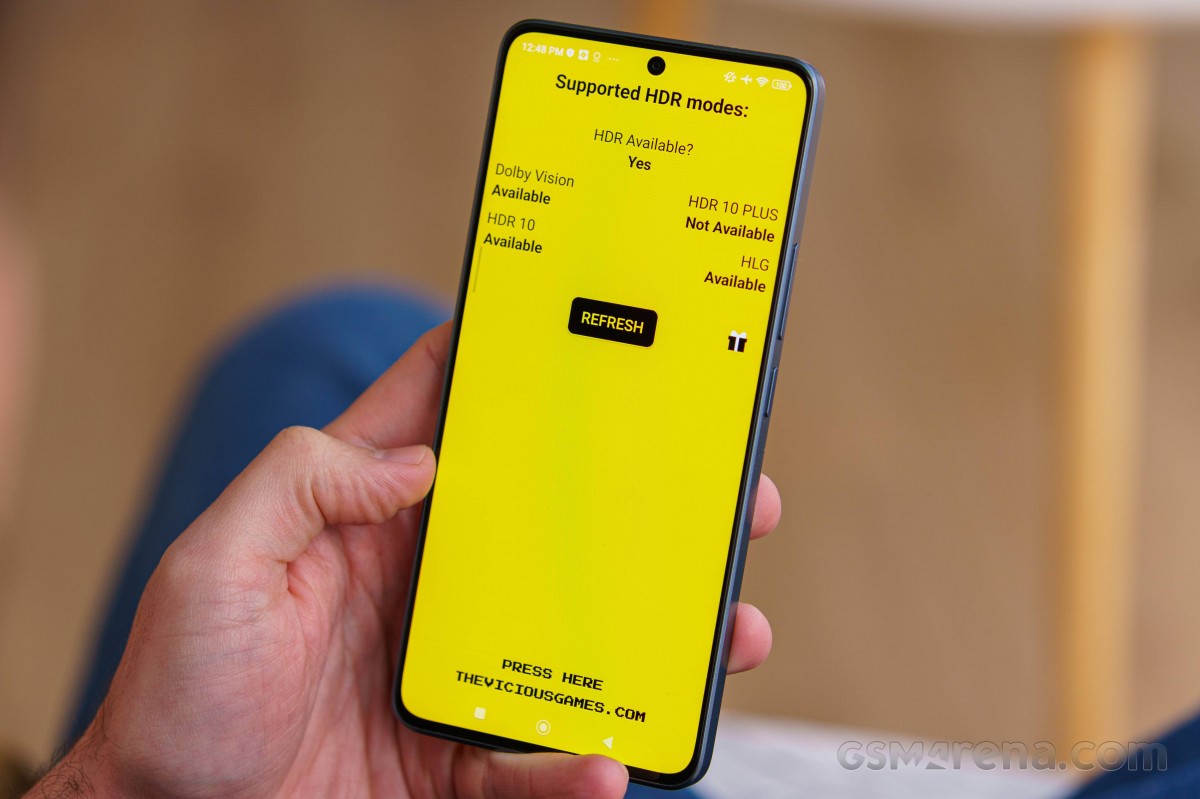
HDR and streaming
The Poco X6 comes with Widevine L1 DRM support, and Full HD streaming with HDR10 and Dolby Vision support is available on popular platforms, including Netflix.
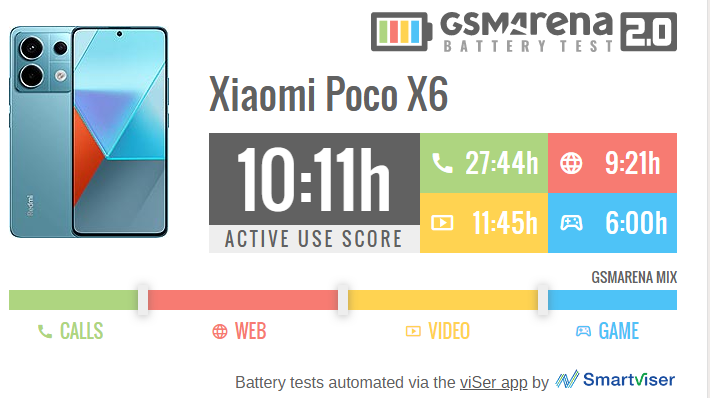
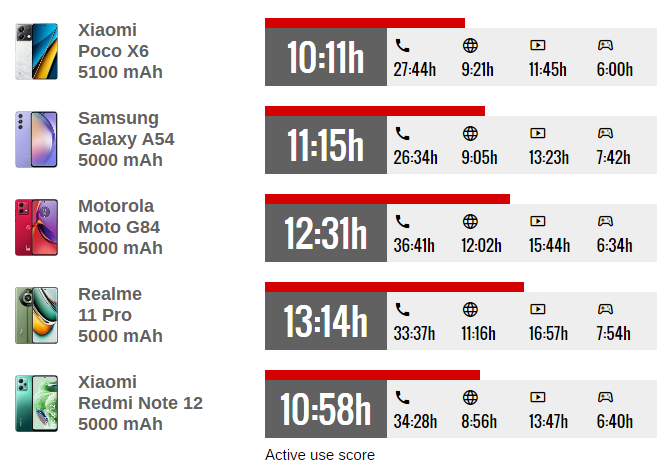
Battery life
The Poco X6 comes with a 5,100 mAh battery, which is a slight upgrade over the 5,000 mAh battery inside the Poco X5.
In our active use test, the Poco X6 delivered average numbers in all on-screen tests.
Charging speed
Poco X6 supports 67W fast charging and comes with a 67W Xiaomi charger and cable.
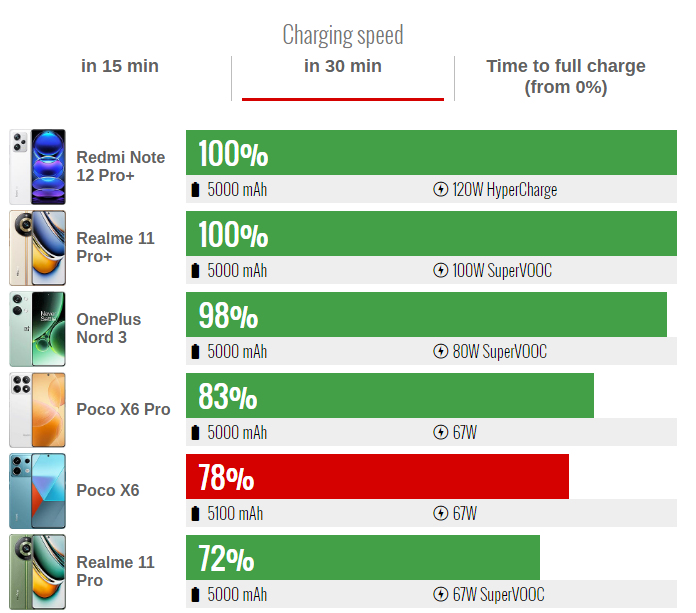
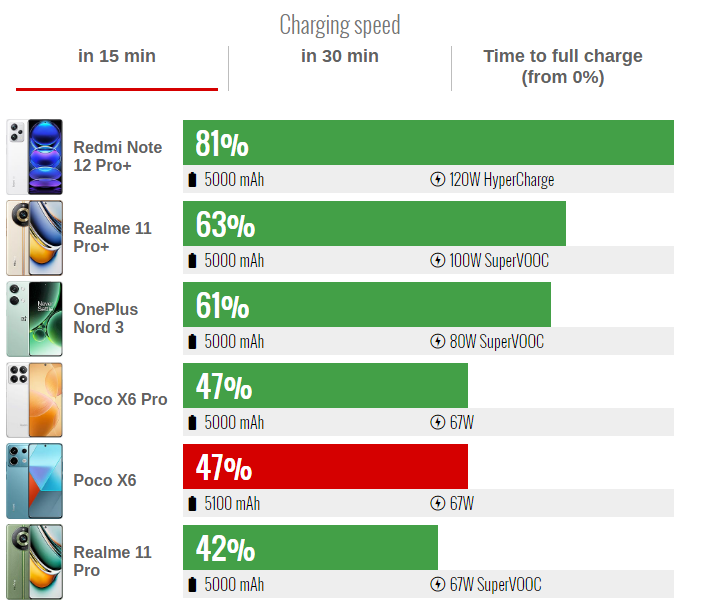
 The charger charges 47% of the Poco X6 battery in 15 minutes and 78% in 30 minutes. Full charge took 48 minutes which is very fast.

Speakers
The Poco X6 relies on the traditional hybrid stereo speaker setup with a new twist. These two pieces are placed behind special nets on both the top and bottom sides. The top speaker also plays the role of a phone and therefore has another output in the front.
As usual, the top speaker is quieter than the bottom speaker and focuses more on high frequencies. But since it has two outputs – the Poco X6 offers a balanced sound output. The speakers support Dolby Atmos enhancement and it is turned on by default.
The Poco X6 scored well in our loudness test. Sound quality is very good – vocals are excellent, high frequencies are well represented and there is some subtle bass.
Turning off Dolby Atmos makes little difference – it provides a slightly richer but more balanced output.
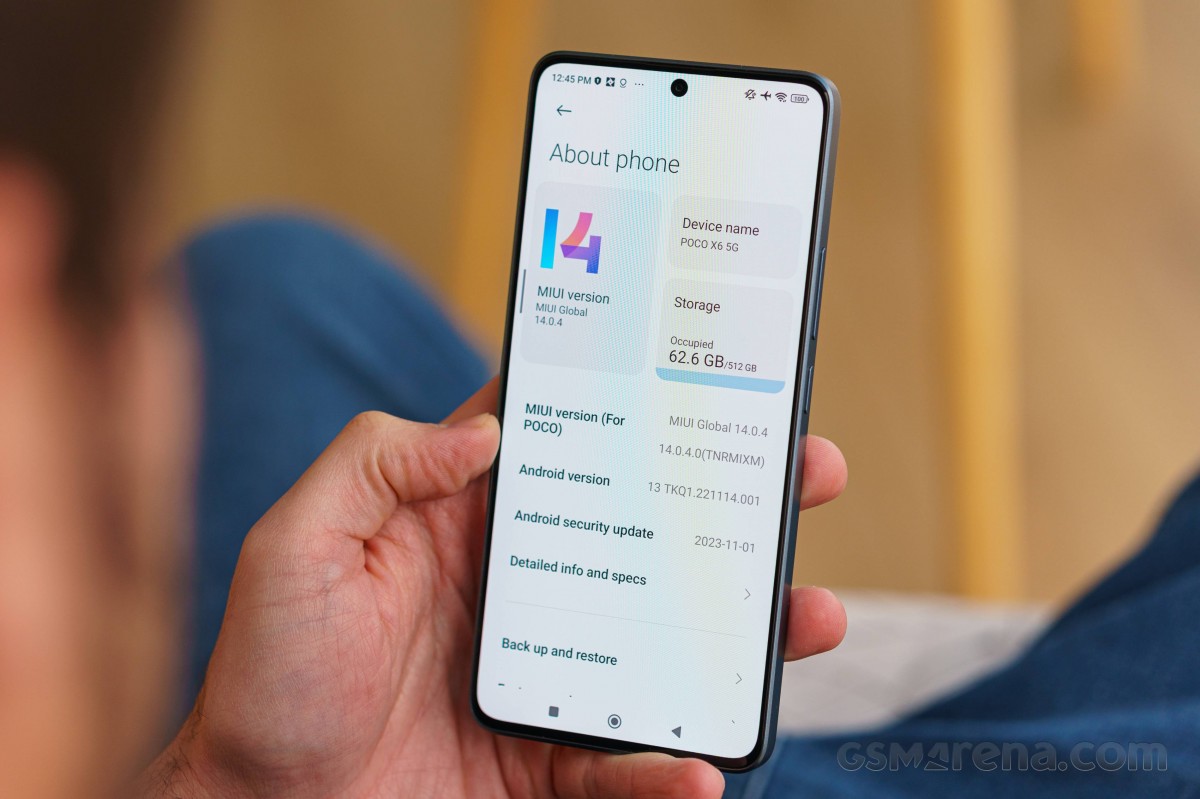
Android 13 with MIUI 14
The Poco X6 runs MIUI 14 on top of Android 13. Technically, the skin is named “MUI 14 for Poco”, but there is little difference between the standard MIUI 14 and this one. The only immediate difference is in the default icon style. It seems to be more in line with Android’s circular icons.
Unlike the Poco X6 Pro, which comes with HyperOS, the regular X6 gets it via an update, one of three major updates, and four years of security patches promised by Poco.

Some of the most notable features of MIUI 14 include native text recognition in the Gallery app, easier management of Xiaomi smart devices via smart devices, enlarged home screen folders, the ability to uninstall most system apps, and super optimization of CPU, GPU, and memory usage.
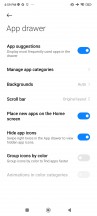
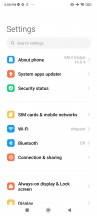
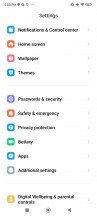
Home screen, recent apps, and general settings remain unchanged. The app drawer is also enabled by default and cannot be disabled in Poco phones. We like the search bar at the bottom of the page for easier access. There are custom and preset app categories for faster navigation.
Home screen, recent apps, settings menu, app drawer


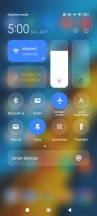
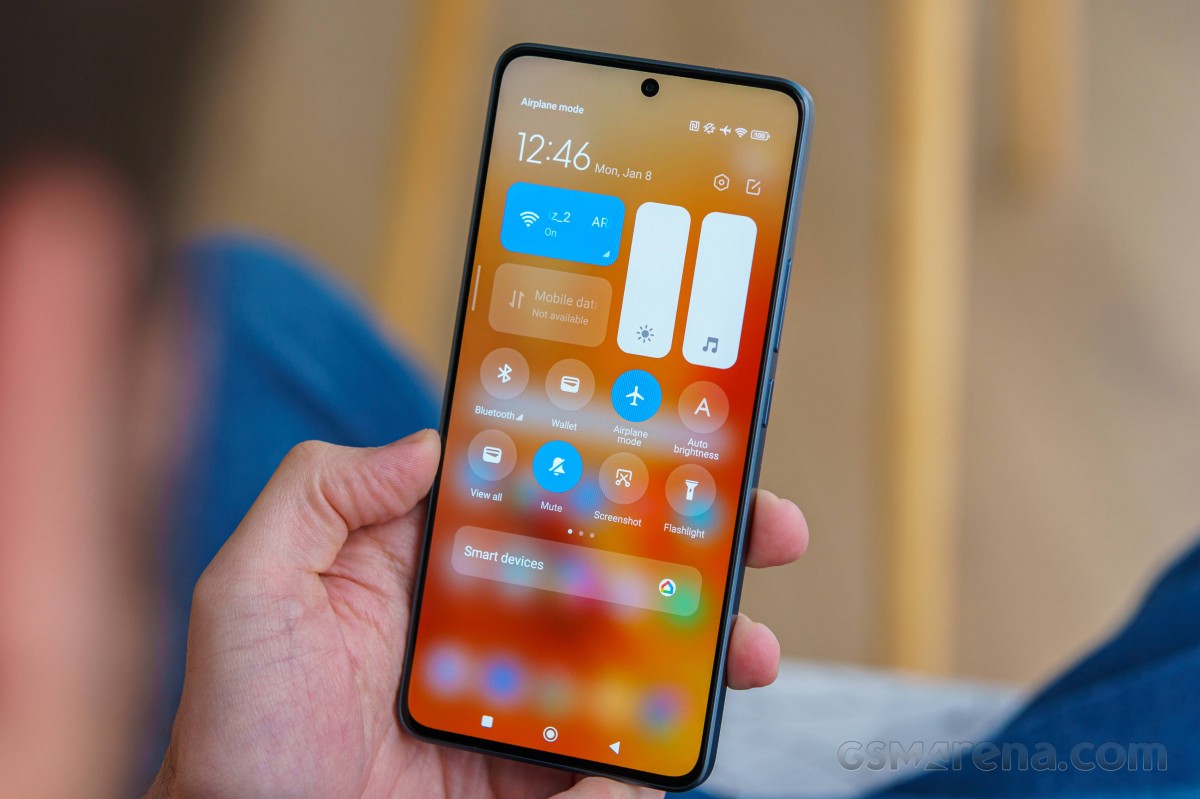
The split between Notifications and Control Center is enabled by default, and that’s probably a good thing. We found this to be very convenient and a way to teach users about MIUI’s unique approach to the user interface. And if you’re not a fan, you can always switch back to standard notifications by swiping in a location.
Control center and notification panel

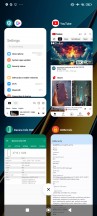
Unlike the standard apps menu of late, the MIUI menu lists apps vertically (you can switch to the standard horizontal orientation) and offers several useful shortcuts. This is where you can open apps in floating windows. However, you can keep up to two apps open at the same time. If you want a faster shortcut for apps that support open windows, just enable the sidebar.
Floating windows and sidebar


The sidebar in video player apps like YouTube becomes the video toolbar. It basically includes the entire sidebar functionality, but in addition to options for floating windows, it includes shortcuts for Screenshot, Record screen, Cast, and Play Video with the screen of that works on YouTube and doesn’t require a Premium subscription. But, as we mentioned, you need to whitelist the apps beforehand where you want this feature to be enabled.
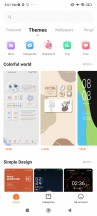
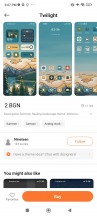
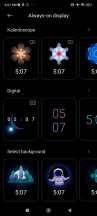
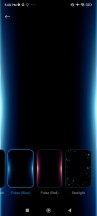
Themes have always been a big part of MIUI and they are available in MIUI 14 as well. You can download new ones from the theme store, and they can change wallpapers, ringtones, system icons, and even the always-on display style.
Themes and other customization options


Of course, in addition to the preset settings, there is also an always-on display setting. Surprisingly, there is no real always-on display functionality, as it can only be displayed for 10 seconds after tapping on the lock screen. Not “always on”.
The display is always on
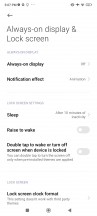


The Notification effect lights up the edges of the screen when new notifications come in, but there’s no customization other than a few different colors and a Starlight option. This effect can work with or without AoD. Frustrating.
Moving towards privacy and security, MIUI comes with a pre-installed system security app. Aside from the extra layer of malware protection it provides, the app keeps many of the app’s settings and privacy features in one place. It can manage your blacklist, manage or limit your data usage, configure battery behavior, and free up some RAM. It can also manage the permissions of your installed apps, define the battery behavior of selected apps, and apply restrictions to specific apps only.
Security application

All in all, MIUI 14 has changed little in terms of overall user experience compared to the 13th iteration, and that’s not a bad thing. Fast and customizable as always. Xiaomi has also paid special attention to the touch part of this device – we found the motor to be clear, strong, accurate, and responsive. It reacts to many actions throughout the system and during navigation. Even if it is not intrusive or strong enough, there is an intensity of tactile feedback.
Finally, there are some ads, but they can be stopped from within the settings in the app that show the ads and/or recommendations.
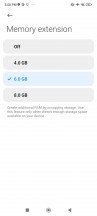
Performance and metrics
Poco X6 is the first smartphone by Qualcomm to run on Snapdragon 7s Gen 2, a chipset based on 4nm process technology and a slightly faster version of Snapdragon 6 Gen 1. This platform is as powerful as the 7+ Gen 2 or even the original 7 Gen 1. But it’s an upgrade over the Snapdragon 695 in the Poco X5.
The Snapdragon 7s Gen 2 has an octa-core processor with 4x Cortex-A78 @2.4GHz and 4x Cortex-A55 @1.95GHz. There is no Prime here and the core design is older (2020).
The SD7sG2 uses the Adreno 710 GPU, which was first introduced in the Snapdragon 6 Gen 1 SoC. It is listed as supporting FHD+ resolution at 144Hz.
The 6700’s FastConnect connectivity platform is a step back from the 6900 in the Snapdragon 7+ Gen 2, with a maximum DL speed of just 2.9Gbps, while Bluetooth support is limited to 5.2, which still supports low-energy audio. he does.
ISP Spectra supports a smartphone with a camera of up to 200 megapixels and 4K video recording at 30 frames per second. Memory is LPDRR5 clocked at 3200MHz, while other features include USB-C 3.1 and Quick Charge 4+.
The Poco X6 is available in three LPDDR4X RAM + UFS2.2 storage configurations – 8GB + 256GB, 12GB + 256GB, and 12GB + 512GB (ours).
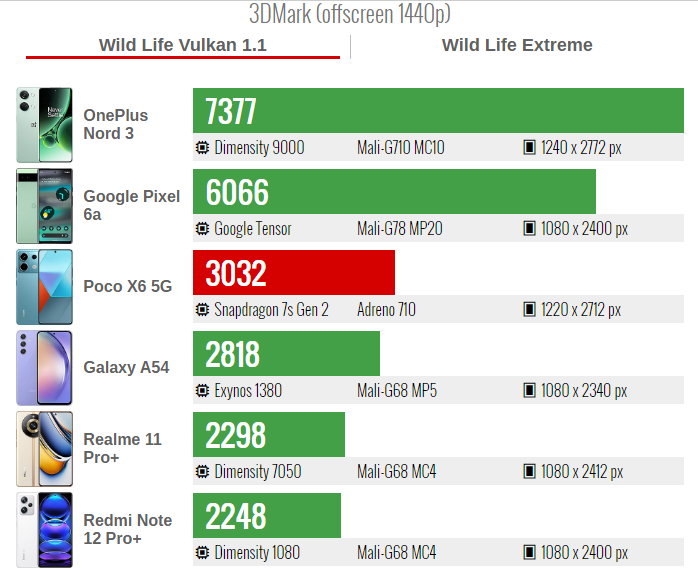
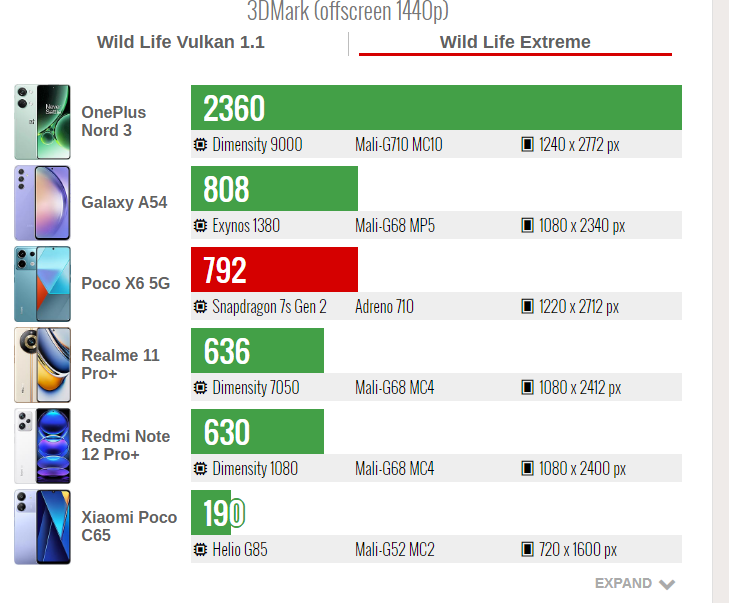
And now, it’s time to run some benchmarks. Note that GFXBench was disabled on our Poco X6, which is why you won’t see the usual graphs.
Even with the older CPU cores, the Poco X6 offers a very capable processor, which is evident in the performance tests.
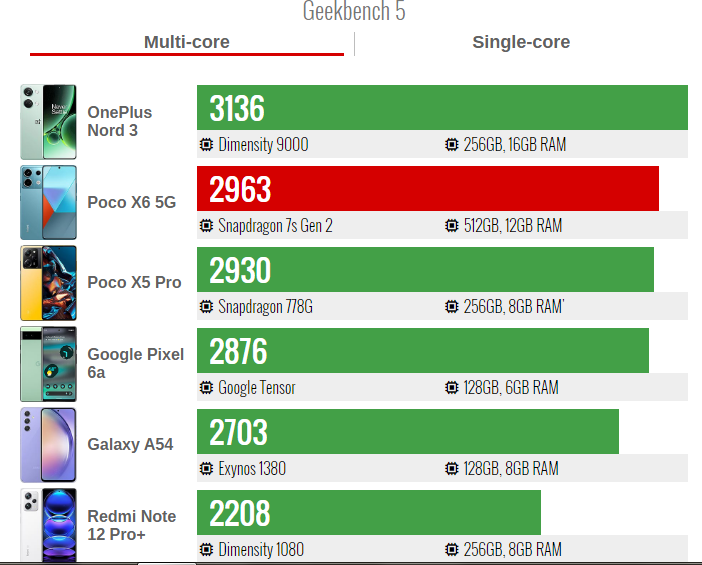
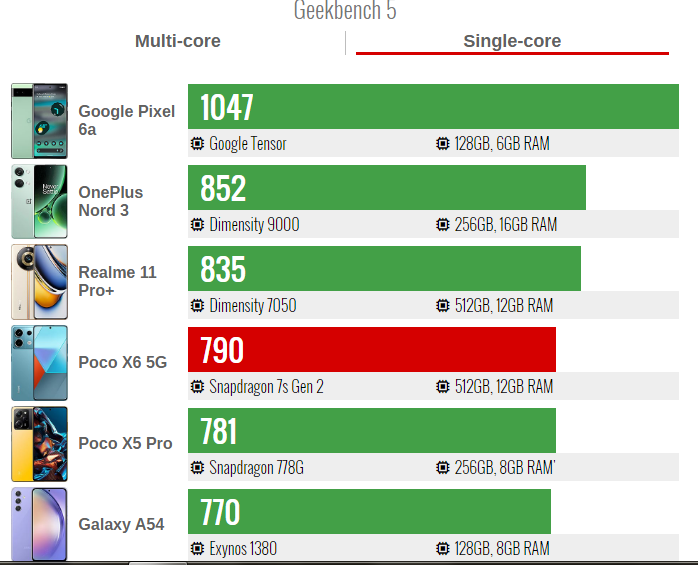
The GPU is quite adequate for the mid-range and should do well for most games.
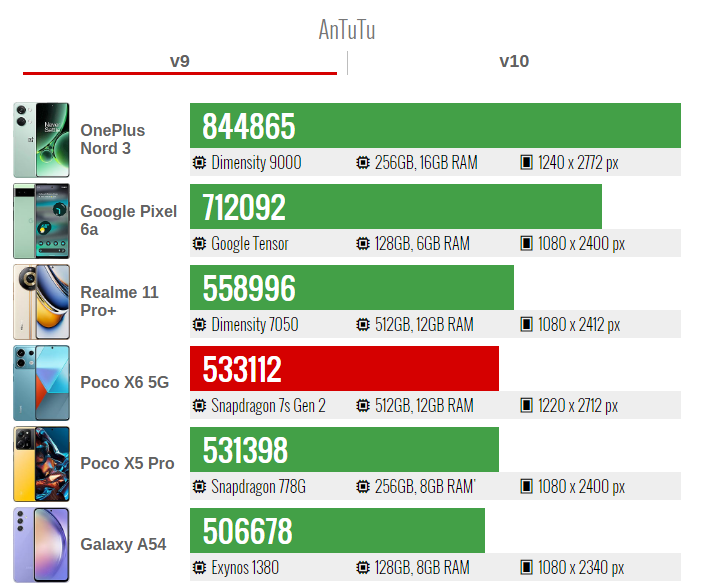
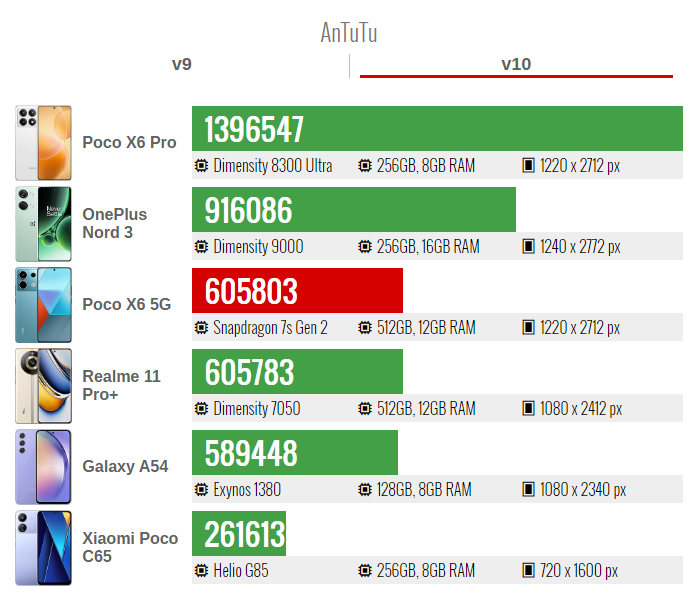
AnTuTu tests put the Poco X6 around the Poco X5 Pro and Realme 11 Pro+. The superiority of the Poco X6 Pro is quite evident in the version 10 test, and it looks like it’s shaping up to be a flagship killer.
Finally, the stability tests gave us good performance – 79% for CPU stability and 90% for CPU stability. Excellent grades, indeed!
Overall, the Poco X6 5G is well equipped for the affordable mid-range class and offers great performance and stability for its price.
A mid-range triple camera, OIS
The Poco X6 has a familiar triple camera setup on its back – a high-resolution main camera, a primary ultra-wide camera, and a small macro shooter. This year, both X6 models are updated for the first time with OIS, which helps with certain things like low-light photography.
The Poco X6’s main camera uses a 64MP OmniVision OV64B 1/2-inch sensor with 0.7μm pixels and a Quad-Bayer filter. The sensor is paired with a 25mm optical image stabilization (OIS) lens and f/1.8 aperture.
The ultra-wide camera uses an 8-megapixel Somy IMX355 sensor with a 16mm f/2.2 ultra-wide lens. Focus is fixed at infinity.
The macro camera uses a 2MP OmniVision OV02B1 sensor behind a 25mm f/2.4 lens and fixed focus at 4cm.
Finally, the front-facing camera uses a 16MP OV16A1Q 1/3.06-inch sensor with 1.0μm pixels, a Quad-Bayer filter, and a 24mm f/2.0 lens. Focus is also fixed.
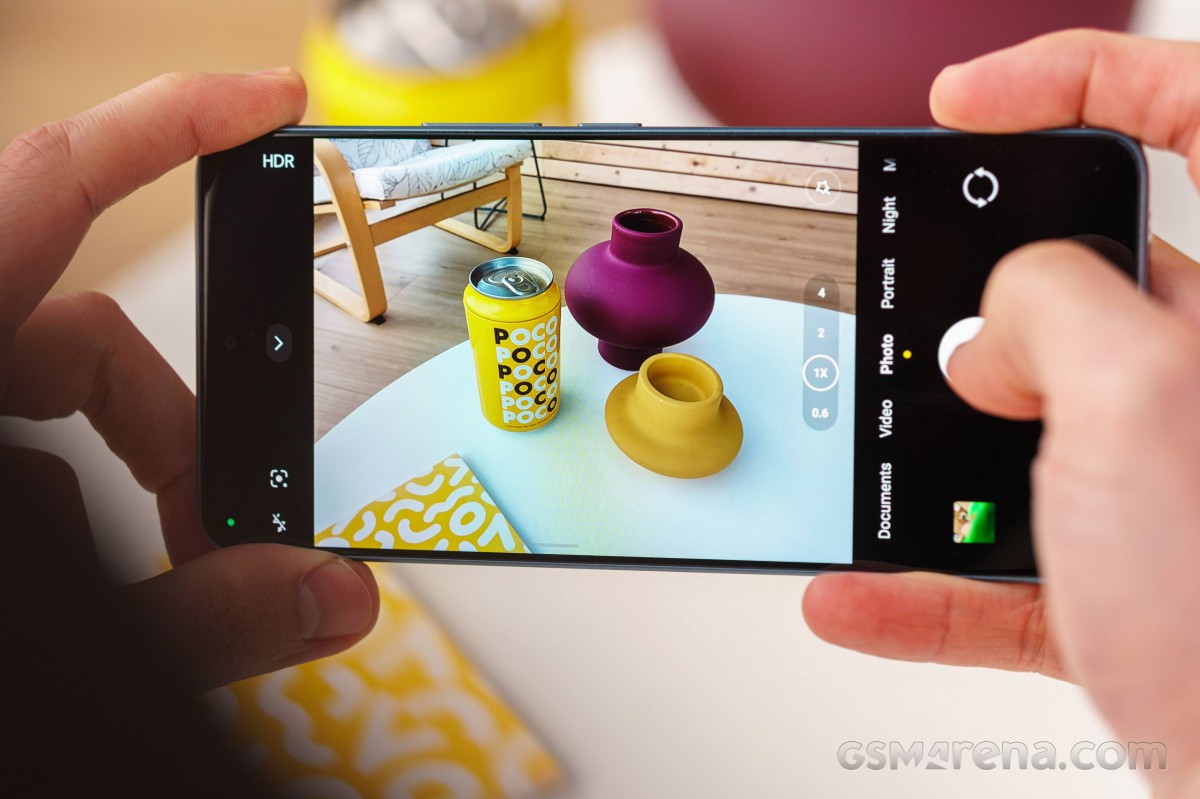
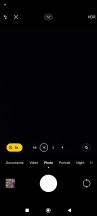
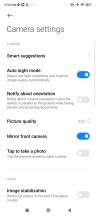
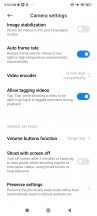
Camera app
The camera app on the Poco X6 is more or less the same as other MIUI phones. The main operation for switching modes works with side swipes, as expected, and you can also tap on the modes you can see to go directly to them. You can add, remove, and reset modes in the main Rolodex by going to the More tab and clicking the Edit button, and you can also access it from the Settings menu.
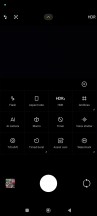
At the bottom of the viewfinder, you have a flash mode switch, an HDR switch, and the Google Lens switch. There’s also a hamburger menu that includes extra options like aspect ratio, AI option, self-timer, and gridlines, the macro switch is here, plus a settings shortcut.
At the near end, you have the camera’s zoom switch, which operates in one of two modes. The first is as simple as tapping on one of the four dots, which reveal ultra-wide (0.6x), prime (1x), and prime (2x and 4x digital zoom) options. Or you can tap on active zoom to show more zoom modes.
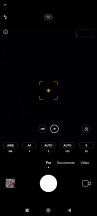
There is a well-featured professional mode where you can change the shooting parameters yourself. You can choose from 4 white balance presets or dial in the light temperature with a slider. There’s a manual focus slider (with peaking as an option), and shutter speed and ISO control with ranges depending on the camera you’re using – prime or ultra-wide.
Night mode is available on the main and ultra-wide cameras.
Camera app

Day photo quality
The main camera saves 16MP photos by default, and these photos are still. They provide a good amount of resolved detail, true colors, decent dynamic range, and low noise.
Main camera


The 2x zoom offers incredible lossless-like magnification with detailed photos that often show more than what you’ll see on default 1x samples. Their contrast is excellent, as is the dynamic range. Noise is low, while colors are vivid but somewhat warmer than they should be.
2x main camera


4x zoom is more like a digital zoom than 2x photos, and you can easily see that it’s just a simple crop with poor detail.
4x main camera


64MP photos aren’t good – average in detail and quite noisy.
Main camera, 64 megapixels


16MP portraits are good – separation is good enough and blur is lovely. There’s some noise and white balance is a mixed bag, but considering the Poco X6 isn’t a high-end phone, the portraits are fine for the class and great for social media.
Main camera, portrait


The ultra-wide camera saves pleasant 8-megapixel photos – they offer acceptable detail, a great field of view, good colors, and tolerable noise levels. Dynamic range is good – not wide, but not too narrow.
Photos are sometimes overexposed, and that’s the only valid criticism we have here.
Ultra-wide camera


2MP macro photos are good with enough detail and lovely colors. Sometimes they come very loud, sometimes not.
Macro camera


Xiaomi and its Quad-Bayer selfie cameras are like a never-ending story. And Poco X6 is just another season. The 16-megapixel camera here saves upscaled 16-megapixel images, which are very good in terms of exposure and subject reflections, good colors, and wide dynamic range. But detail is average at best and everything is soft.
selfie camera


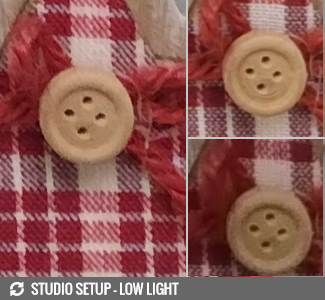
Low-light photo quality
The Poco X6 supports automatic night mode – enabled by default in the advanced camera settings. This means that the camera app decides when and where to use night mode and exposure time. It’s mostly used on the main and ultra-wide camera, even though the moon icon isn’t often shown on the second camera.
Night shots from the main camera are average – detail is less than we expected, noise is visible and colors are harsh, but you can spot red immediately. Still, the photos are well-exposed and have a good dynamic range, which balances out their flaws. Average, actually.
The main camera, automatic


The shutter offers 2x digital zoom at night. There is no trace of the high-quality zooms we’ve featured throughout the day.
2x main camera, automatic


The ultra-wide 8MP night shots are good – colorful, with acceptable detail and wide dynamic range for night photography. They are covered in noise but still usable.
Ultra-wide camera, automatic


And here’s how the main camera fares against the competition in our extensive photo comparison database.
Poco X6 vs Galaxy A54 and Moto G84 in our photo comparison tool

Filming and quality
Poco X6 supports 4K@30fps video recording in its main camera. The ultra-wide camera maxes out at 1080p@30fps, while the 2MP macro supports 720p@30fps. Finally, 1080p at 60fps is available on the main and selfie cameras.
The always-on electronic stabilization works on the main and ultra-wide cameras, but not on selfies and macros.
Audio is always recorded in stereo at a bit rate of 96 kbps.
Main camera
The main camera’s 4K daylight videos are excellent – with detail, low noise, accurate colors, good dynamic range and high contrast.
Zoomed video is 2x enhanced than normal video.
Low-light 4K video from the main camera is disappointing – there’s little detail, high noise levels, low dynamic range and a reddish tint.
EIS works great on the main camera at all resolutions and frame rates.
Ultra-wide camera
1080p daylight shooting from the ultra-wide camera is good – it offers acceptable detail levels, no noise, good colors, and adequate dynamic range.
Low-light 1080p video from the ultra-wide camera is perfectly usable – there’s enough detail, noise doesn’t get in the way, and colors are true to life.
EIS works well on this camera as well.
Selfie camera
The selfie camera captured good 1080p clips with good detail, low noise, and accurate colors. The dynamic range is above average.
Unfortunately, there is no EIS for this camera.
Video screenshot: Original • Original 2x • Ultra Wide • Selfie • Original • Ultra Wide


Here’s how the Poco X6 compares to other devices in our extensive video comparison database.
Poco X6 vs Galaxy A54 and Poco X6 Pro in our video comparison tool


Review of Poco X6 phone competitors
The Poco X6 starts at €300, which is an incredibly competitive and even tempting price tag. It offers the best display in the segment, a premium design, and full specs, so there’s a good chance it’ll be an instant pick.
 Xiaomi’s own Redmi Note 13 Pro is the first competitor that comes to mind, the same phone as the Poco X6 but with a superior 200MP main camera. But for this higher-resolution imager, and arguably a more signature brand, you’ll have to pay around €100 more (expected global price around €380). We would definitely say the Poco X6 makes more sense.
The price of Galaxy A54 is close to Poco X6. It’s a fully waterproof smartphone with better cameras and similar speeds, but it’s a smartphone packed with premium OLED, slower charging, and no charger in the box. Here you have to decide your priorities.
The Moto G84 is a good alternative for a clean Android experience, IP54-like design, a nice OLED display, and more top-notch cameras. It has a longer battery life, an FM radio, and a microSD slot. It is also cheaper.
Finally, you might want to consider the Google Pixel 6a if it’s available in your market. It’s a very affordable flagship phone with an IP67 rating, super fast hardware, and great cameras. It’s a two-year-old compact phone, but it’s worth it. However, you’ll have to settle for a 60Hz display.
Xiaomi Redmi Note 13 • Samsung Galaxy A54 • Motorola Moto G84 • Google Pixel 6a


Summary
The Poco X6 is a great upgrade over the Poco X5, improving on almost every aspect – design, display, battery and charging, speakers, performance, camera, and even software. And like any other Xiaomi phone, it’s well-built and offers great sound for the money.
We liked the Poco X6 for its IP54-rated design, but the real best is the Dolby Vision OLED display with all sorts of niceties. The 67W fast charging and the new chip are also quite good.
The cameras perform well in bright daylight, but low-light performance is mediocre at best. We expected more
 Finally, the Poco X6 should have launched with HyperOS like the Poco X6 Pro, but alas – it comes with Android 13 and MIUI 14. A HyperOS update is just around the corner, but one of those three promised major updates will eat you right after. Buying a phone is a terrible trick.
Overall, the Poco X6 is a solid phone with a competitive price and features. And that’s why it’s recommended despite some not-so-big flaws – it’s just a solid suggestion.
Why should we buy Poco X6?
- IP54-rated design, Victus Gorilla Glass screen protector
- Bright AMOLED with Dolby Vision, 120 Hz, can have accurate color.
- Fast charging, fast charger included.
- Dolby Atmos speakers with good volume.
- Good mid-range performance and stability.
- Reliable cameras for photos and videos in the day.
- Snappy MIUI 14, four years of updates with 3 main inputs.
Why should we avoid buying Poco X6?
- Average battery life.
- The selfie camera produces soft photos and lacks EIS for video recording.
- HyperOS is not available at launch.
Source: GSMARENA.COM


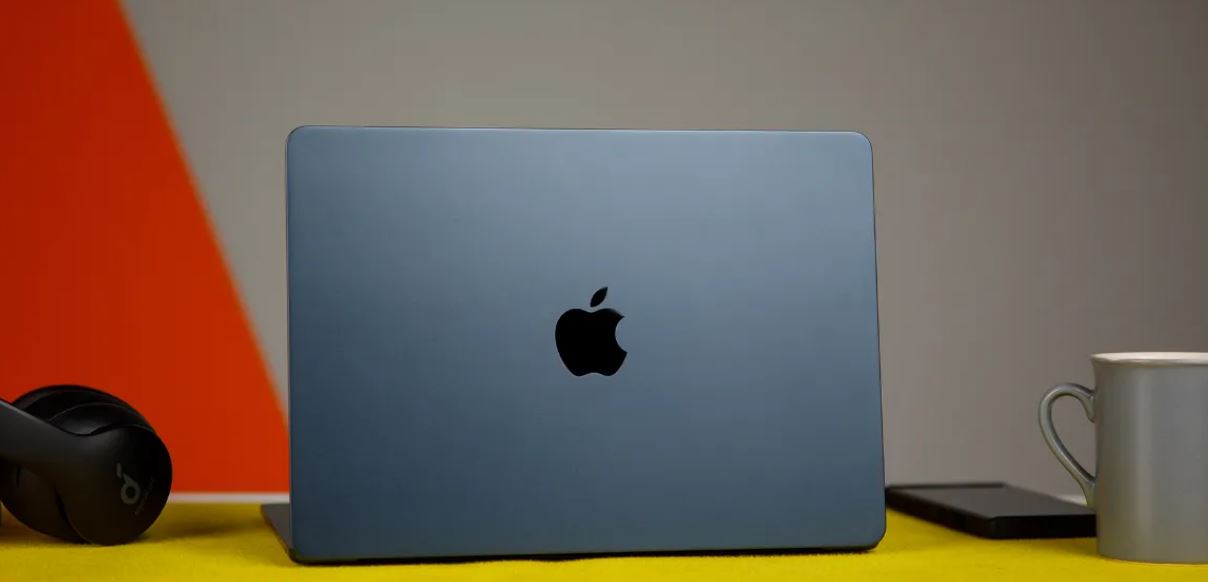


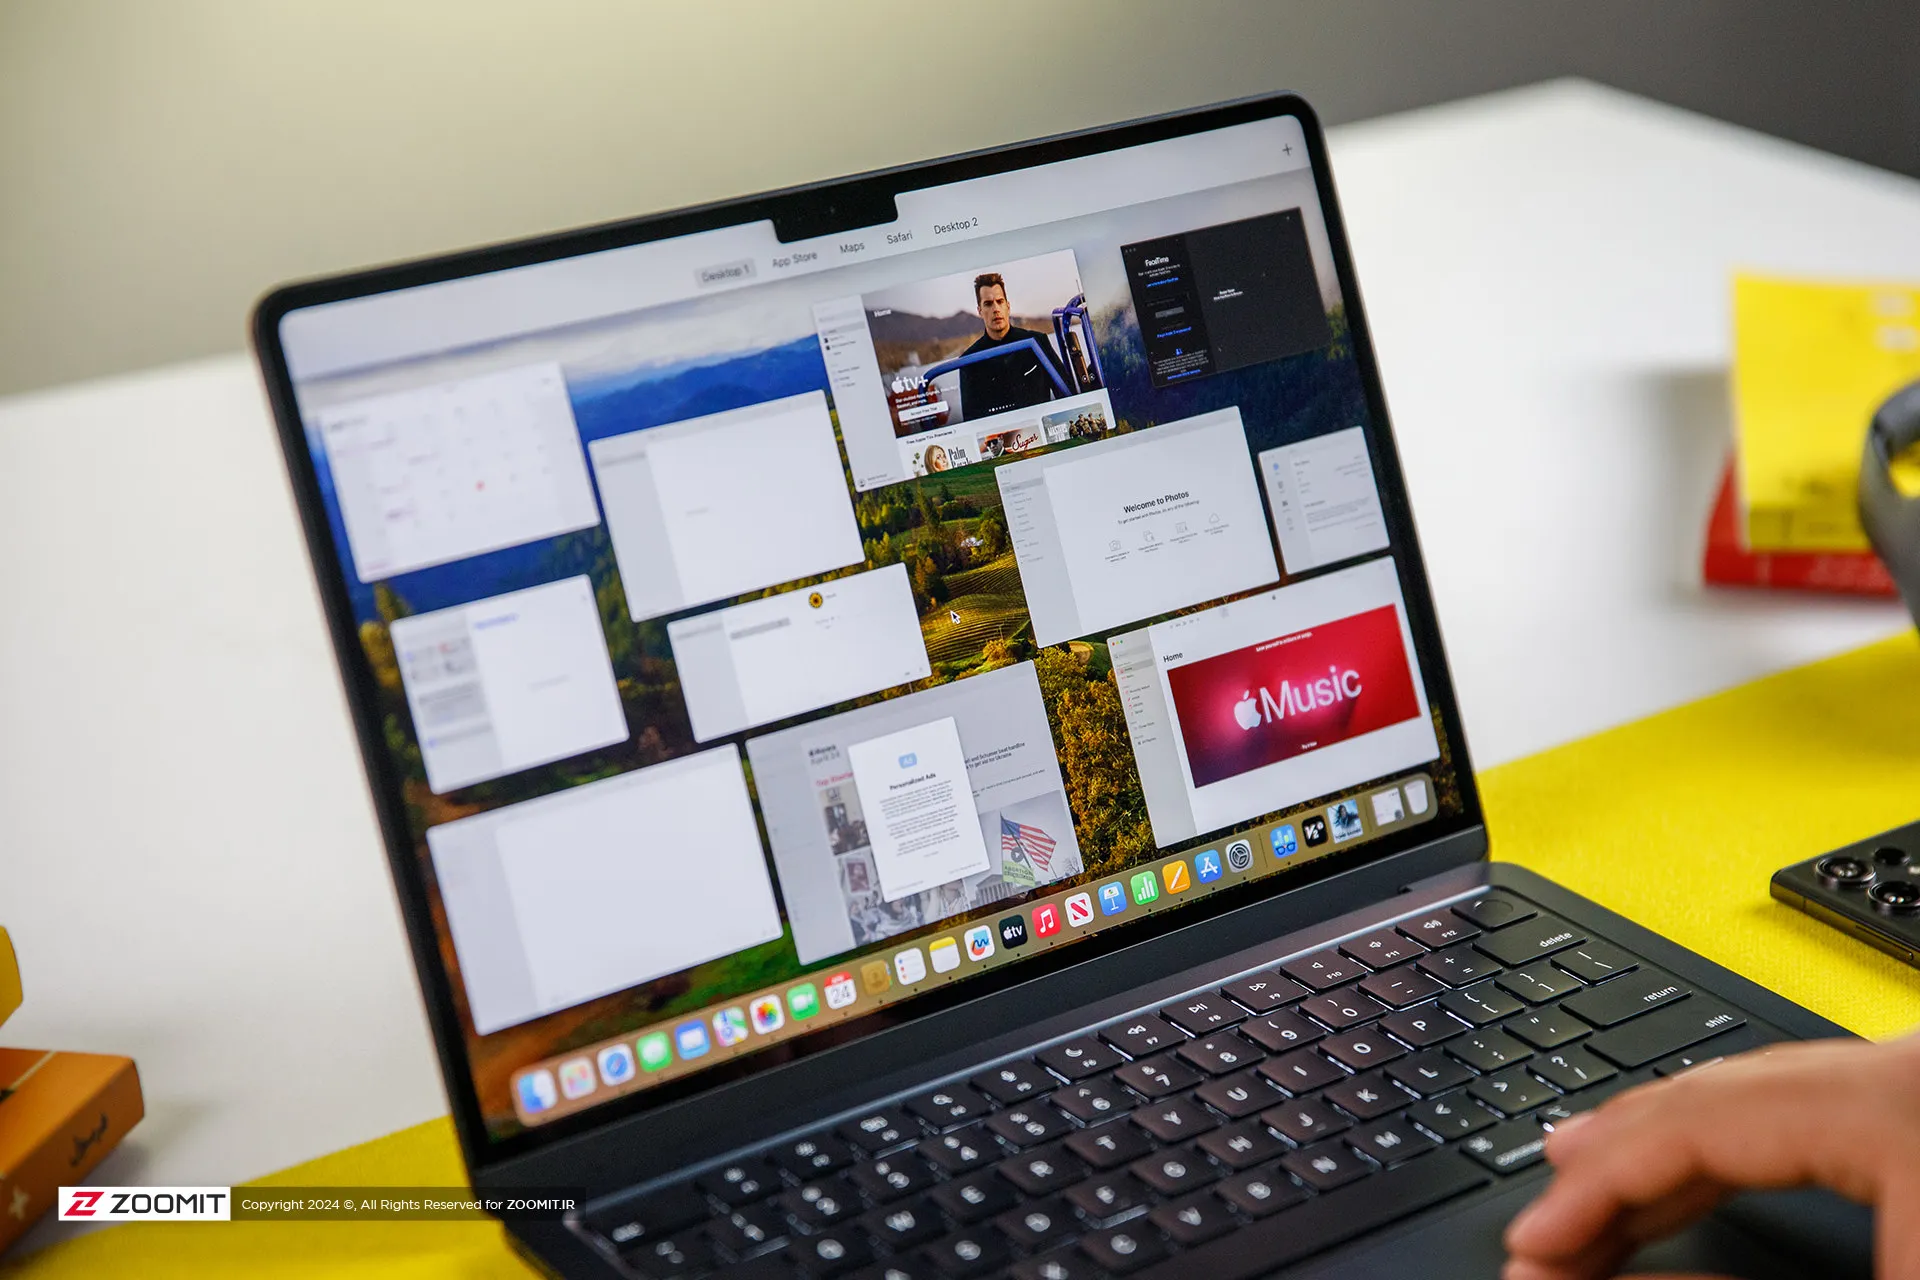
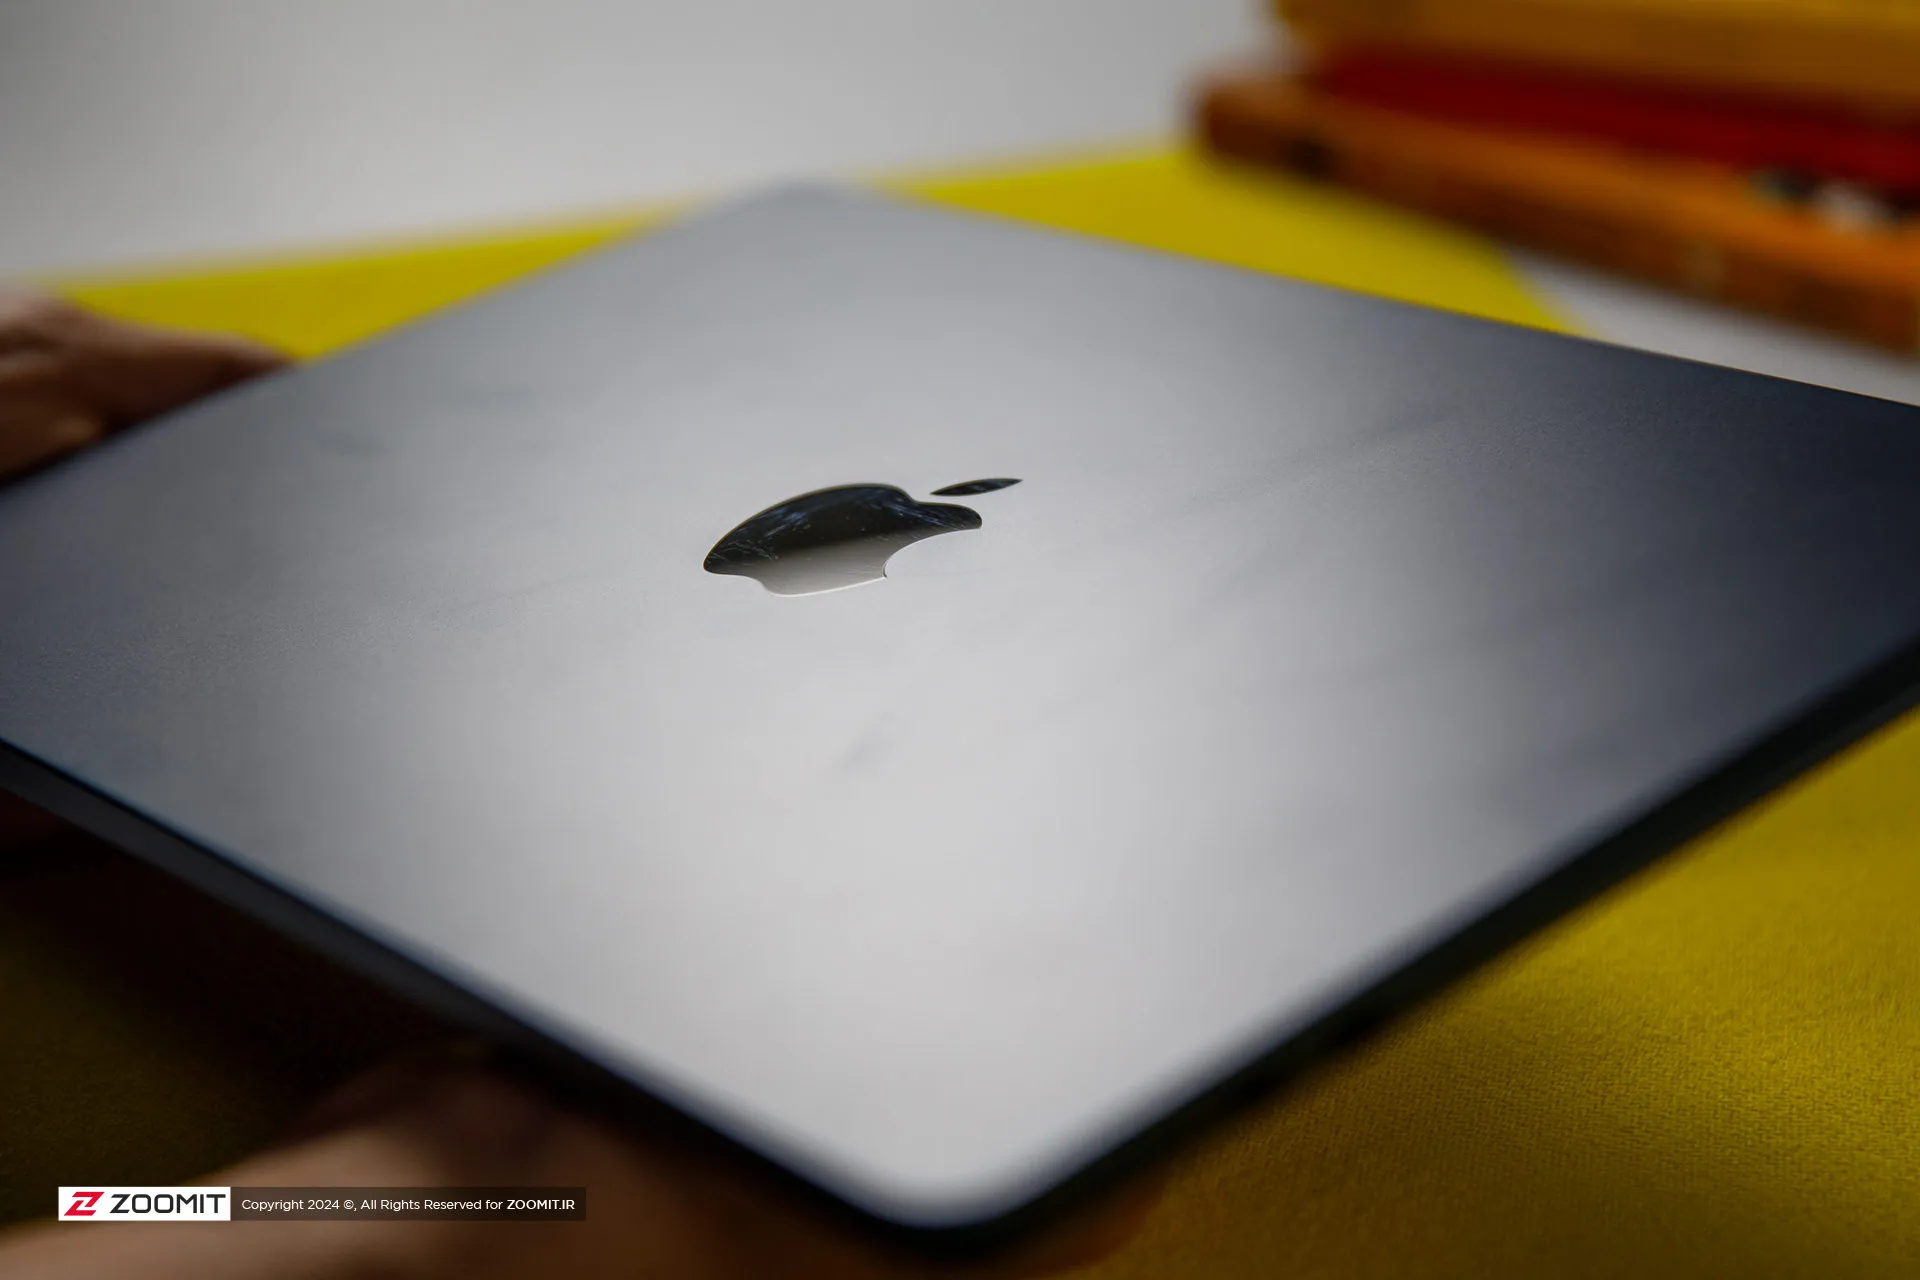 Grease and fingerprints on the laptop body
 MacBook Air 2022
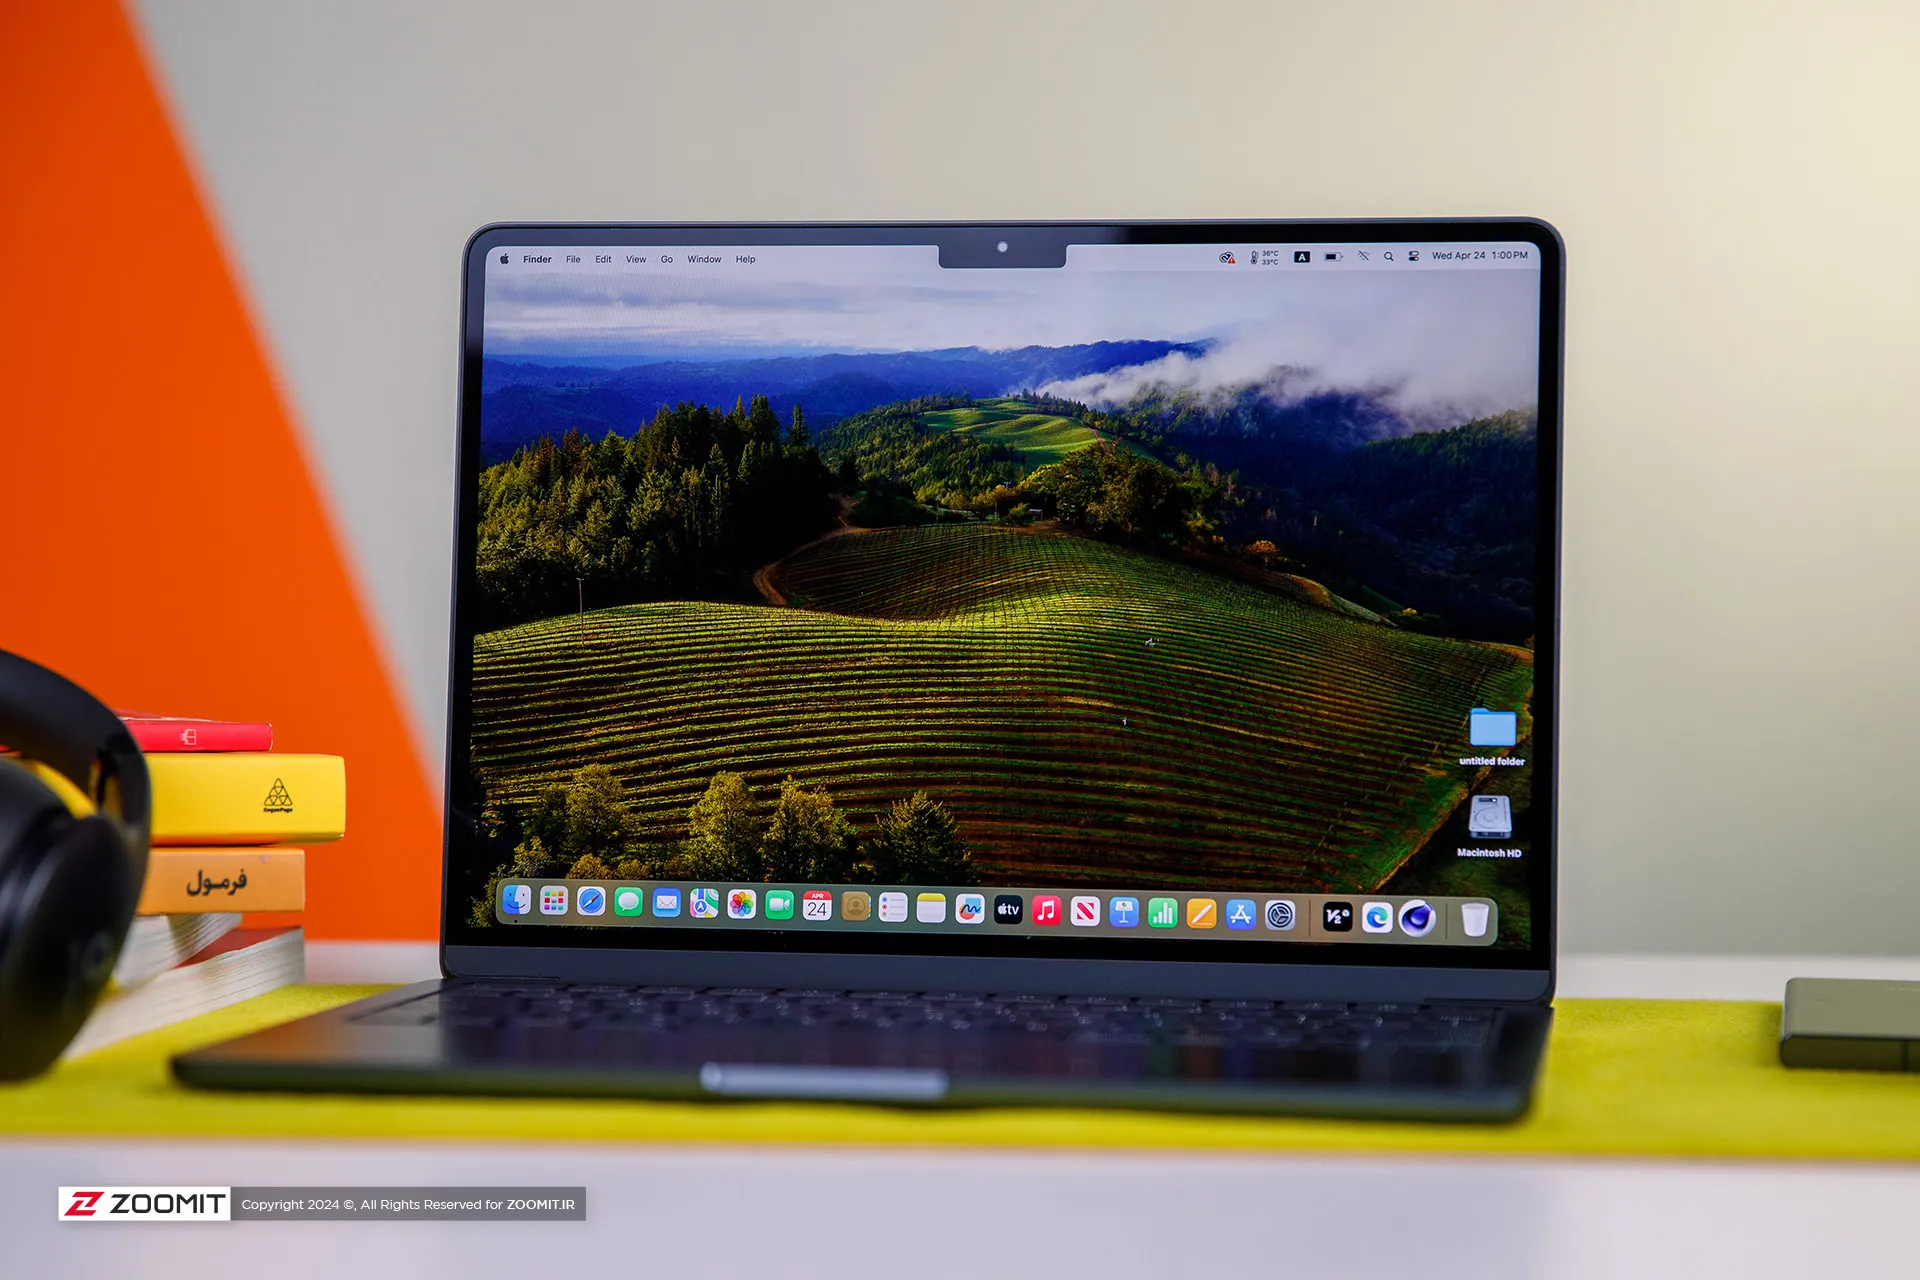
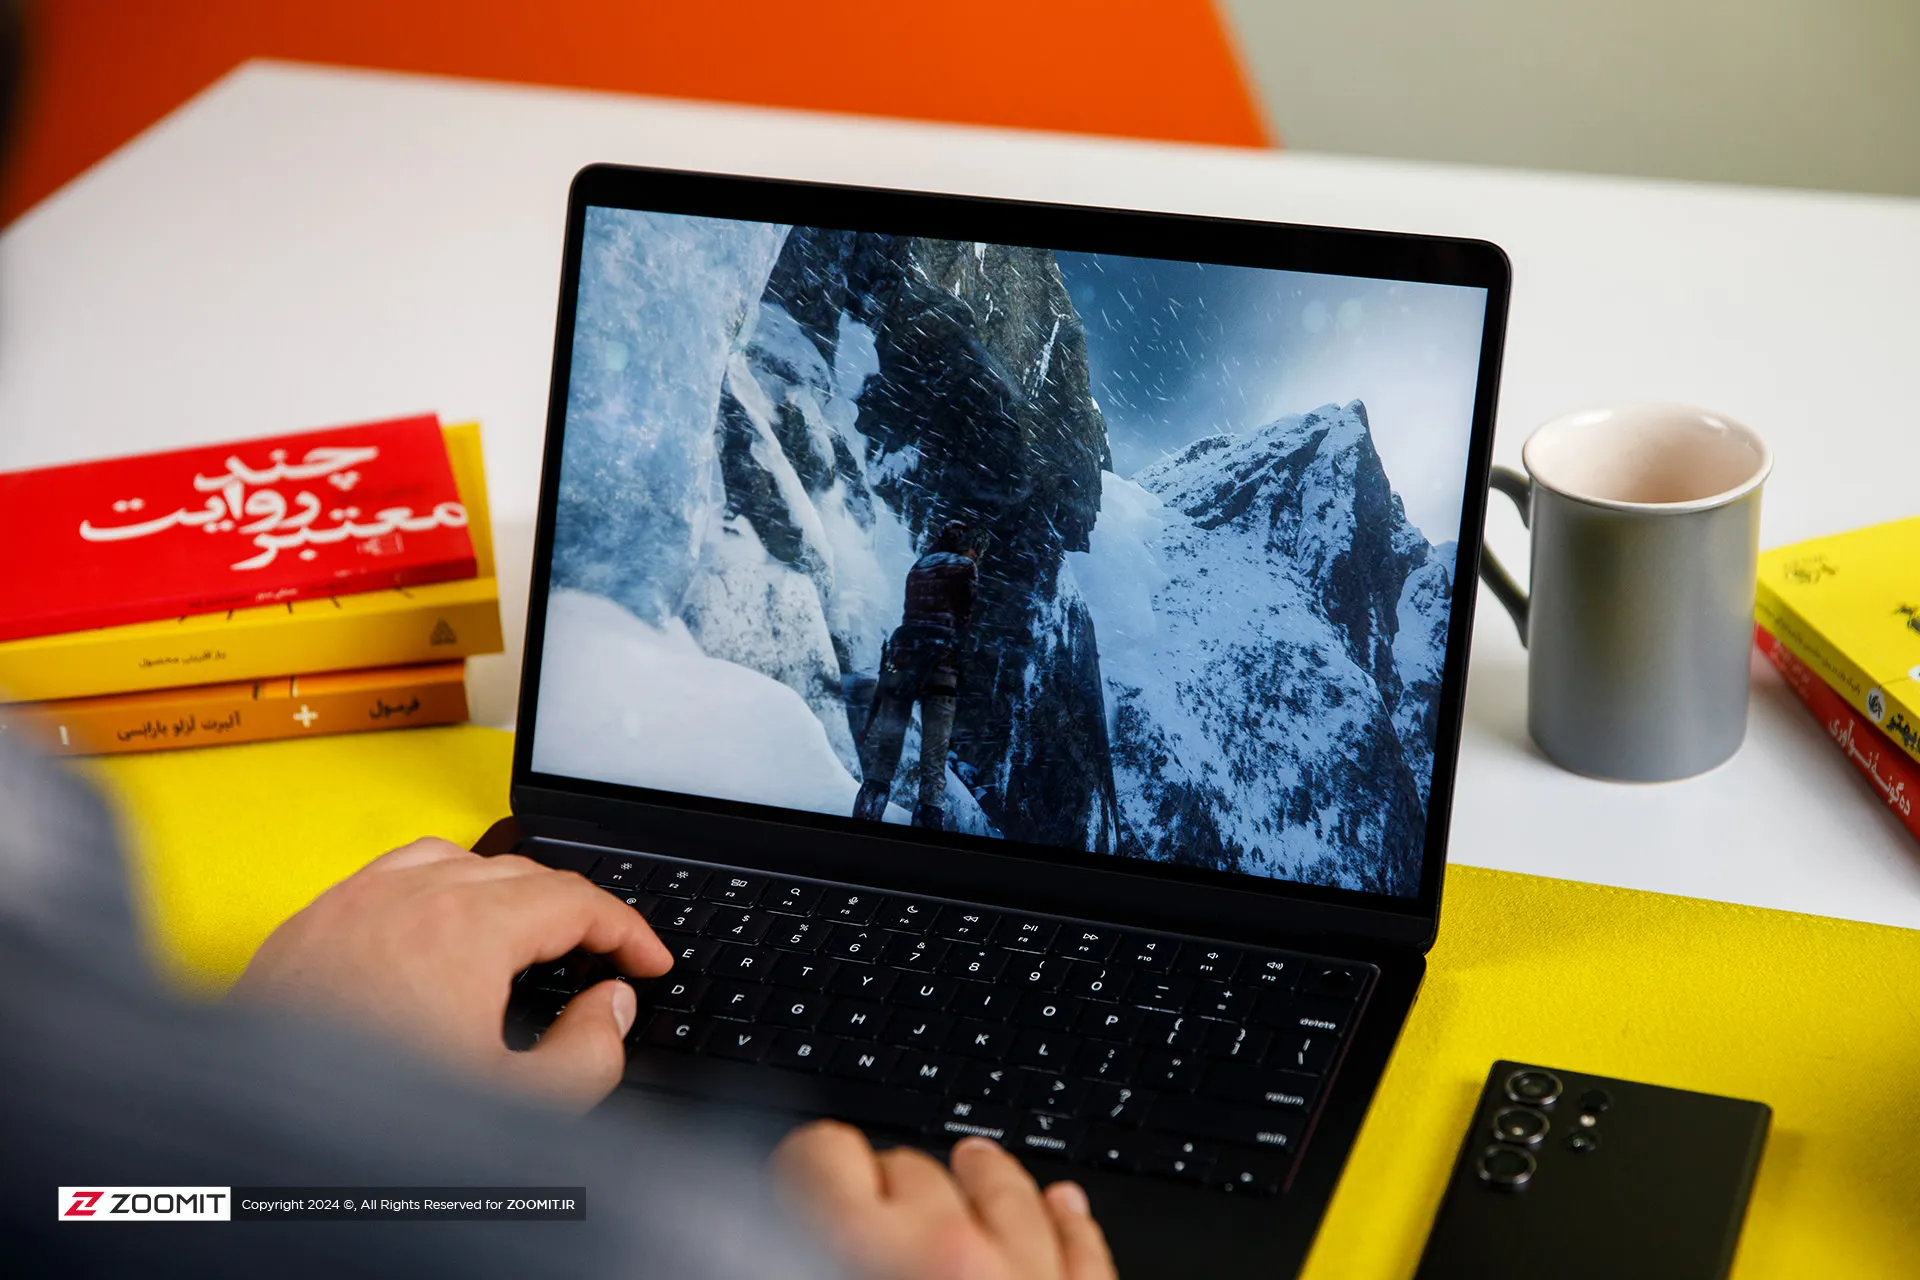
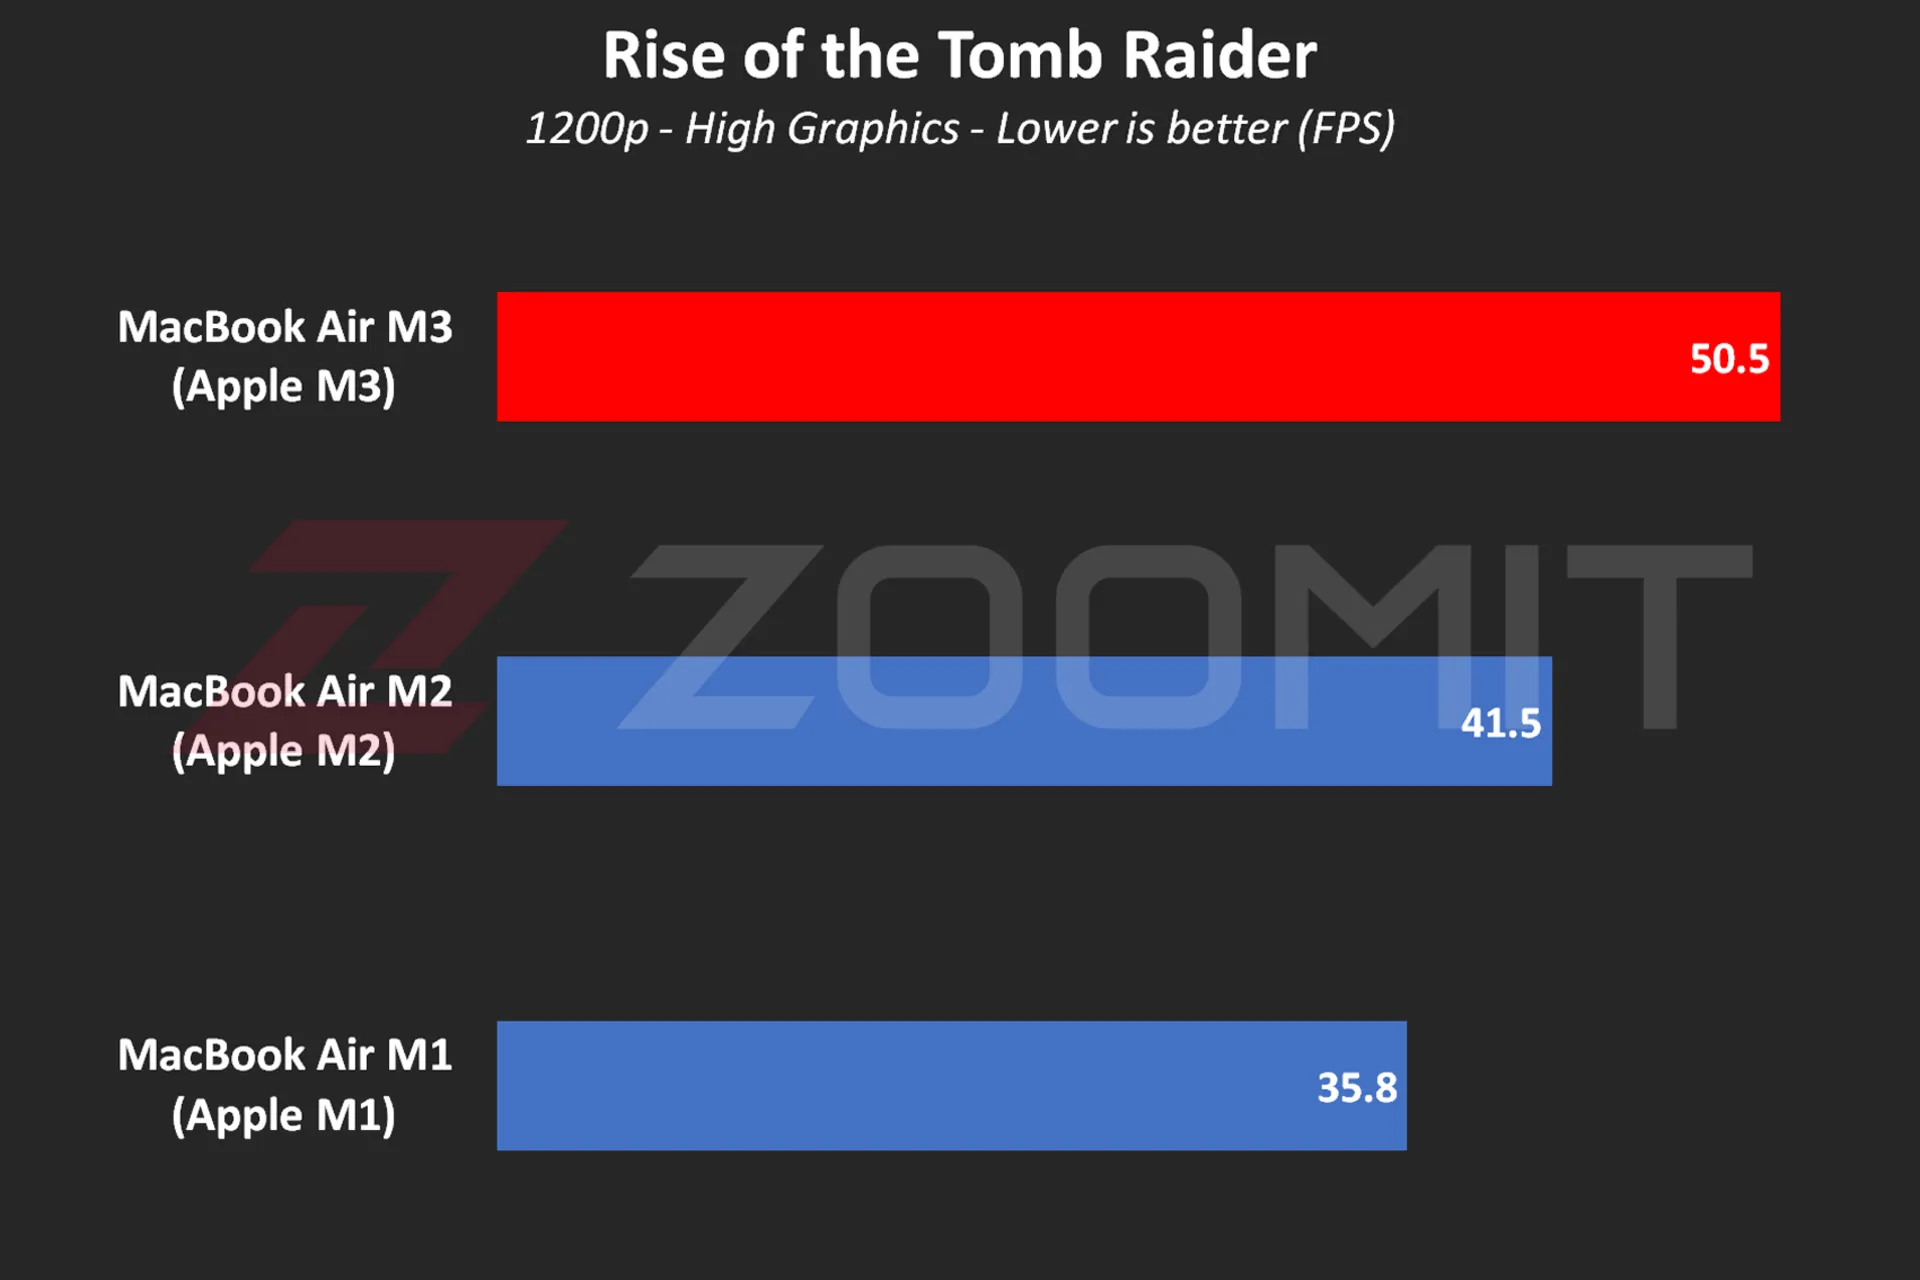 MacBook Air M3 performance while playing Rise of the Tomb Raider game
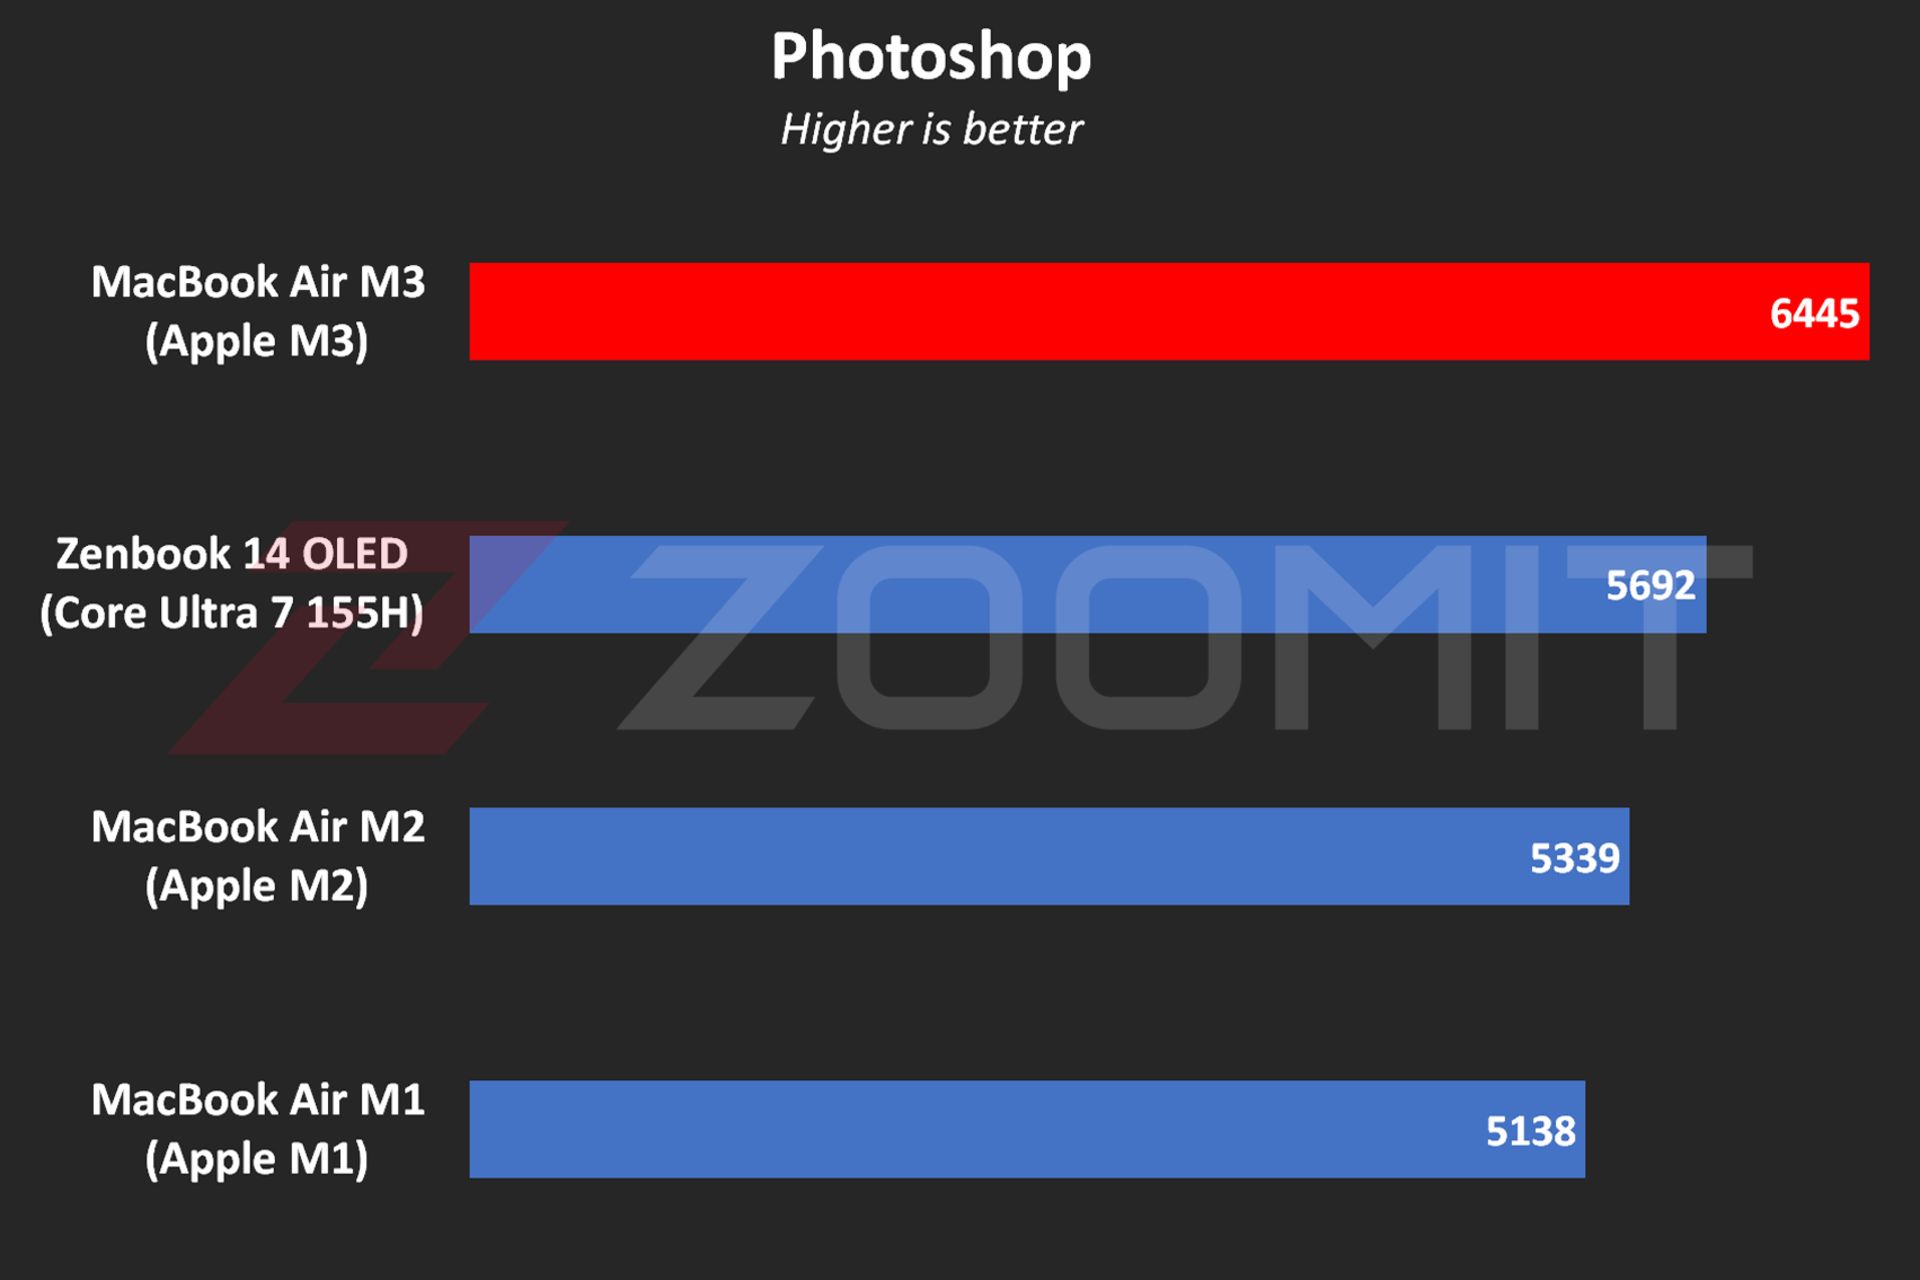 MacBook Air M3 performance in Photoshop software
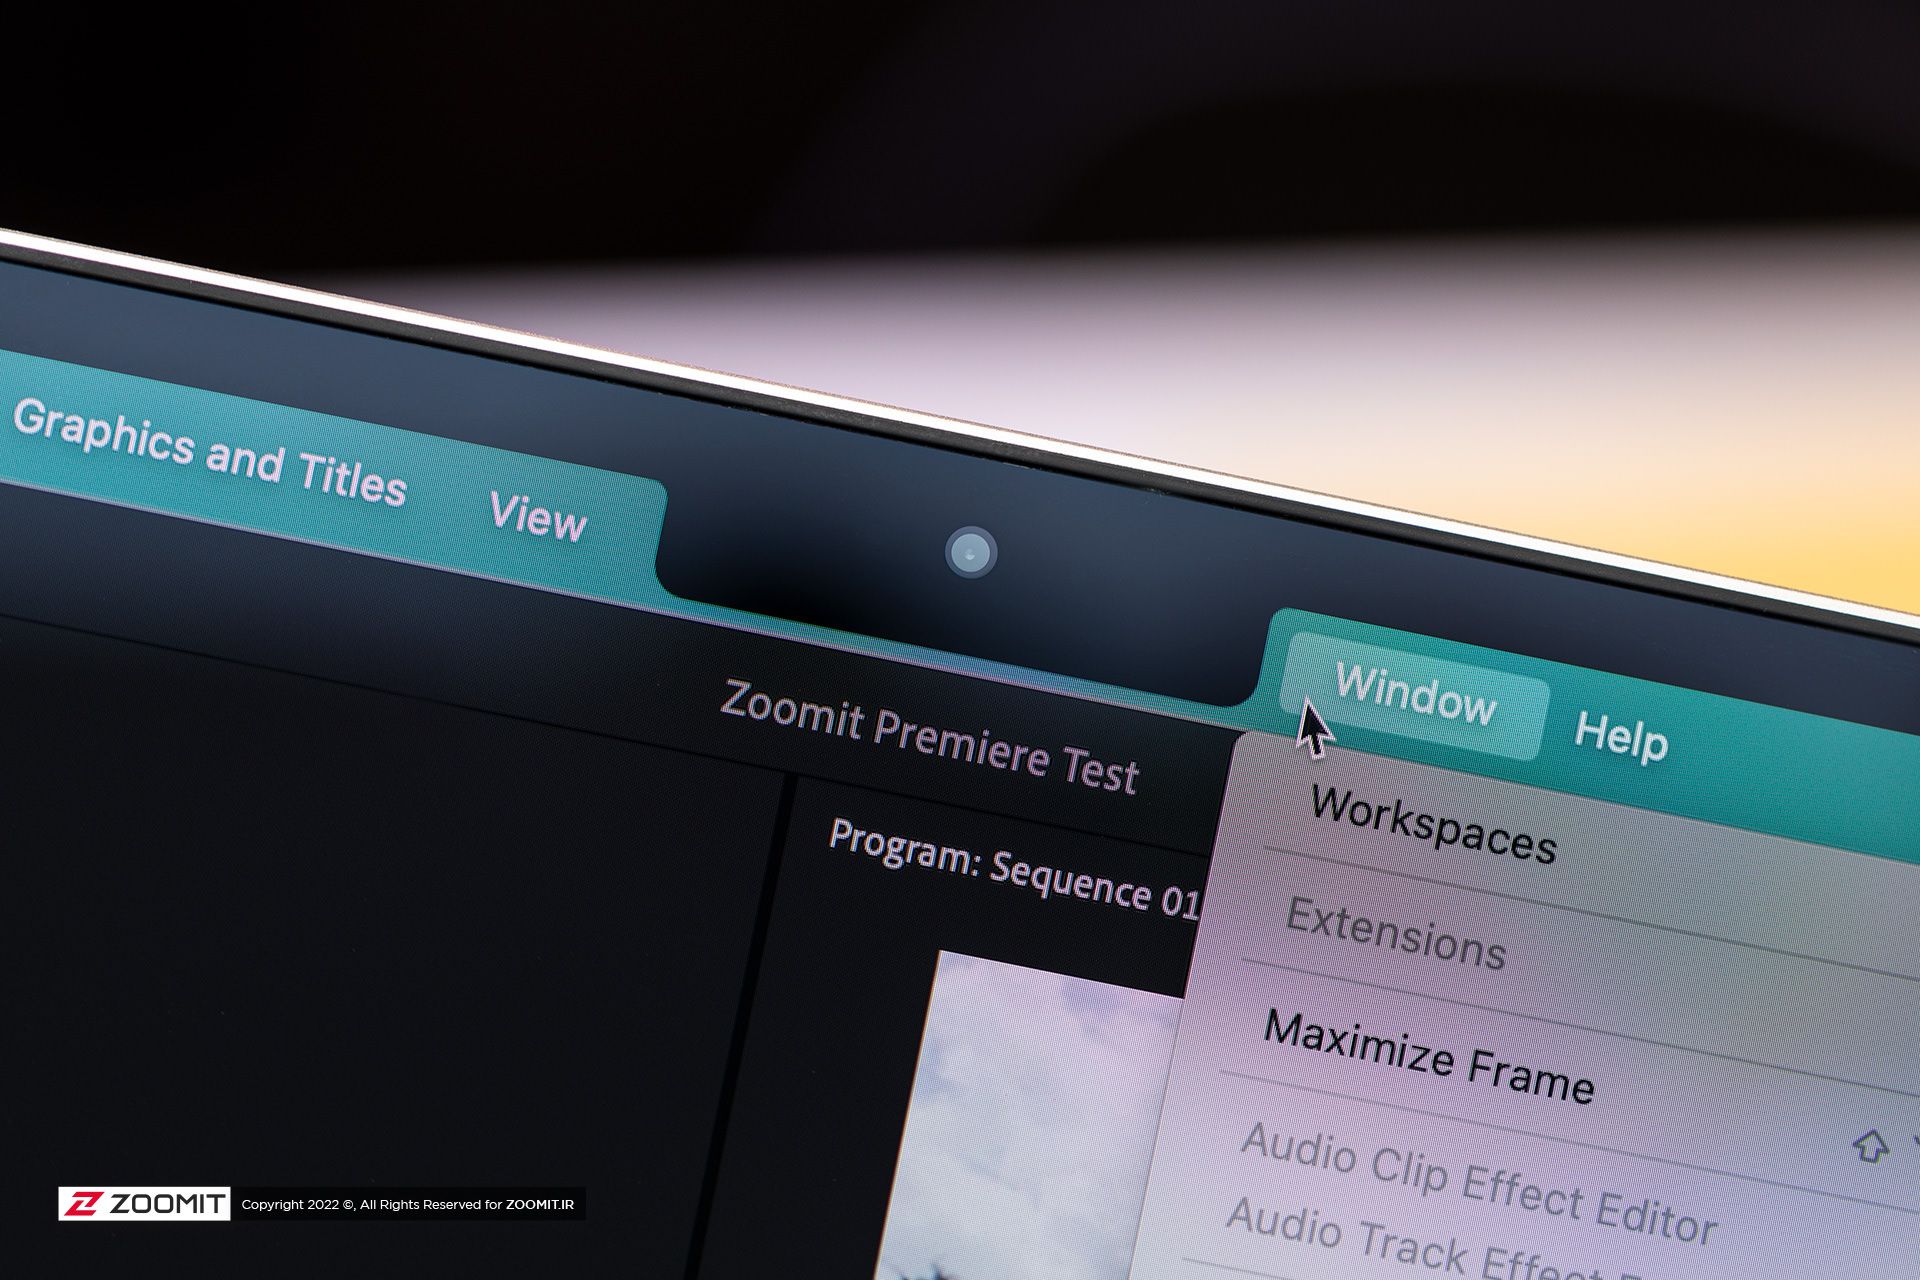
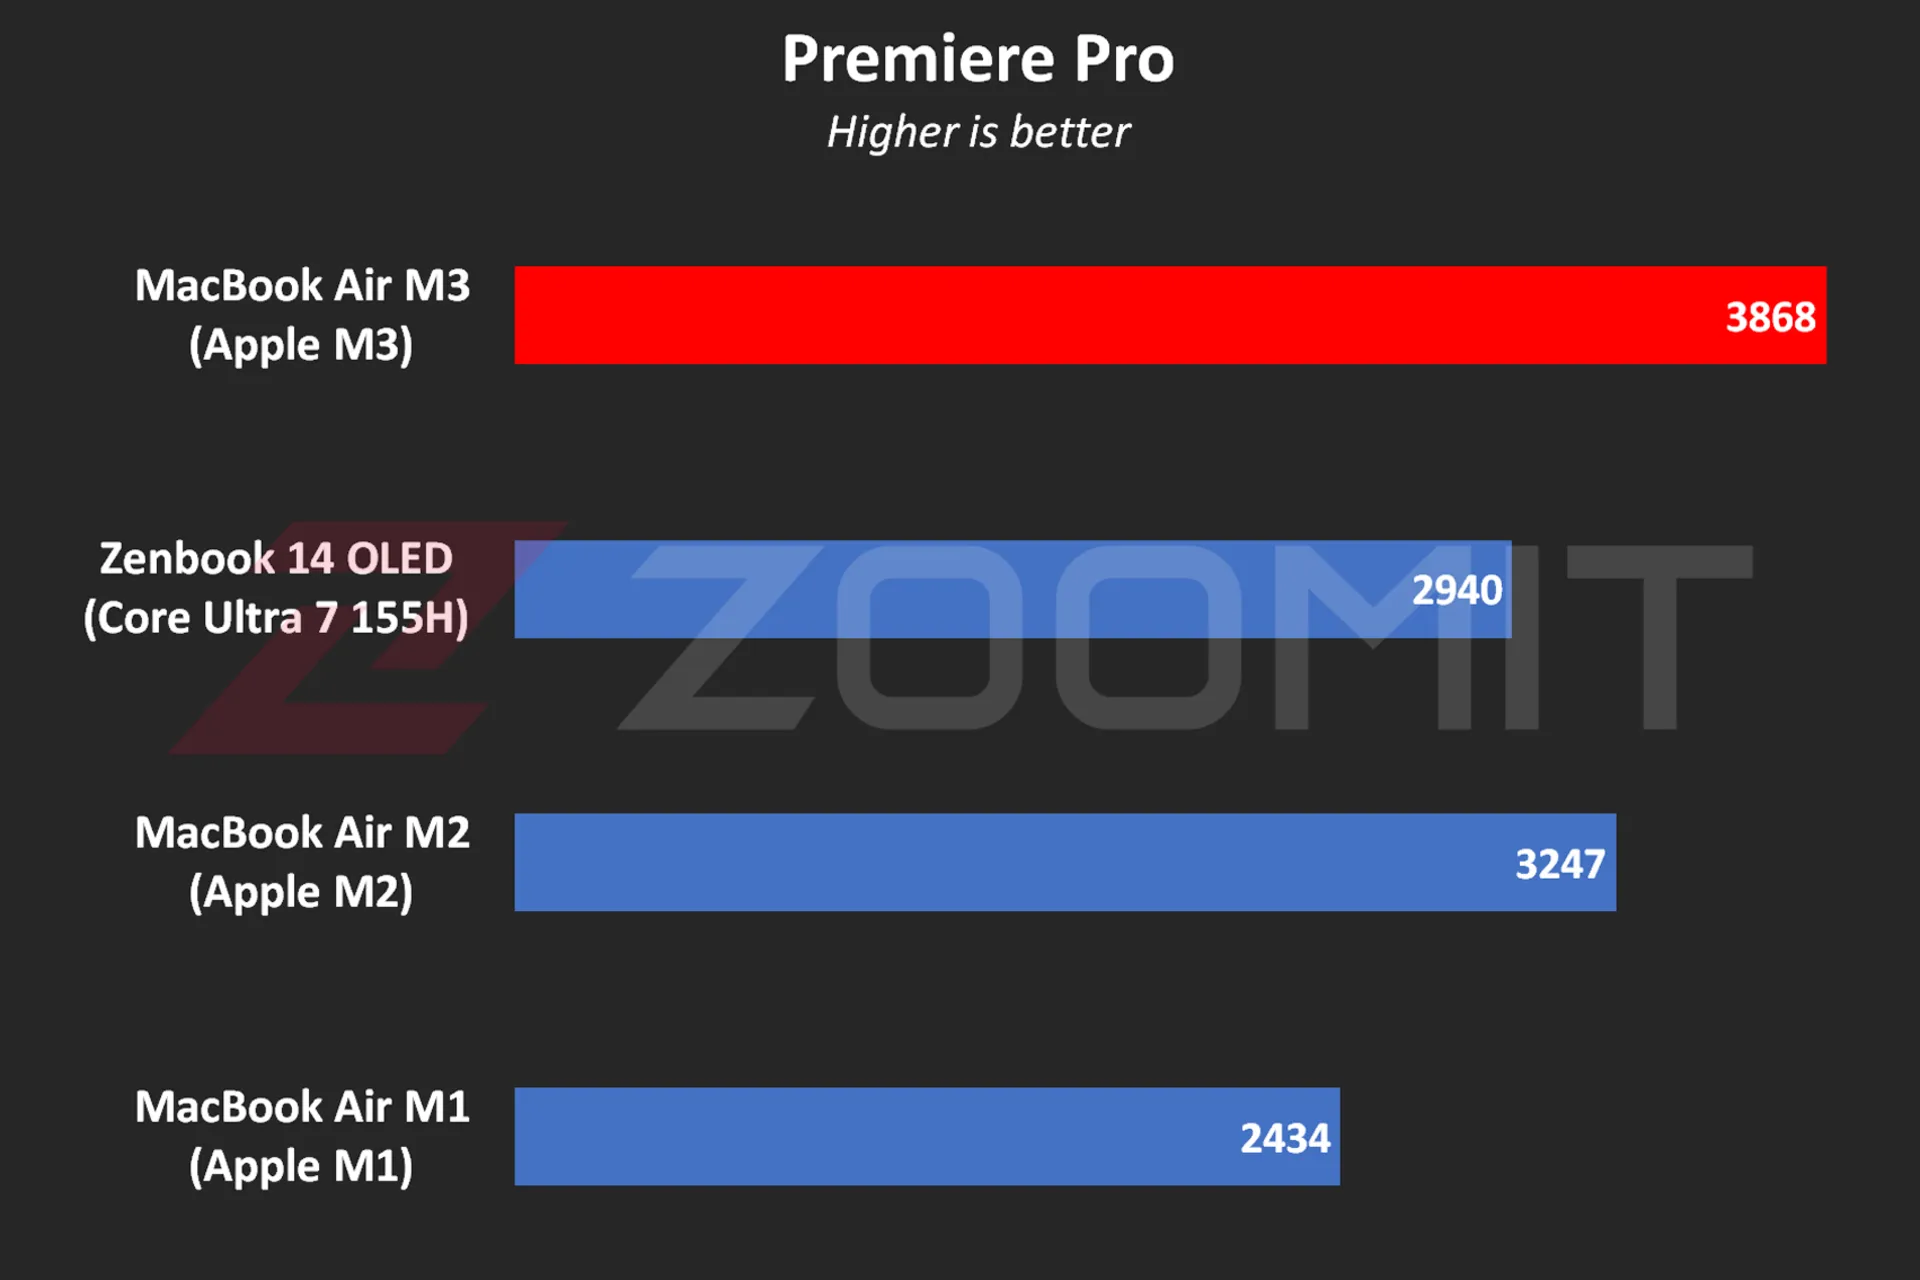 Performance of MacBook Air M3 in Premier Pro software
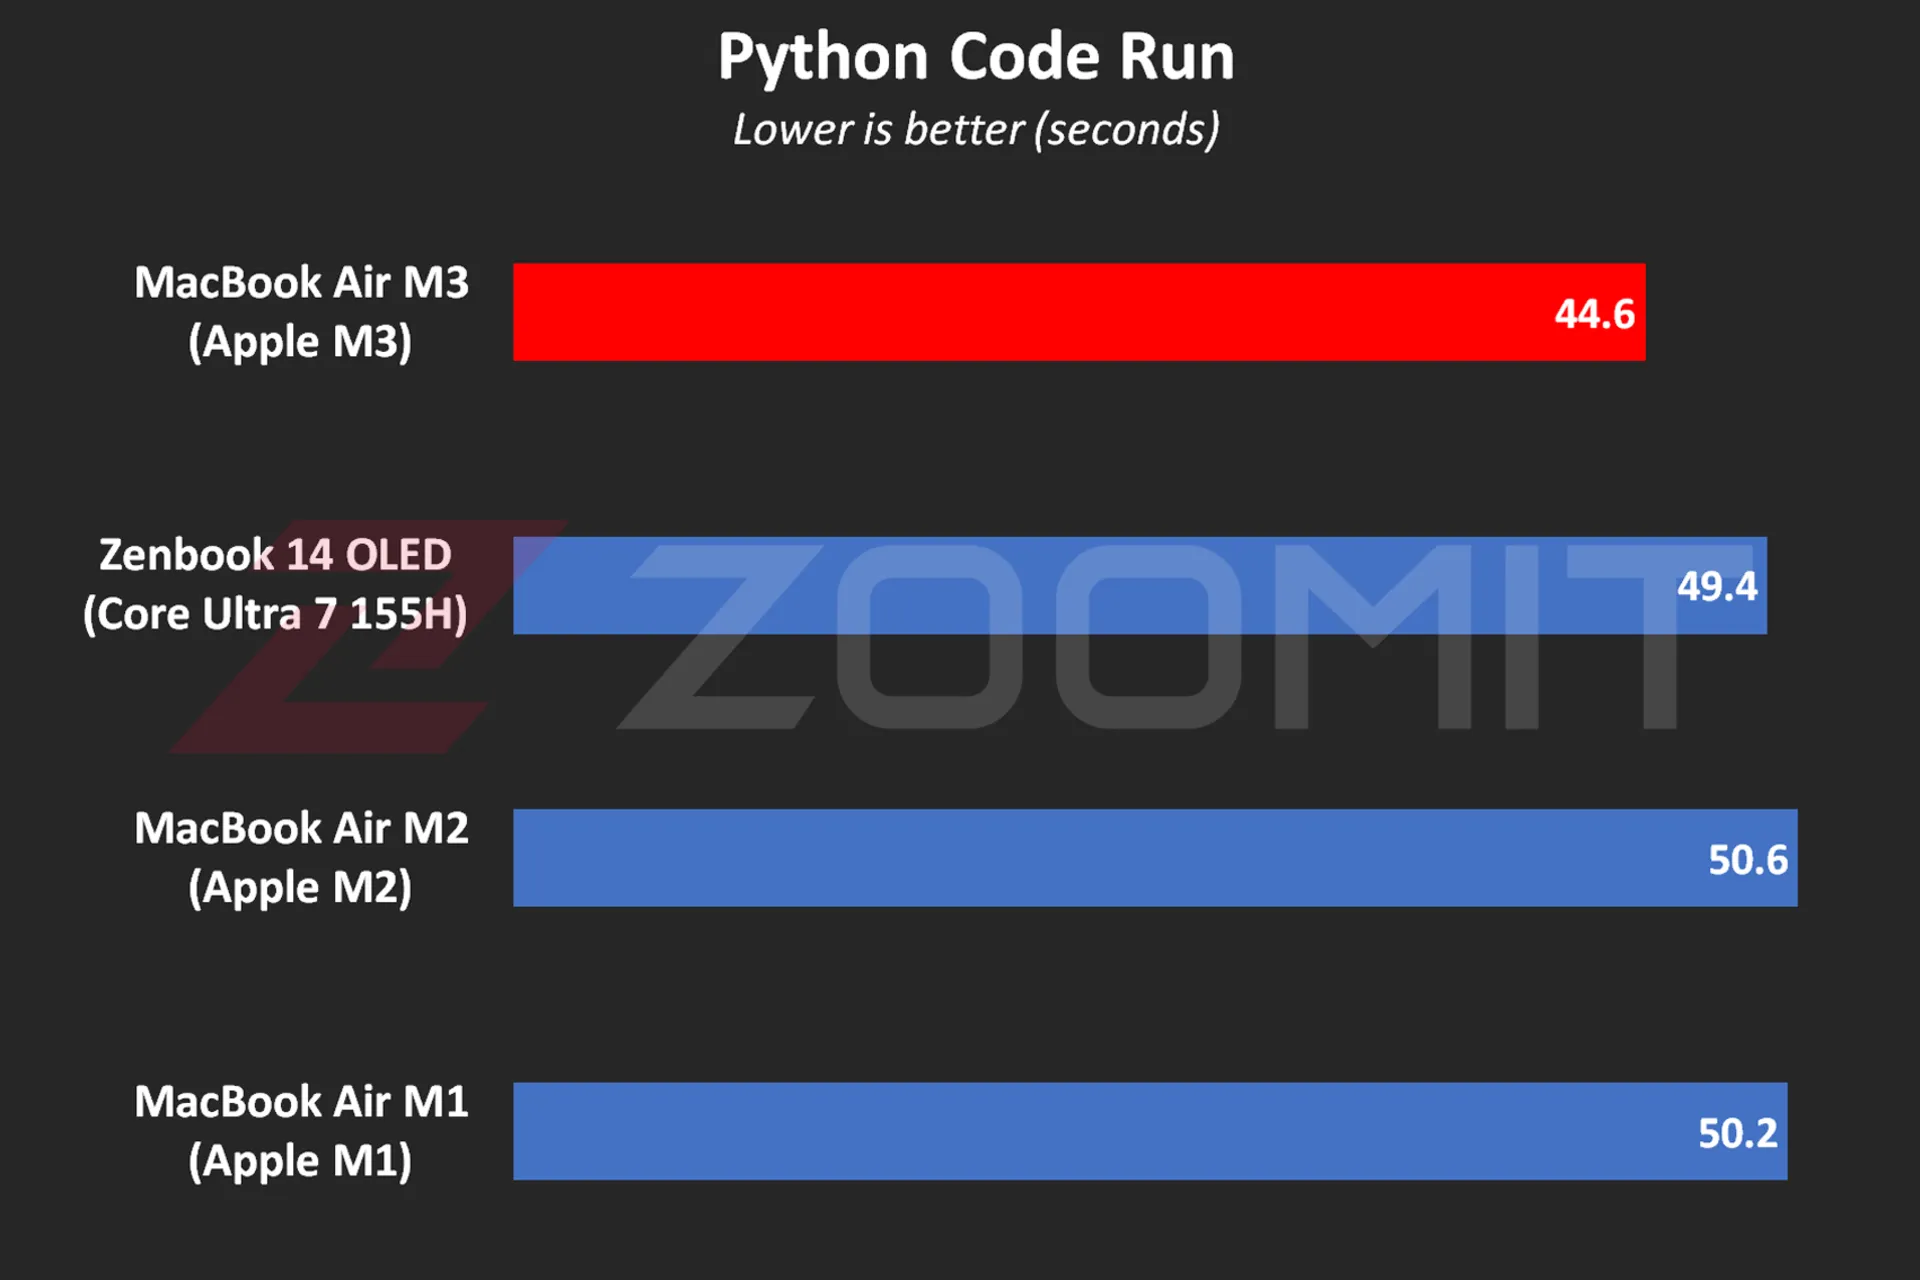 MacBook Air M3 performance while running Python code
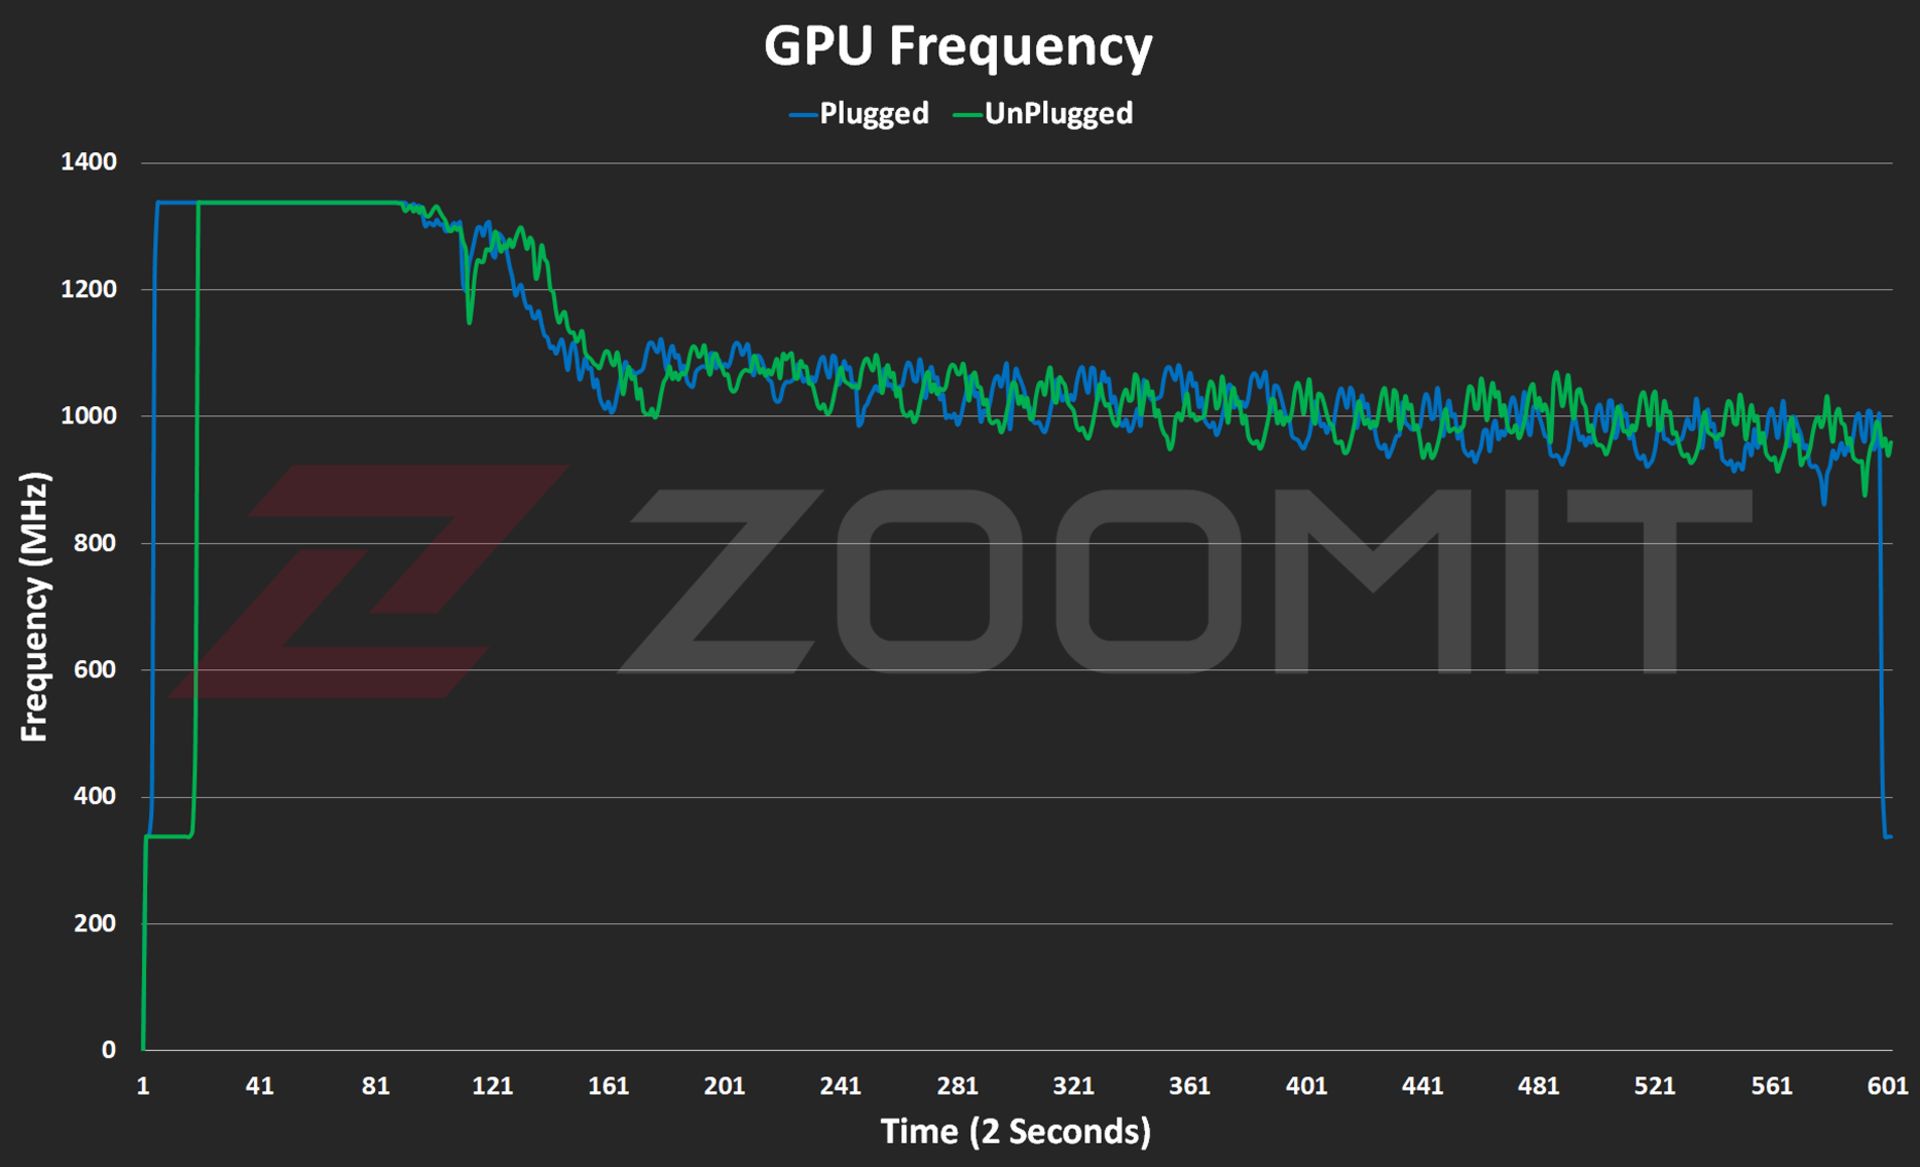
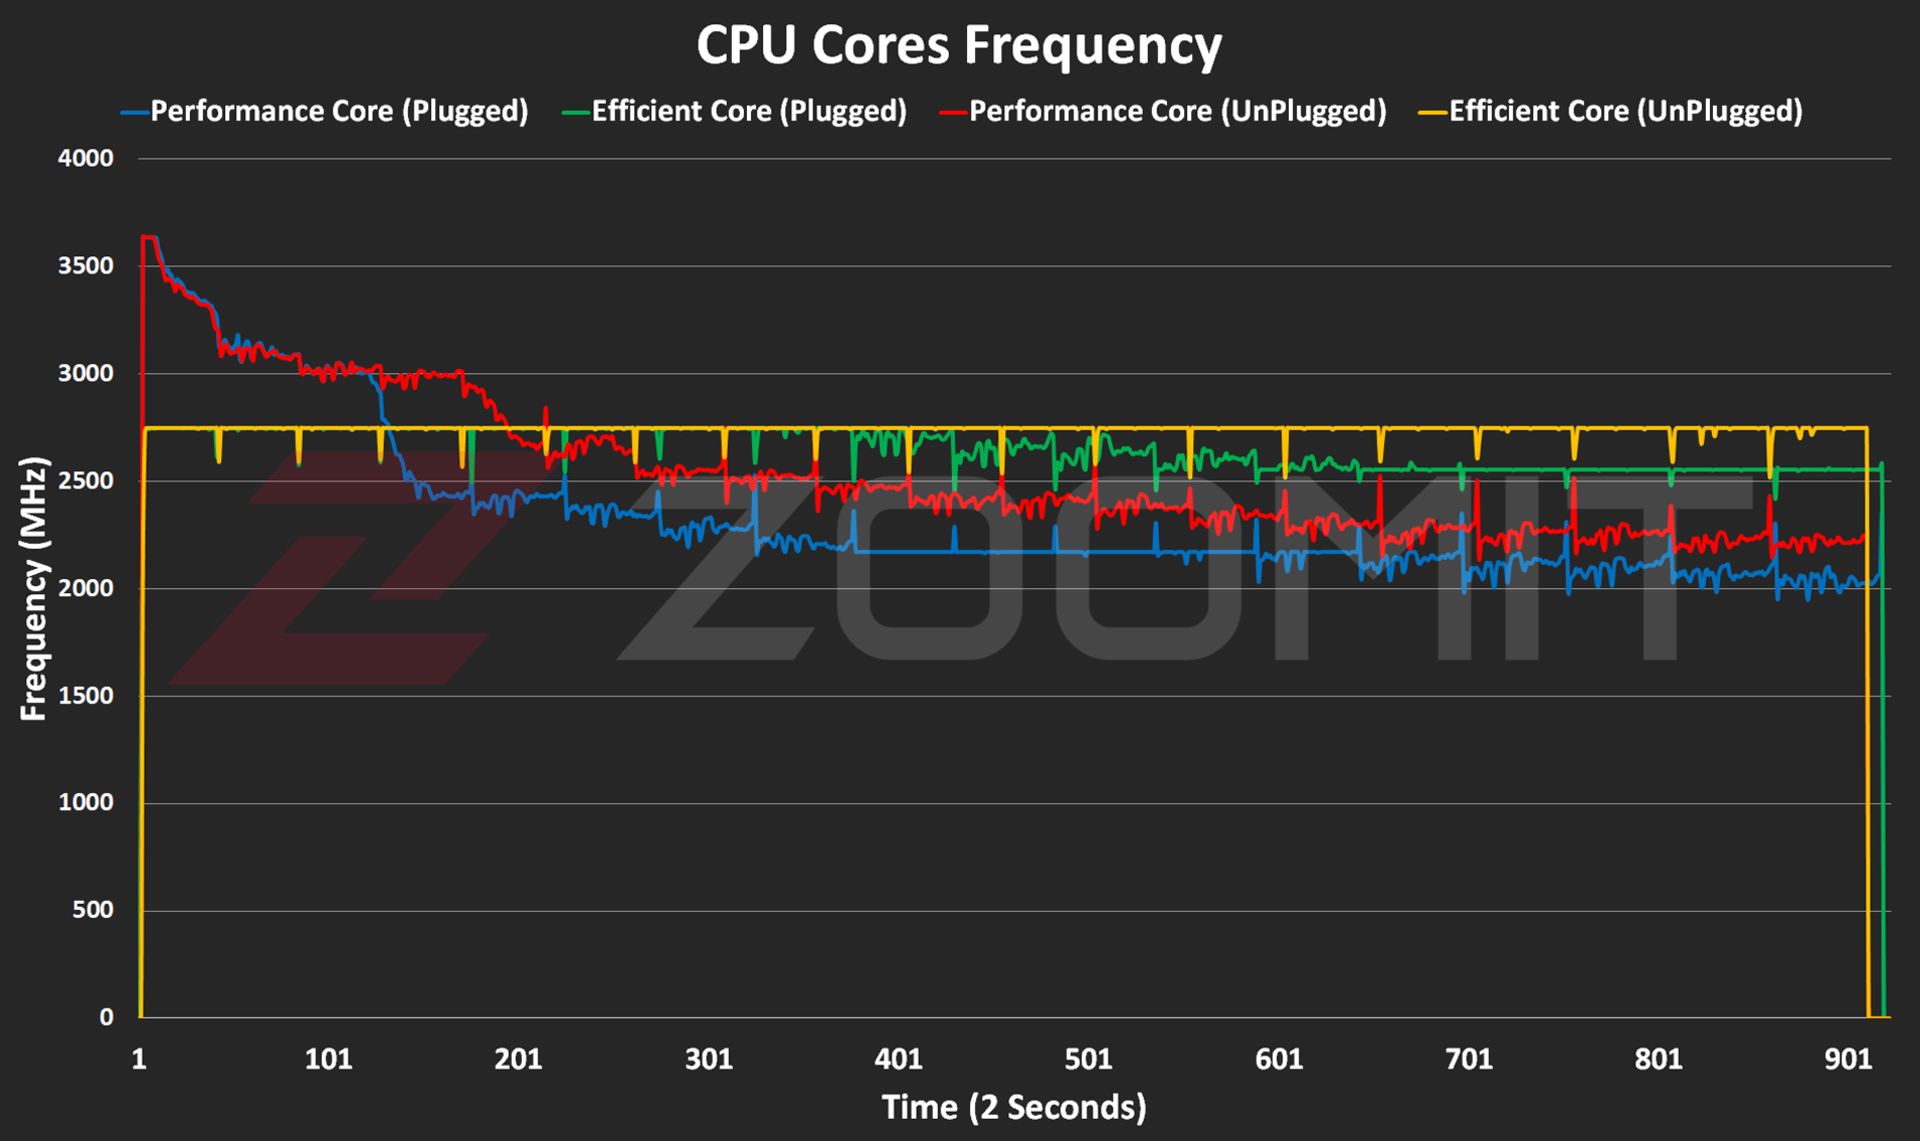 CPU frequency in MacBook Air M3
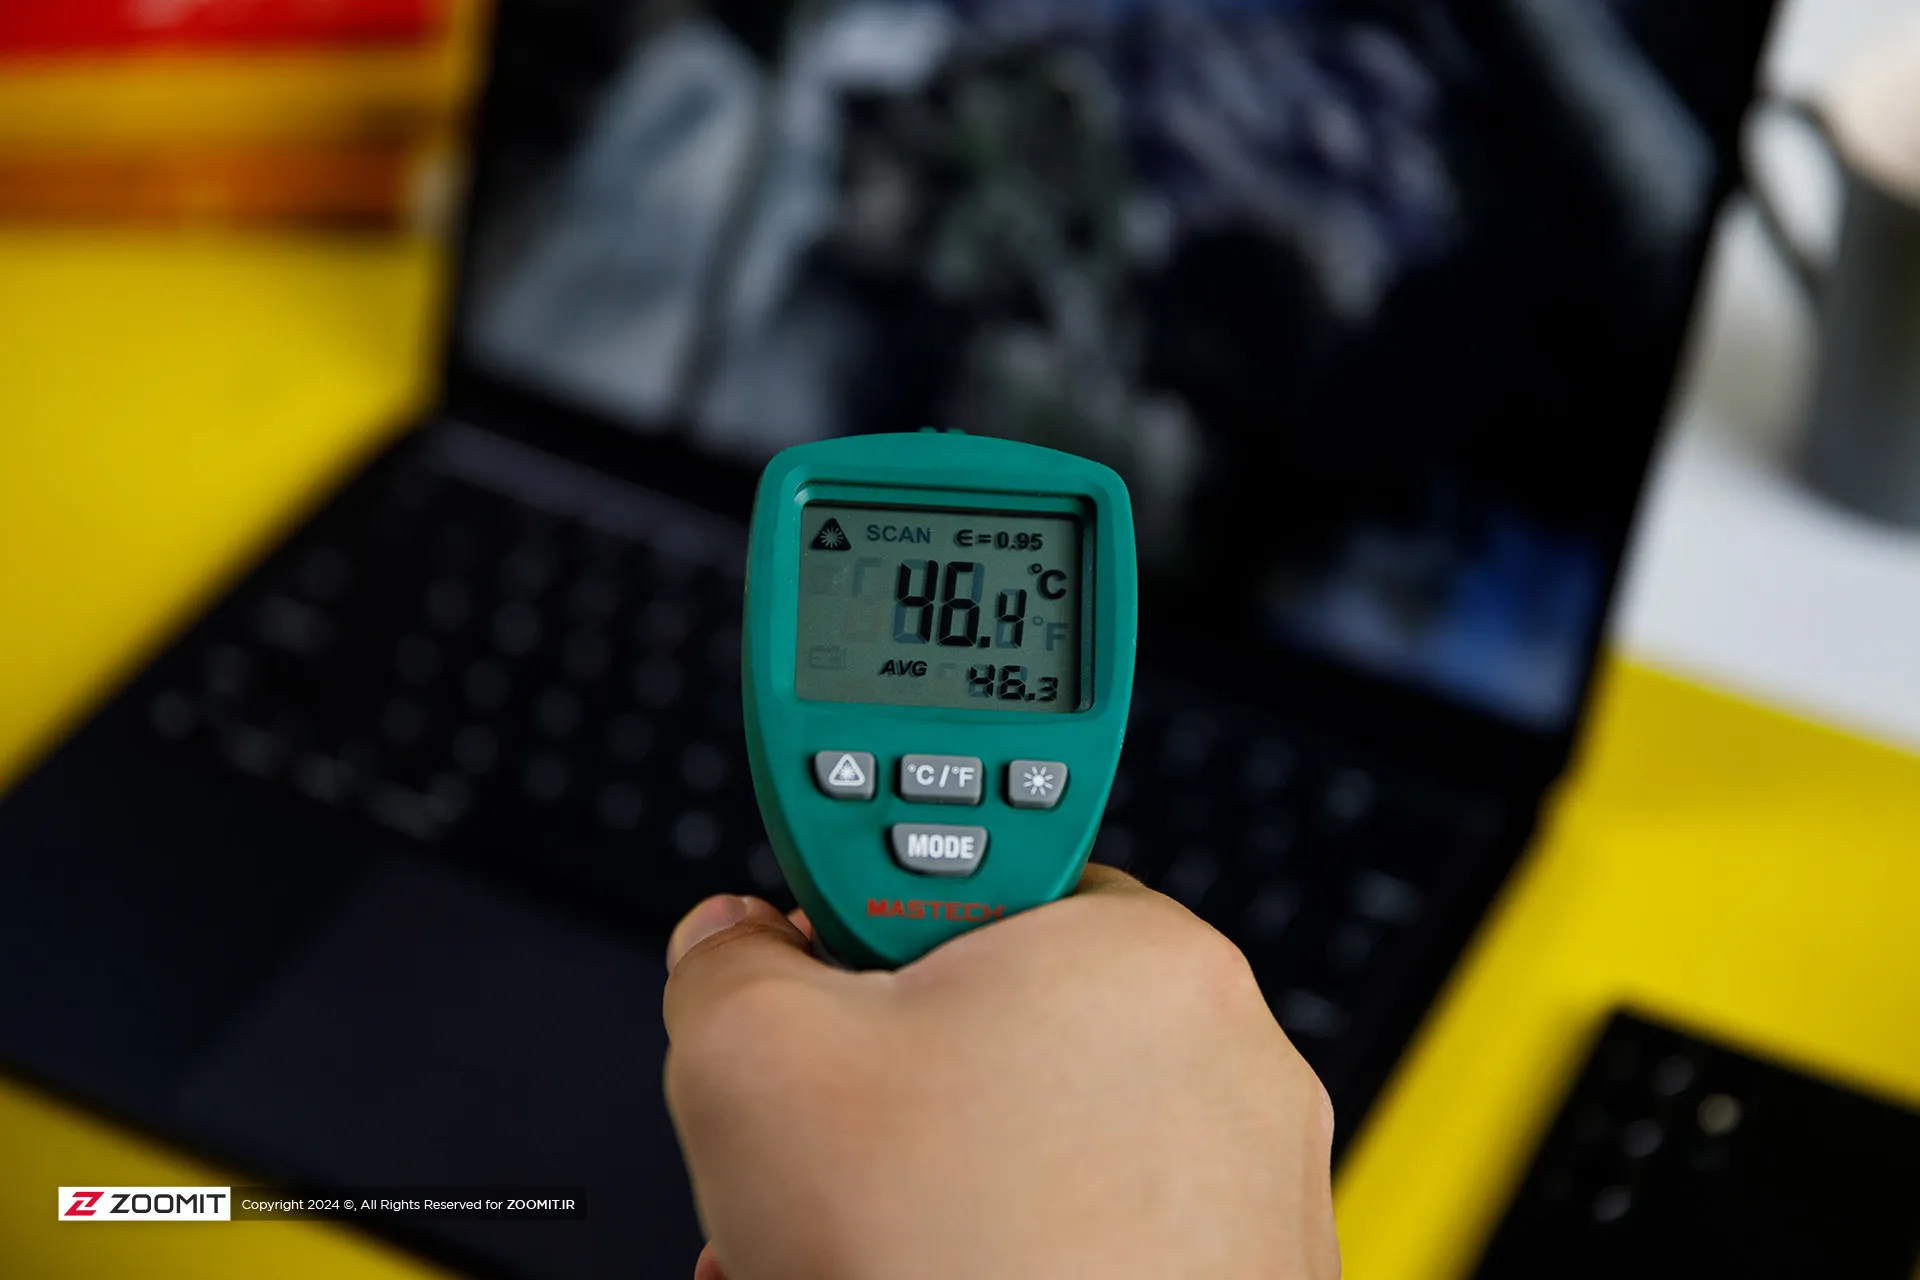
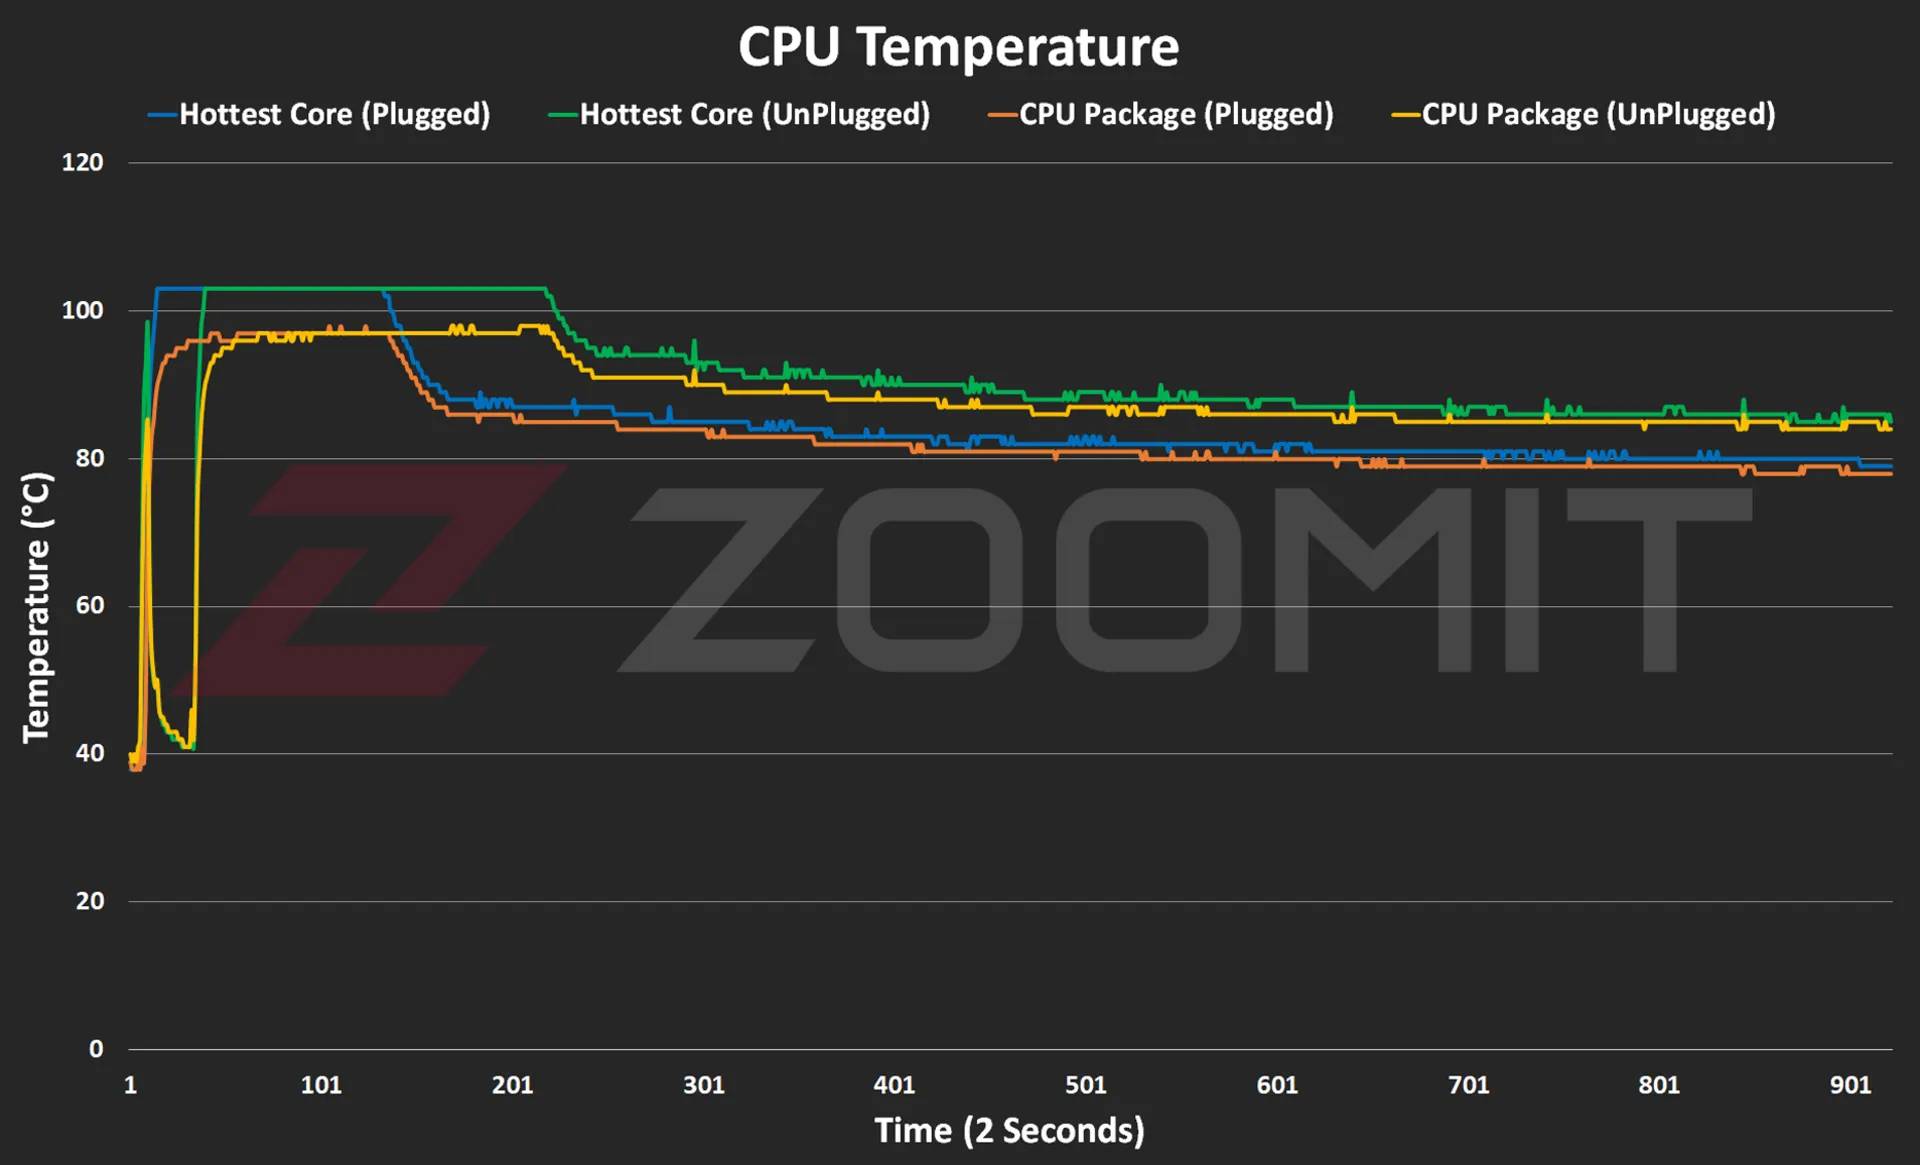 CPU temperature on MacBook Air M3
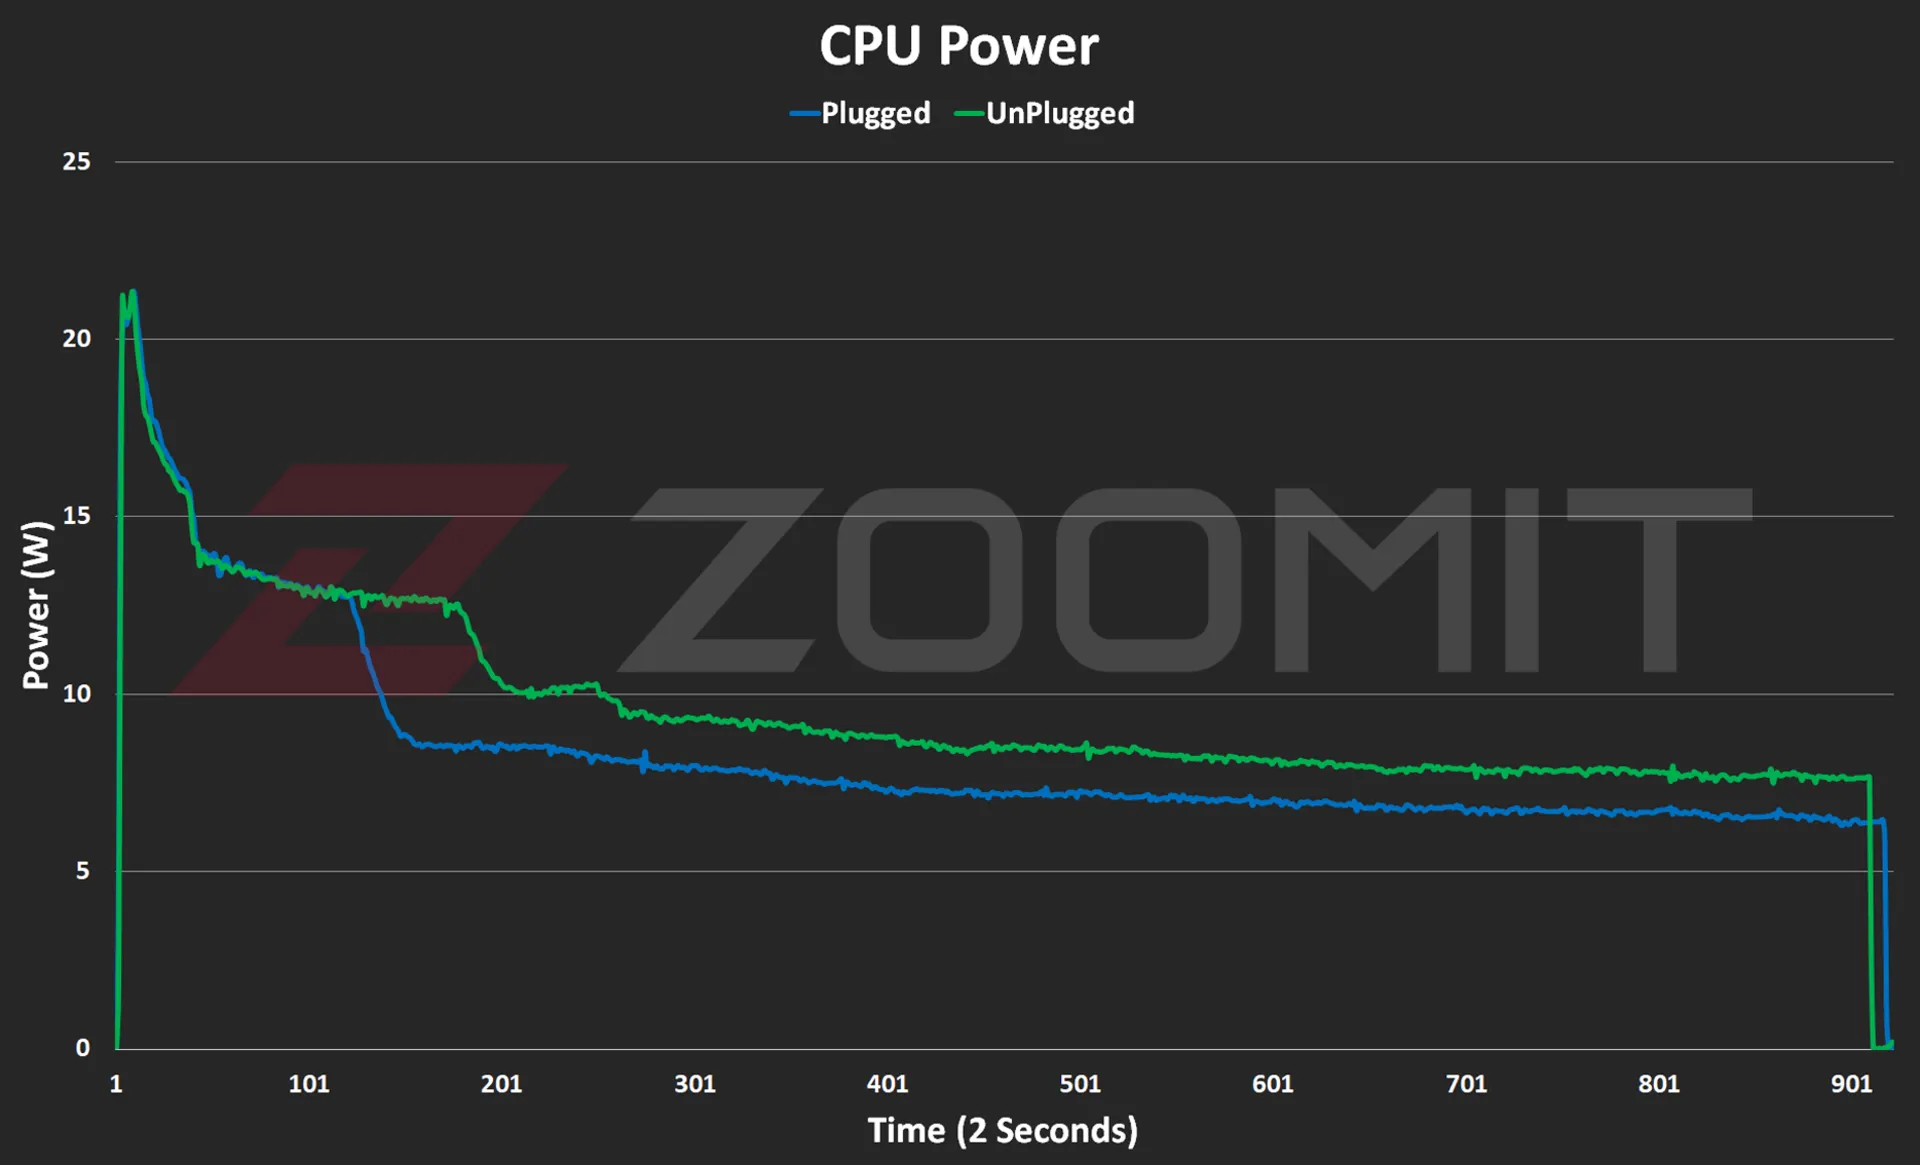 CPU consumption in MacBook Air M3
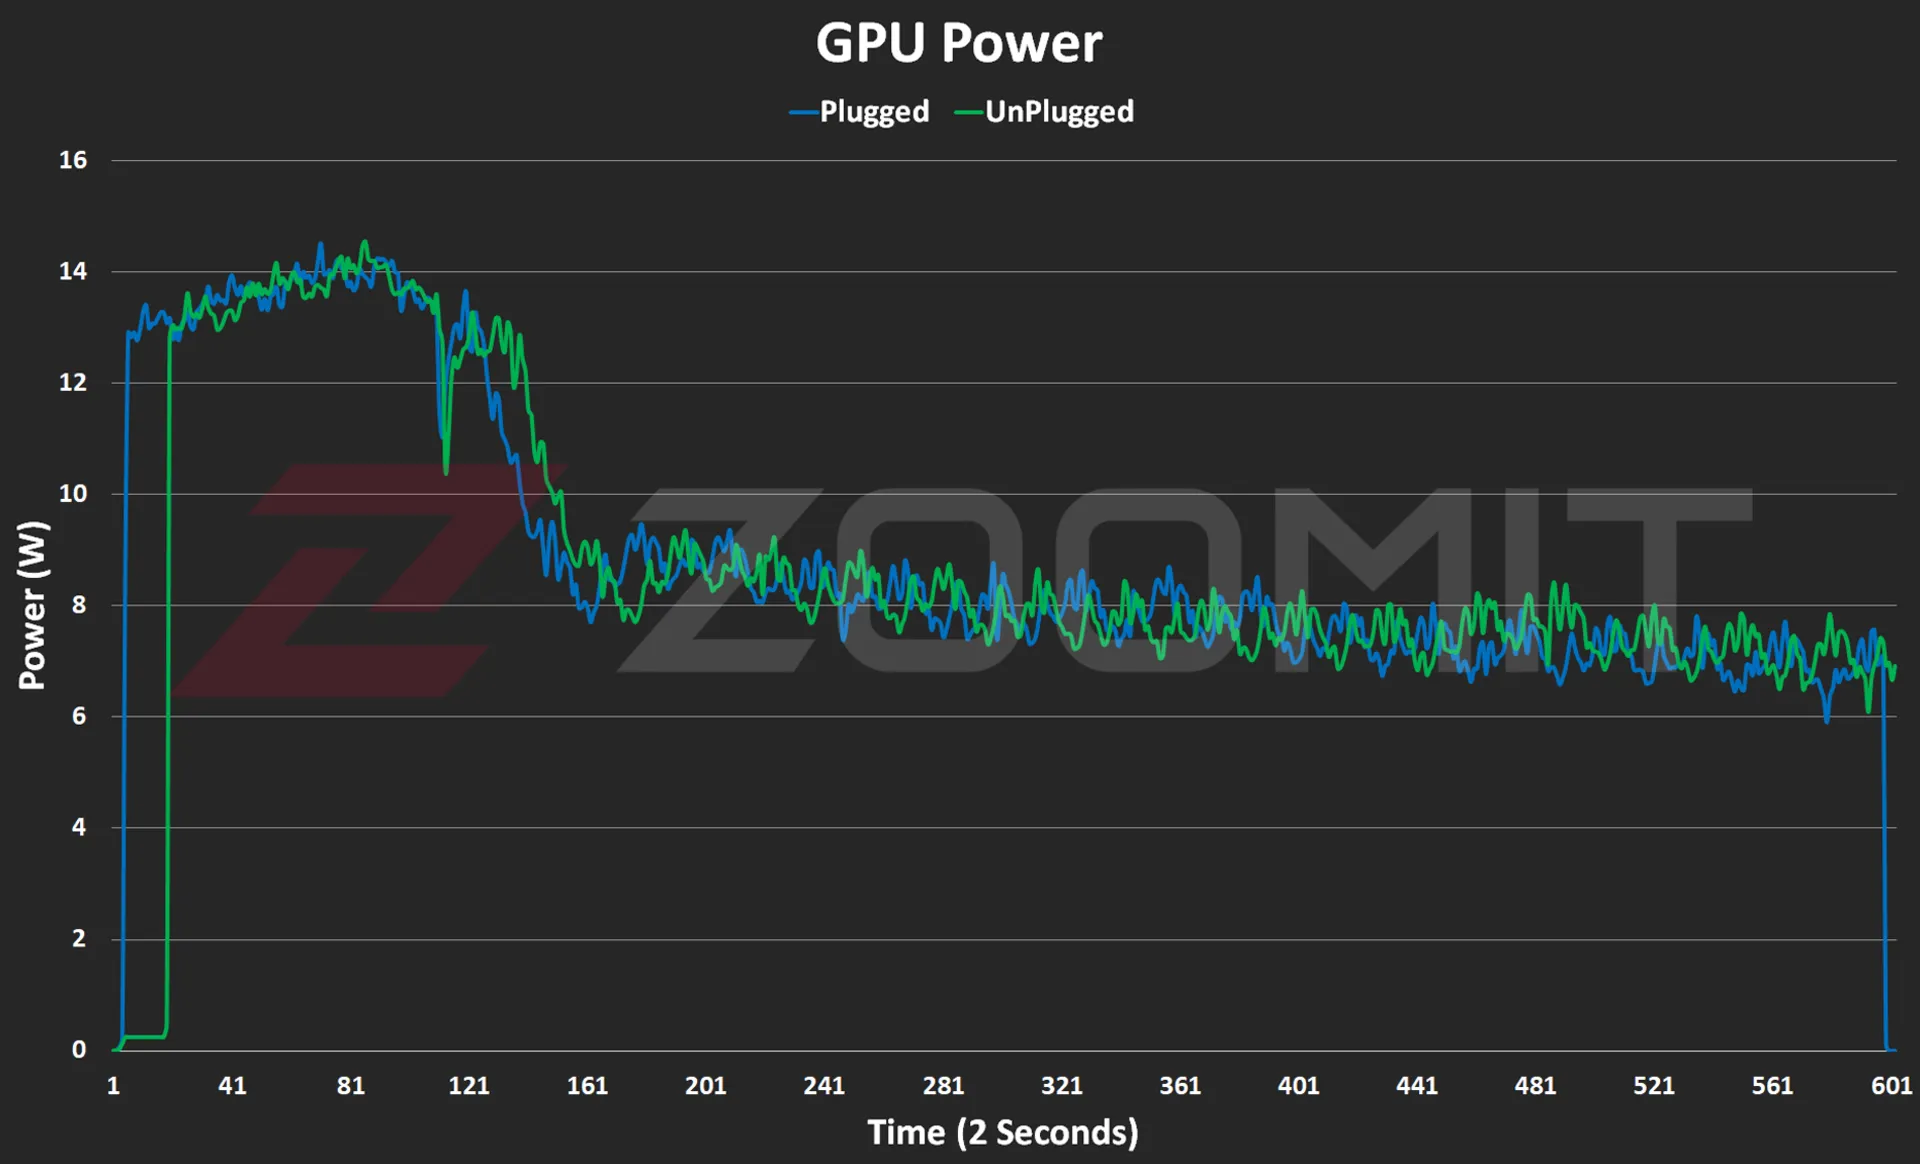 GPU consumption in MacBook Air M3
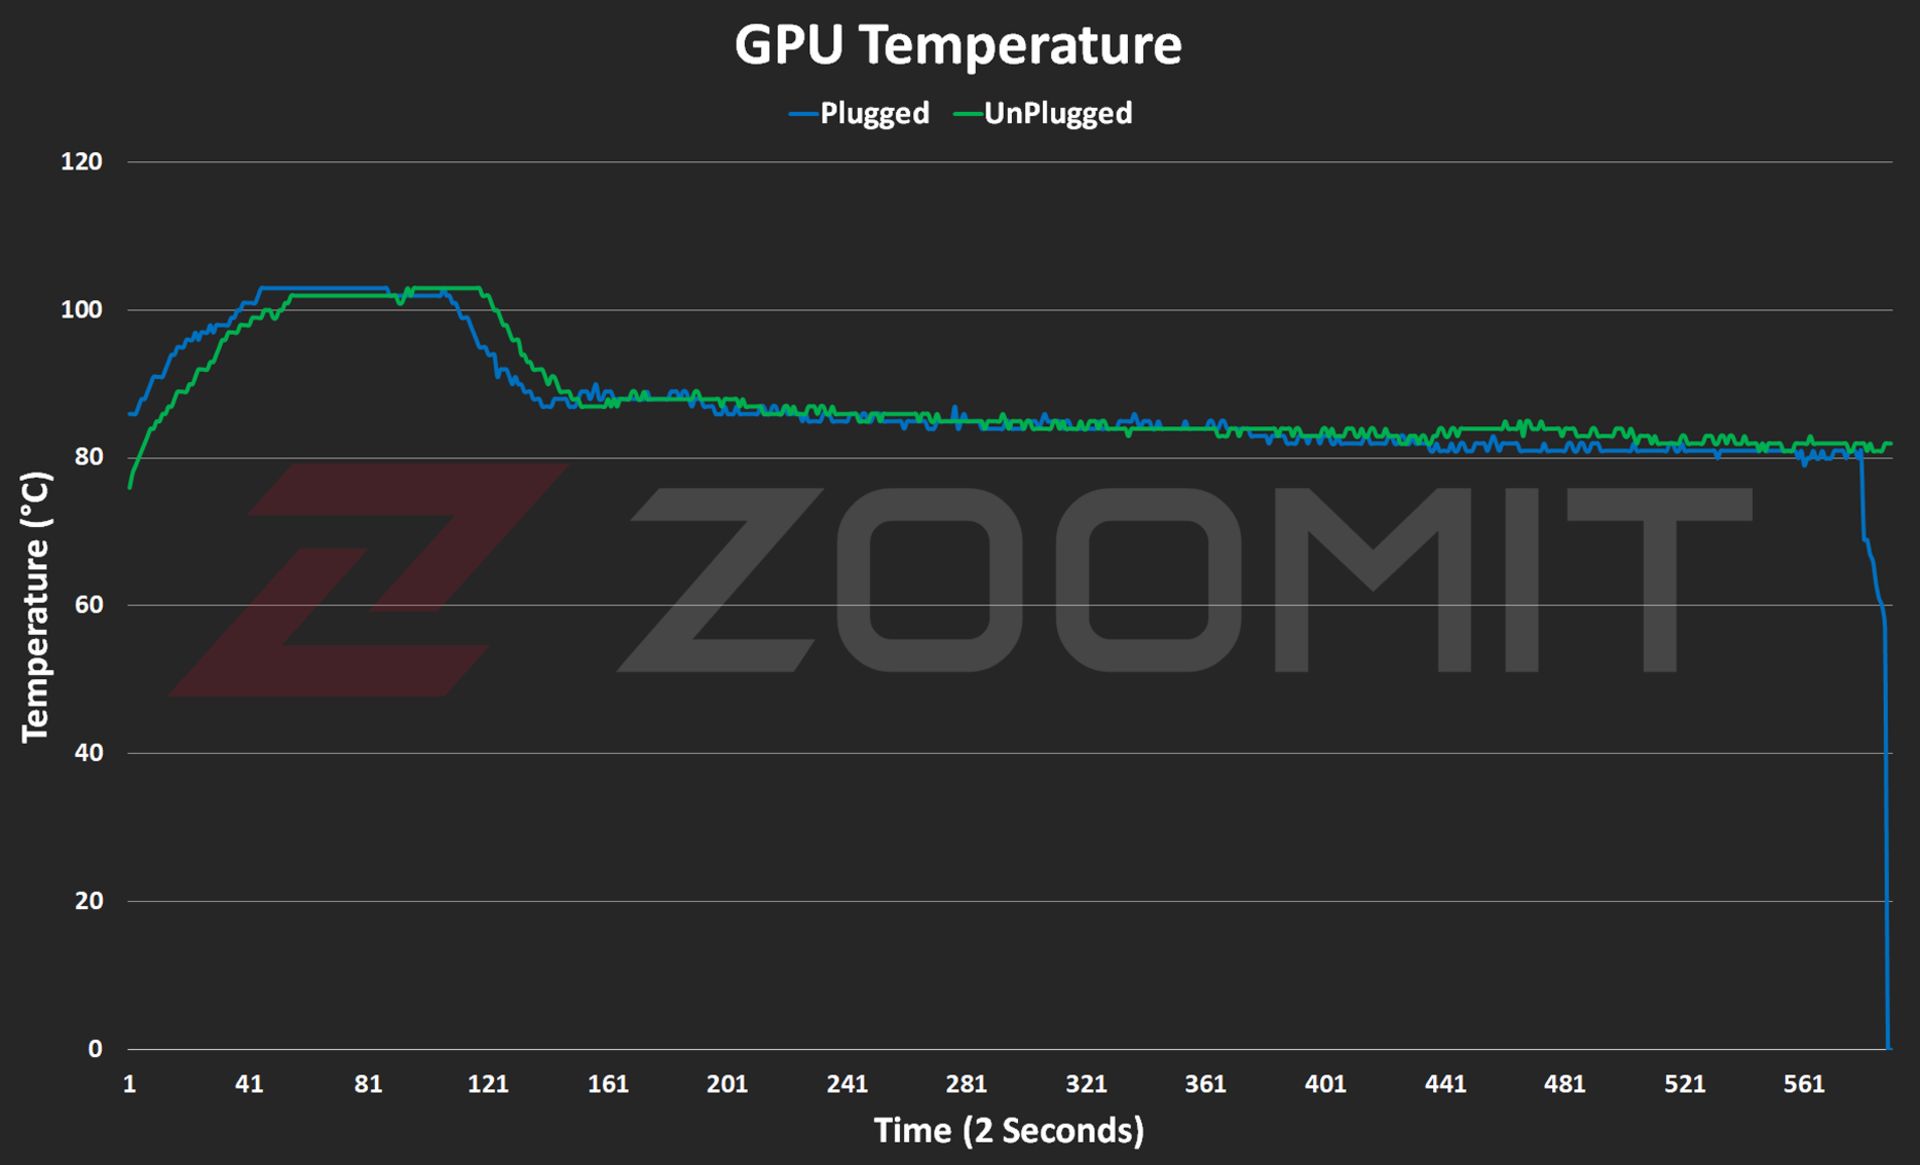
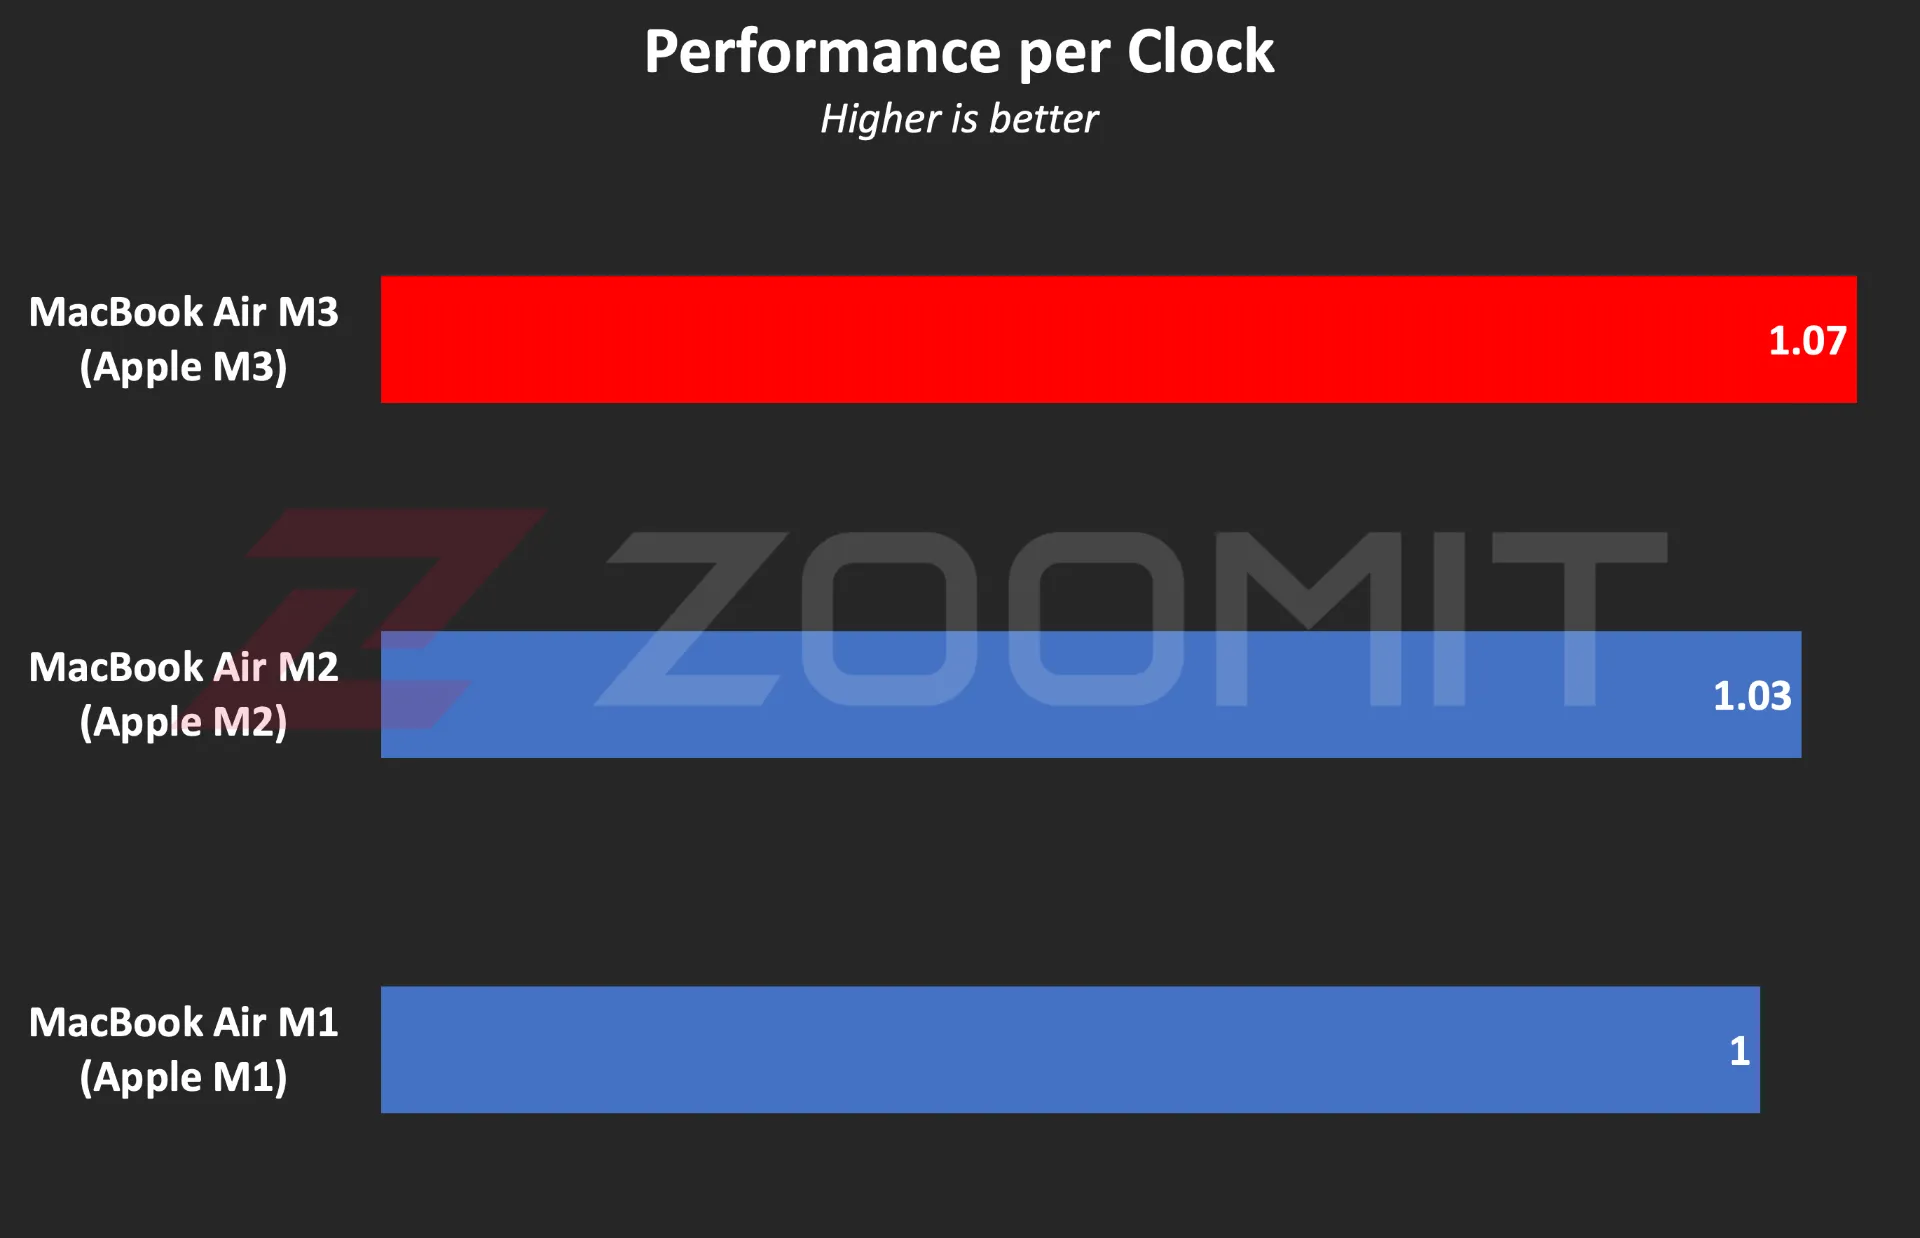 Ratio of performance to CPU frequency
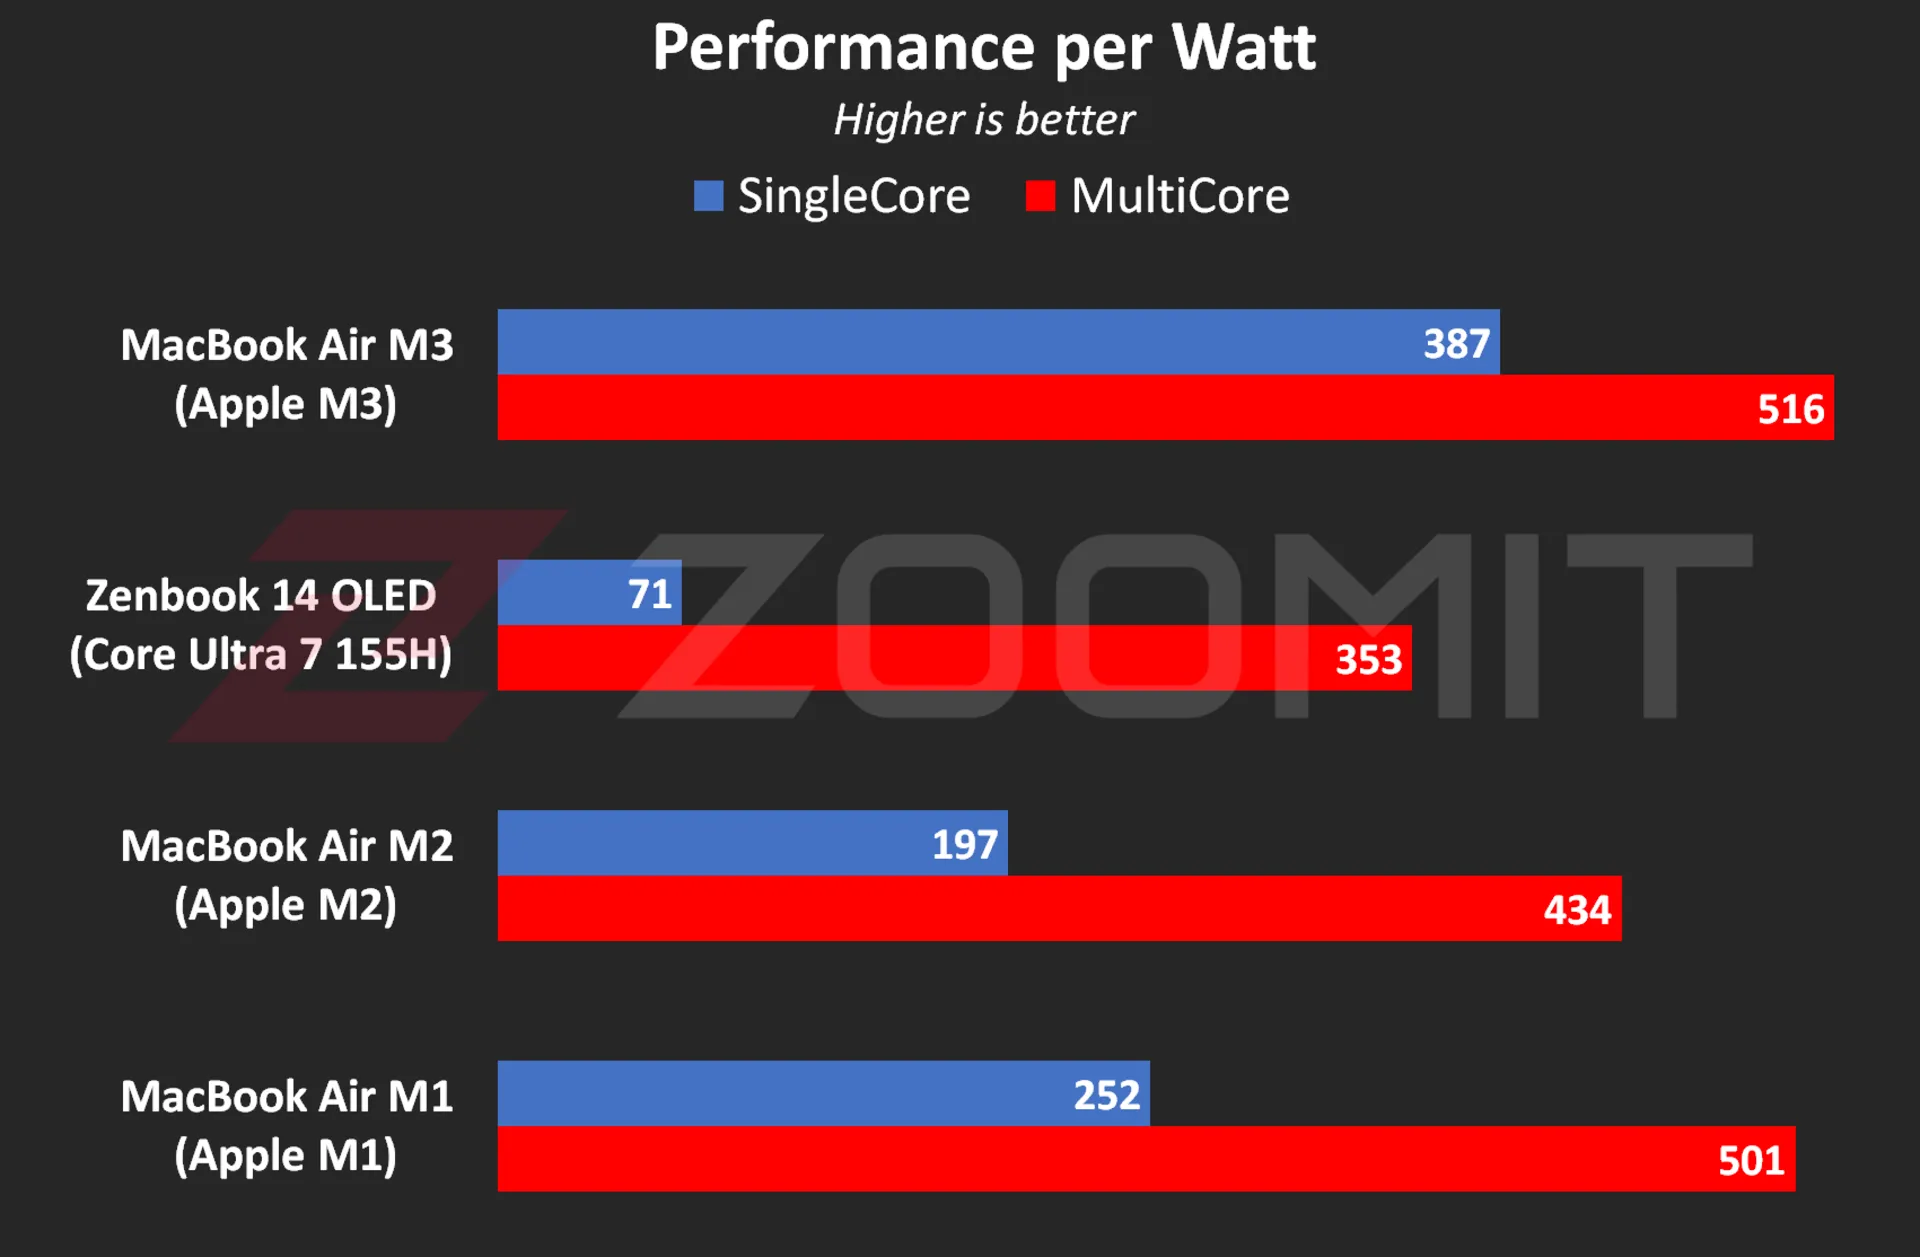 The ratio of performance to CPU power consumption
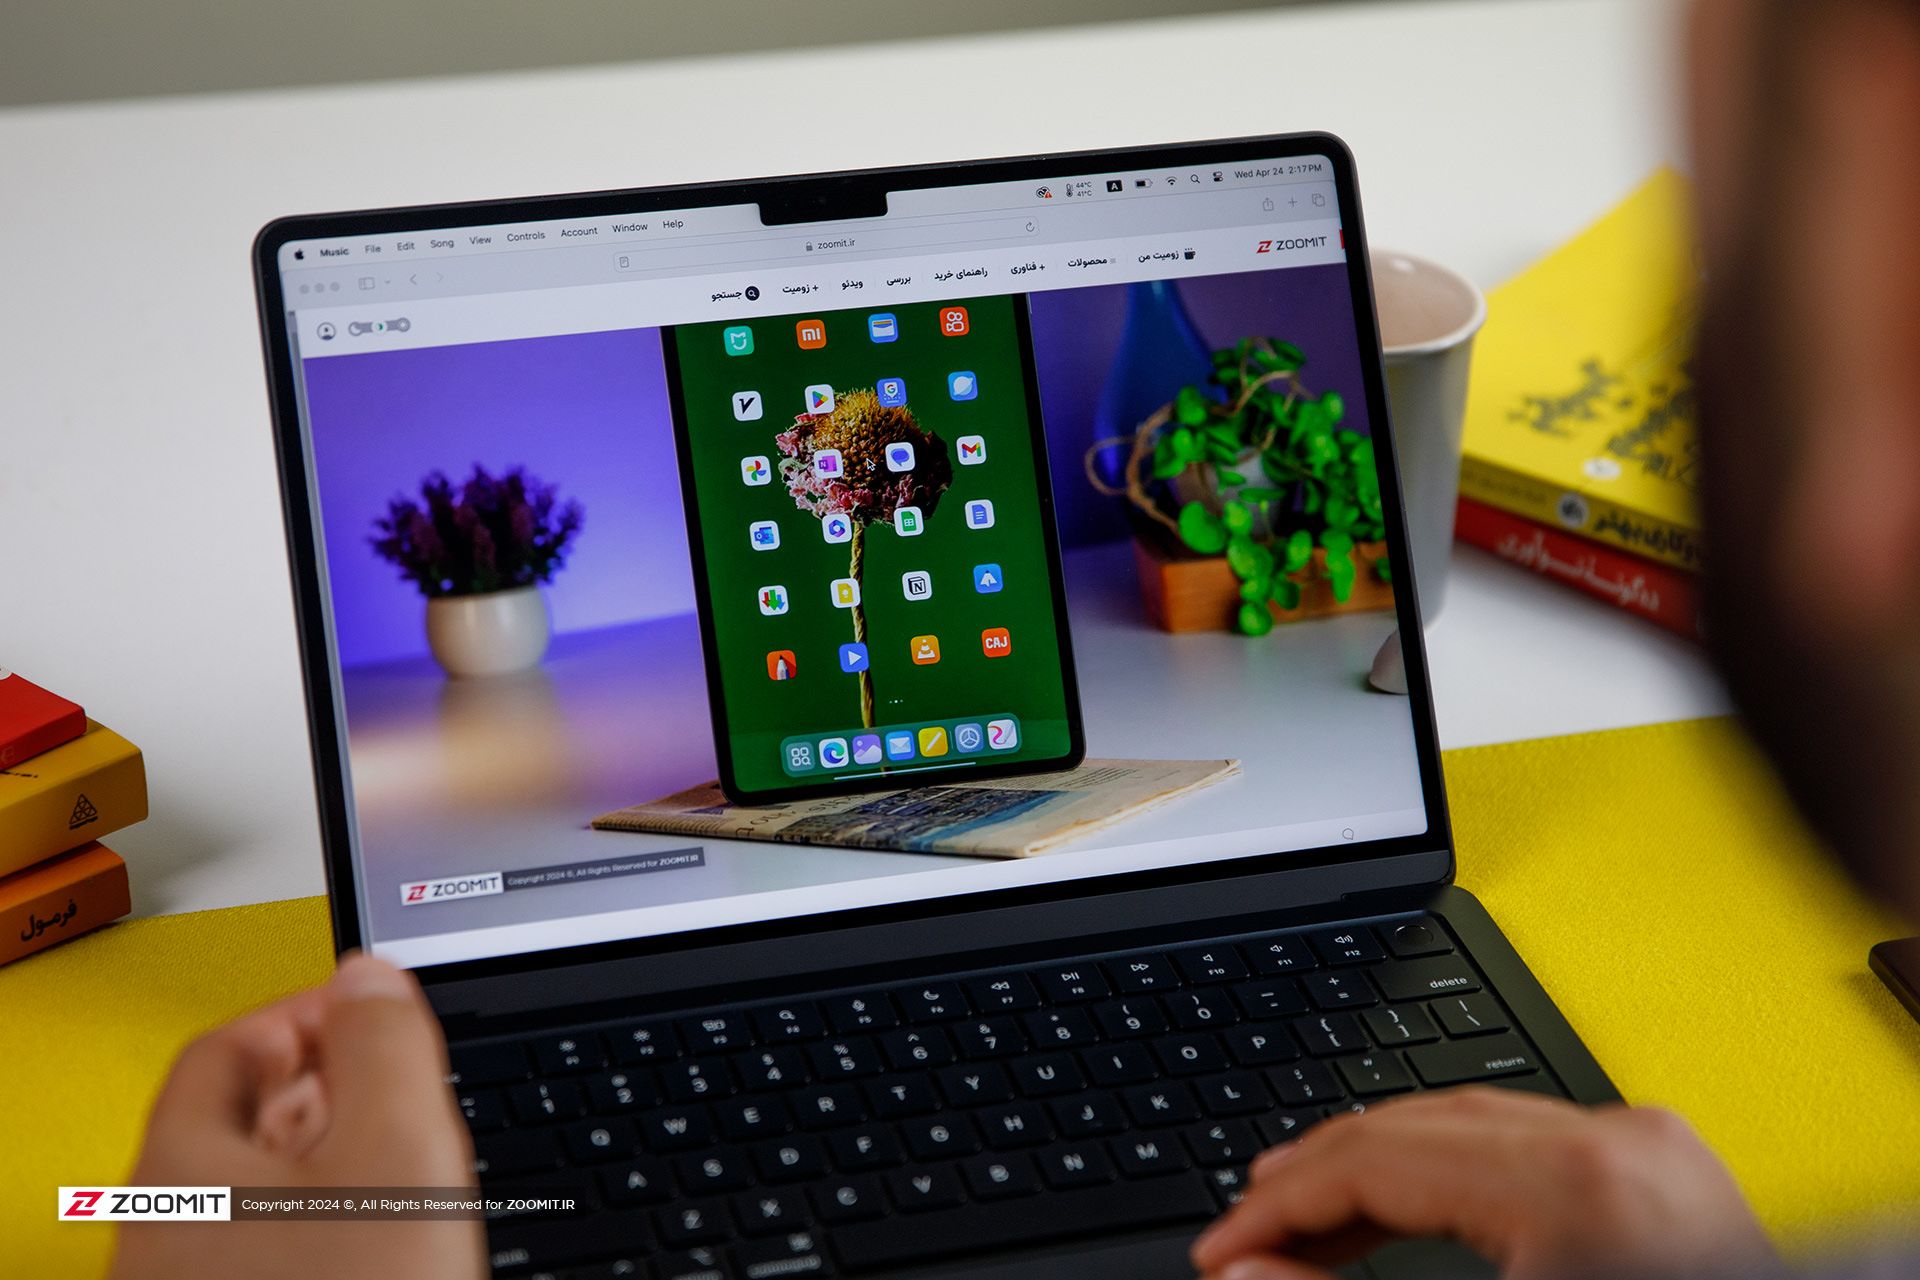


 Mark Kelly (left) and Scott Kelly (right) made it possible for researchers to study the health effects of long-duration space travel by studying NASA twins.